Перфораторы Makita HR5202C - инструкция пользователя по применению, эксплуатации и установке на русском языке. Мы надеемся, она поможет вам решить возникшие у вас вопросы при эксплуатации техники.
Если остались вопросы, задайте их в комментариях после инструкции.
"Загружаем инструкцию", означает, что нужно подождать пока файл загрузится и можно будет его читать онлайн. Некоторые инструкции очень большие и время их появления зависит от вашей скорости интернета.


8
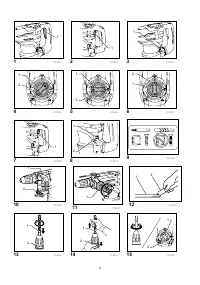
Fig.13
Insert the bit into the tool. Turn the bit and push it in until
it engages.
If the bit cannot be pushed in, remove the bit. Pull the
release cover down a couple of times. Then insert the
bit again. Turn the bit and push it in until it engages.
After installing, always make sure that the bit is securely
held in place by trying to pull it out.
Fig.14
To remove the bit, pull the release cover down all the
way and pull the bit out.
Bit angle (when chipping, scaling or
demolishing)
Fig.15
The bit can be secured at 24 different angles. To
change the bit angle, rotate the change lever so that the
pointer points to the
symbol. Turn the bit to the
desired angle.
Fig.16
Rotate the change lever so that the pointer points to
the
symbol. Then make sure that the bit is securely
held in place by turning it slightly.
Depth gauge
Fig.17
The depth gauge is convenient for drilling holes of
uniform depth.
Press and hold the lock button, and insert the depth
gauge into the hex hole.
Fig.18
Make sure the toothed side of the depth gauge faces
the marking.
Adjust the depth gauge by moving it back and forth
while pressing the lock button. After adjustment, release
the lock button to lock the depth gauge.
NOTE:
•
The depth gauge cannot be used at the position
where the depth gauge strikes against the gear
housing/motor housing.
OPERATION
CAUTION:
•
Make sure the work material is secured and not
unstable. Flown object may cause personal injury.
•
Do not pull the tool out forcibly even the bit gets
stuck. Loss of control may cause injury.
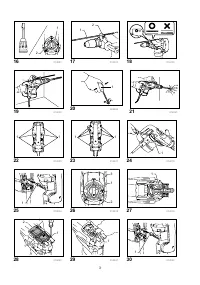
Hammer drilling operation
Fig.19
Set the change lever to the
symbol.
Position the bit at the desired location for the hole, then
pull the switch trigger.
Do not force the tool. Light pressure gives best results.
Keep the tool in position and prevent it from slipping
away from the hole.
Do not apply more pressure when the hole becomes
clogged with chips or particles. Instead, run the tool at
an idle, then remove the bit partially from the hole. By
repeating this several times, the hole will be cleaned out
and you can continue drilling operation.
CAUTION:
•
There is a tremendous and sudden twisting force
exerted on the tool/bit at the time of hole break-
through, when the hole becomes clogged with
chips and particles, or when striking reinforcing
rods embedded in the concrete. Always use the
side grip (auxiliary handle) and firmly hold the tool
by both side grip and switch handle during
operations, and maintain good balance and safe
footing. Failure to do so may result in the loss of
control of the tool and potentially severe injury.
Blow-out bulb (optional accessory)
Fig.20
After drilling the hole, use the blow-out bulb to clean the
dust out of the hole.
Chipping/Scaling/Demolition
Fig.21
Set the change lever to the
or
symbol.
Hold the tool firmly with both hands. Turn the tool on
and apply slight pressure on the tool so that the tool
does not bounce around, uncontrolled. Pressing very
hard on the tool will not increase the efficiency.
MAINTENANCE
CAUTION:
•
Always be sure that the tool is switched off and
unplugged before attempting to perform inspection
or maintenance.
•
Never use gasoline, benzine, thinner, alcohol or
the like. Discoloration, deformation or cracks may
result.
Lubrication
CAUTION:
•
This servicing should be performed by Makita
Authorized Service Centers only.
•
Do not perform lubrication just after the operation,
wait until the tool cools down. Otherwise skin burn
may result.
This tool requires no hourly or daily lubrication because
it has a grease-packed lubrication system. However, it is
necessary to replace grease and carbon brushes
periodically for tool's long life.
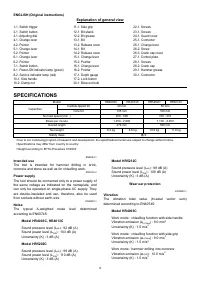
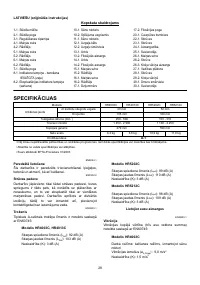
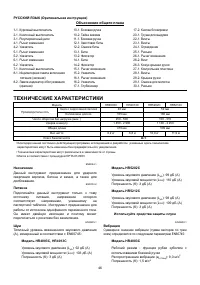
Характеристики

Остались вопросы?Не нашли свой ответ в руководстве или возникли другие проблемы? Задайте свой вопрос в форме ниже с подробным описанием вашей ситуации, чтобы другие люди и специалисты смогли дать на него ответ. Если вы знаете как решить проблему другого человека, пожалуйста, подскажите ему :)


