
Перфораторы Makita HR166DWAJ - инструкция пользователя по применению, эксплуатации и установке на русском языке. Мы надеемся, она поможет вам решить возникшие у вас вопросы при эксплуатации техники.
Если остались вопросы, задайте их в комментариях после инструкции.
"Загружаем инструкцию", означает, что нужно подождать пока файл загрузится и можно будет его читать онлайн. Некоторые инструкции очень большие и время их появления зависит от вашей скорости интернета.


10 ENGLISH
►
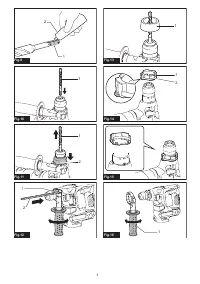
Fig.14:
1.
Spacer
2.
Spring
►
Fig.15
Install the side grip so that the groove on the grip fit in
the protrusion on the spacer. Turn the grip clockwise to
secure it.
►
Fig.16:
1.
Side grip
Install the dust cup set so that the claws of the dust cup
fit in in the slits on the spacer.
►
Fig.17:
1.
Dust cup
2.
Claws
NOTE:
If you connect a vacuum cleaner to the dust
cup set, remove the dust cap before connecting it.
►
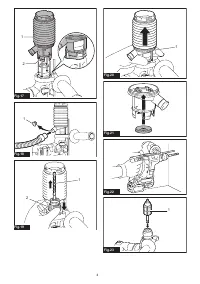
Fig.18:
1.
Dust cap
To remove the drill bit, pull the chuck cover down all the
way and pull the drill bit out.
►
Fig.19:
1.
Bit
2.
Chuck cover
To remove the dust cup set, hold the root of dust cup
and pull it out.
►
Fig.20:
1.
Dust cup
NOTE:
If the cap comes off from the dust cup, attach
it with its printed side facing up so that groove on the
cap fits in the inside periphery of the attachment.
►
Fig.21
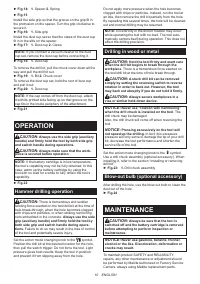
OPERATION
CAUTION:
Always use the side grip (auxiliary
handle) and firmly hold the tool by both side grip
and switch handle during operations.
CAUTION:
Always make sure that the work-
piece is secured before operation.
NOTE:
If the battery cartridge is in low temperature,
the tool’s capability may not be fully obtained. In this
case, warm up the battery cartridge by using the
tool with no load for a while to fully obtain the tool’s
capability.
►
Fig.22
Hammer drilling operation
CAUTION:
There is tremendous and sudden
twisting force exerted on the tool/drill bit at the time of
hole break-through, when the hole becomes clogged
with chips and particles, or when striking reinforcing
rods embedded in the concrete.
Always use the side
grip (auxiliary handle) and firmly hold the tool by
both side grip and switch handle during opera
-
tions.
Failure to do so may result in the loss of control
of the tool and potentially severe injury.
Set the action mode changing knob to the
symbol.
Position the drill bit at the desired location for the hole,
then pull the switch trigger. Do not force the tool. Light
pressure gives best results. Keep the tool in position
and prevent it from slipping away from the hole.
Do not apply more pressure when the hole becomes
clogged with chips or particles. Instead, run the tool at
an idle, then remove the drill bit partially from the hole.
By repeating this several times, the hole will be cleaned
out and normal drilling may be resumed.
NOTE:
Eccentricity in the drill bit rotation may occur
while operating the tool with no load. The tool auto
-
matically centers itself during operation. This does not
affect the drilling precision.
Drilling in wood or metal
CAUTION:
Hold the tool firmly and exert care
when the drill bit begins to break through the
workpiece.
There is a tremendous force exerted on
the tool/drill bit at the time of hole break through.
CAUTION:
A stuck drill bit can be removed
simply by setting the reversing switch to reverse
rotation in order to back out. However, the tool
may back out abruptly if you do not hold it firmly.
CAUTION:
Always secure workpieces in a
vise or similar hold-down device.
NOTICE:
Never use “rotation with hammering”
when the drill chuck is installed on the tool.
The
drill chuck may be damaged.
Also, the drill chuck will come off when reversing the
tool.
NOTICE:
Pressing excessively on the tool will
not speed up the drilling.
In fact, this excessive
pressure will only serve to damage the tip of your drill
bit, decrease the tool performance and shorten the
service life of the tool.
Set the action mode changing knob to the symbol.
Use a drill chuck assembly (optional accessory). When
installing it, refer to the section “Installing or removing
drill bit”.
►
Fig.23:
1.
Drill chuck assembly
Blow-out bulb (optional accessory)
After drilling the hole, use the blow-out bulb to clean the
dust out of the hole.
►
Fig.24
MAINTENANCE
CAUTION:
Always be sure that the tool is
switched off and the battery cartridge is removed
before attempting to perform inspection or
maintenance.
NOTICE:
Never use gasoline, benzine, thinner,
alcohol or the like. Discoloration, deformation or
cracks may result.
To maintain product SAFETY and RELIABILITY,
repairs, any other maintenance or adjustment should
be performed by Makita Authorized or Factory Service
Centers, always using Makita replacement parts.
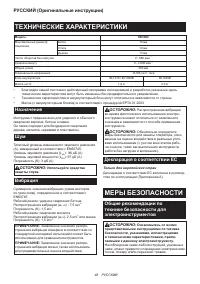
Характеристики

Остались вопросы?Не нашли свой ответ в руководстве или возникли другие проблемы? Задайте свой вопрос в форме ниже с подробным описанием вашей ситуации, чтобы другие люди и специалисты смогли дать на него ответ. Если вы знаете как решить проблему другого человека, пожалуйста, подскажите ему :)


