
Обогреватели Timberk TCH A1N 700 - инструкция пользователя по применению, эксплуатации и установке на русском языке. Мы надеемся, она поможет вам решить возникшие у вас вопросы при эксплуатации техники.
Если остались вопросы, задайте их в комментариях после инструкции.
"Загружаем инструкцию", означает, что нужно подождать пока файл загрузится и можно будет его читать онлайн. Некоторые инструкции очень большие и время их появления зависит от вашей скорости интернета.
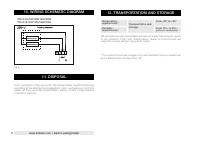


www.timberk.com • electric ceiling heater
6
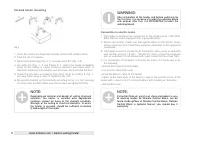
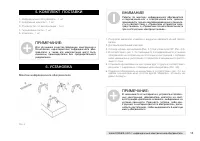
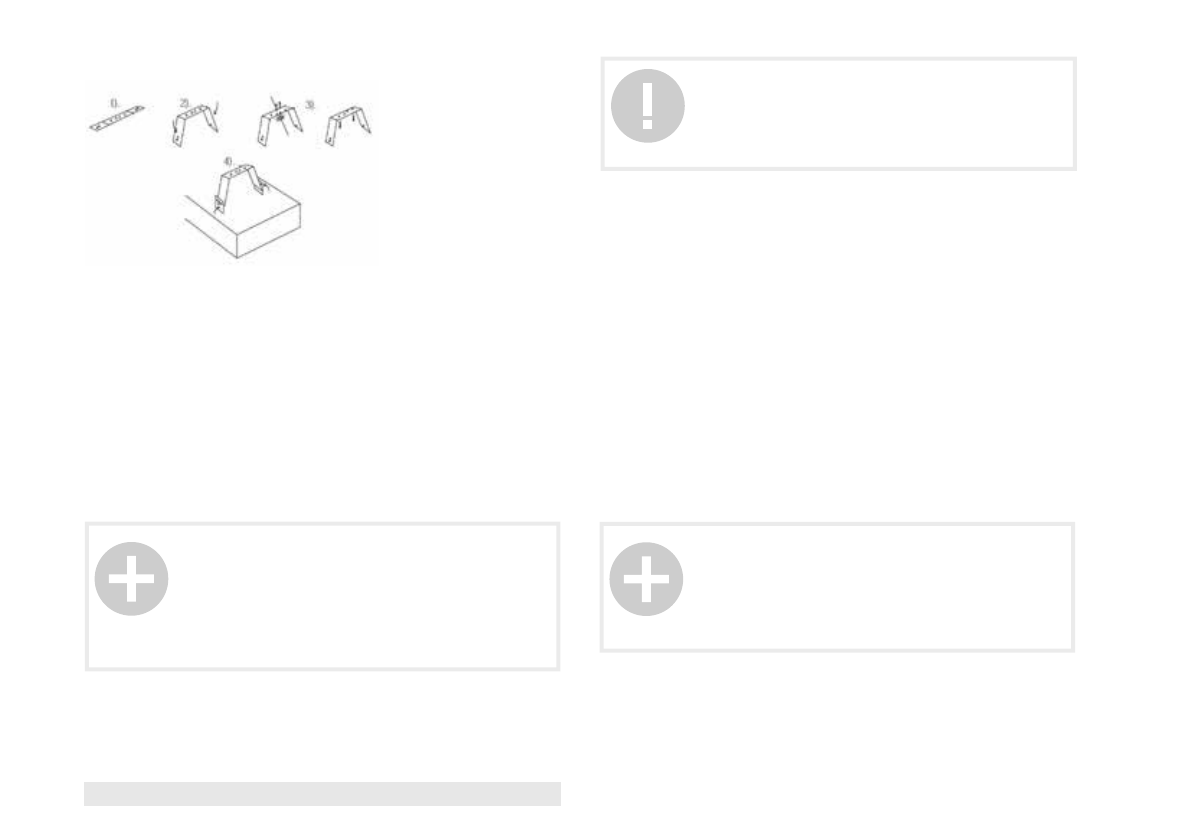
1. Open the factory package and carefully remove the heater from it.
2. Take the set of fasteners.
3. Bend the bracket legs (Fig. 4.1) at angle about 90° (Fig. 4.2).
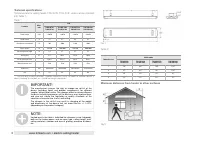
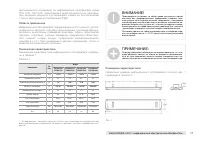
4. According to Figs. 1, 2 and Tables 3, 4, select the heater installation
place on the ceiling or ceiling structural elements with observation of
minimum distances from objects and minimum distance from the floor.
5. Install the brackets at distance from each other according to Fig. 1,
securing them using a chain or fasteners (fig. 4.3).
6. Suspend the heater on the brackets according to Fig. 4.4, first securing
on edge, then another. Make sure that screws are tightened firmly.
Connection to electric mains
1. The heater is designed for connection to the single-phase ~220-240V,
50Hz electric mains equipped with a grounding loop.
2. Before connection, make sure that specifications of the electric mains
at the connection point meet the parameters indicated on the appliance
nameplate.
3. The heater should be connected to the electric mains using a cable with
wire section at least 1.5 mm
2
. The electric mains should be equipped
with an automatic circuit breaker with rated current not less than 16A.
4. For connection of the heater to the electric mains, it is necessary to do
the following:
•
remove the cover from the heater.
•
cut a hole in the rubber seal.
•
insert the electric cable to the heater.
•
tightly fix the bare ends of the electric cable in the junction block of the
heater with screws in strict correspondence with marking on the block.
•
reinstall the cover.
Infrared heater mounting
NOTE:
Depending on material and design of ceiling structural
elements, the heater is secured onto appropriate
fasteners chosen on basis of the strength condition.
Strength of the ceiling or structural elements, to which
the heater is secured, should be sufficient to endure
5-fold weight of the heater.
NOTE:
Instruction Manual, which can show and explain a way
of working modes for Remote Control Block, can be
found inside giftbox of Remote Control Block. Remote
Control Block is optional feature; you should buy it
separately.
WARNING!
After installation of the heater and before switching for
the first time, it is necessary to wipe the radiating board
with alcohol. After that, it is PROHIBITED to touch the
radiating board.
Fig.4
Содержание
- 2 Инфракрасный; бора без специального уведомления.
- 10 инфракрасный электрический обогреватель; Уважаемый покупатель!; МЕРЫ ПРЕДОСТОРОЖНОСТИ
- 11 РАБОЧИЕ ХАРАКТЕРИСТИКИ; Принцип работы
- 12 Область применения; Размерные характеристики
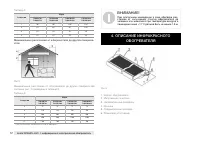
- 13 Минимальные расстояния от обогревателя до других поверхностей; Минимальные расстояния от обогревателя до других поверхно-; При длительном нахождении в зоне обогрева рас-; ОПИСАНИЕ ИНФРАКРАСНОГО
- 14 КОМПЛЕКТ ПОСТАВКИ; нием минимальных расстояний от предметов и минимального рассто-; Монтаж инфракрасного обогревателя
- 15 Подключение к электрической сети; ЭКСПЛУАТАЦИЯ ИНФРАКРАСНОГО
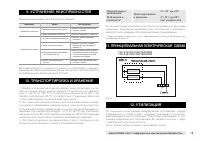
- 16 УСТРАНЕНИЕ НЕИСПРАВНОСТЕЙ; ПРИНЦИПИАЛЬНАЯ ЭЛЕКТРИЧЕСКАЯ СХЕМА; Температурные
- 17 ИНФОРМАЦИЯ О СЕРТИФИКАЦИИ
- 18 клиентской поддержки. Теперь Вы всегда сможете заказать и офор-
- 19 • в частично признанной
- 20 Если вы заметили ошибку в инструкции, пожалуйста, сообщите нам


