Настольные часы VITEK VT-3519 SR - инструкция пользователя по применению, эксплуатации и установке на русском языке. Мы надеемся, она поможет вам решить возникшие у вас вопросы при эксплуатации техники.
Если остались вопросы, задайте их в комментариях после инструкции.
"Загружаем инструкцию", означает, что нужно подождать пока файл загрузится и можно будет его читать онлайн. Некоторые инструкции очень большие и время их появления зависит от вашей скорости интернета.


4
ENGLISH
instructions on safety measures and infor-
mation about danger, which can be caused
by improper usage of the device.
•
Keep the device out of reach of children.
•
Never allow children to use the device as
a toy.
•
The device is intended for household usage
only.
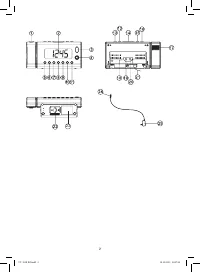
Power connection
–
To plug the device to the mains, Insert the
power adapter plug (24) into the power jack
(19) «DC». Connect the net adapter (25) to
AC mains.
–
The device is equipped with an integrated
battery system of reser ve supply, which
in case of AC supply voltage interruption
allows to save settings of current time,
timer, alarm and recorded radio stations.
When the voltage gets normal, the device
will switch to supply from the net adapter.
–
Open the battery compartment lid (22) hav-
ing preliminary unscrewed the fixing screw.
Insert a CR2032 battery (not supplied), fol-
lowing the polarity.
–
Close the batter y compartment lid and
tighten up the screw.
ATTENTION!
Battery leakage can lead not only to damages
of the device but also to injures. In order to
avoid the device damage, follow the following
instructions:
–
insert a battery following the polarity;
–
remove the battery if you are not planning to
use the device for a long time;
–
do not dismantle the battery, do not subject
it to high temperatures; and
–
replace the batteries in time.
Time setup
1.
Plug the device into the mains.
2.
Press and hold button (7) «MEM TIME», time
format symbols will start flashing on the
display: 12 hours (12Hr) or 24 hours (24Hr).
3.
Use the buttons (8) and (9) to select the time
format.
4.
Press the button (7) «MEM TIME»
.
The hour
digits will start flashing on the display.
5.
Use the buttons (8) and (9) to select the
necessary hour.
6.
Press the button (7) «MEM TIME»
.
The min-
ute digits will start flashing on the display.
7.
Use the buttons (8) and (9) to select the nec-
essary minutes.
8.
To finish the setup procedure press the but-
ton (7) «MEM TIME»
.
Note: If in the course of setup during 60
seconds the buttons (8) and (9) are not
pressed, the device will switch to the cur-
rent time mode.
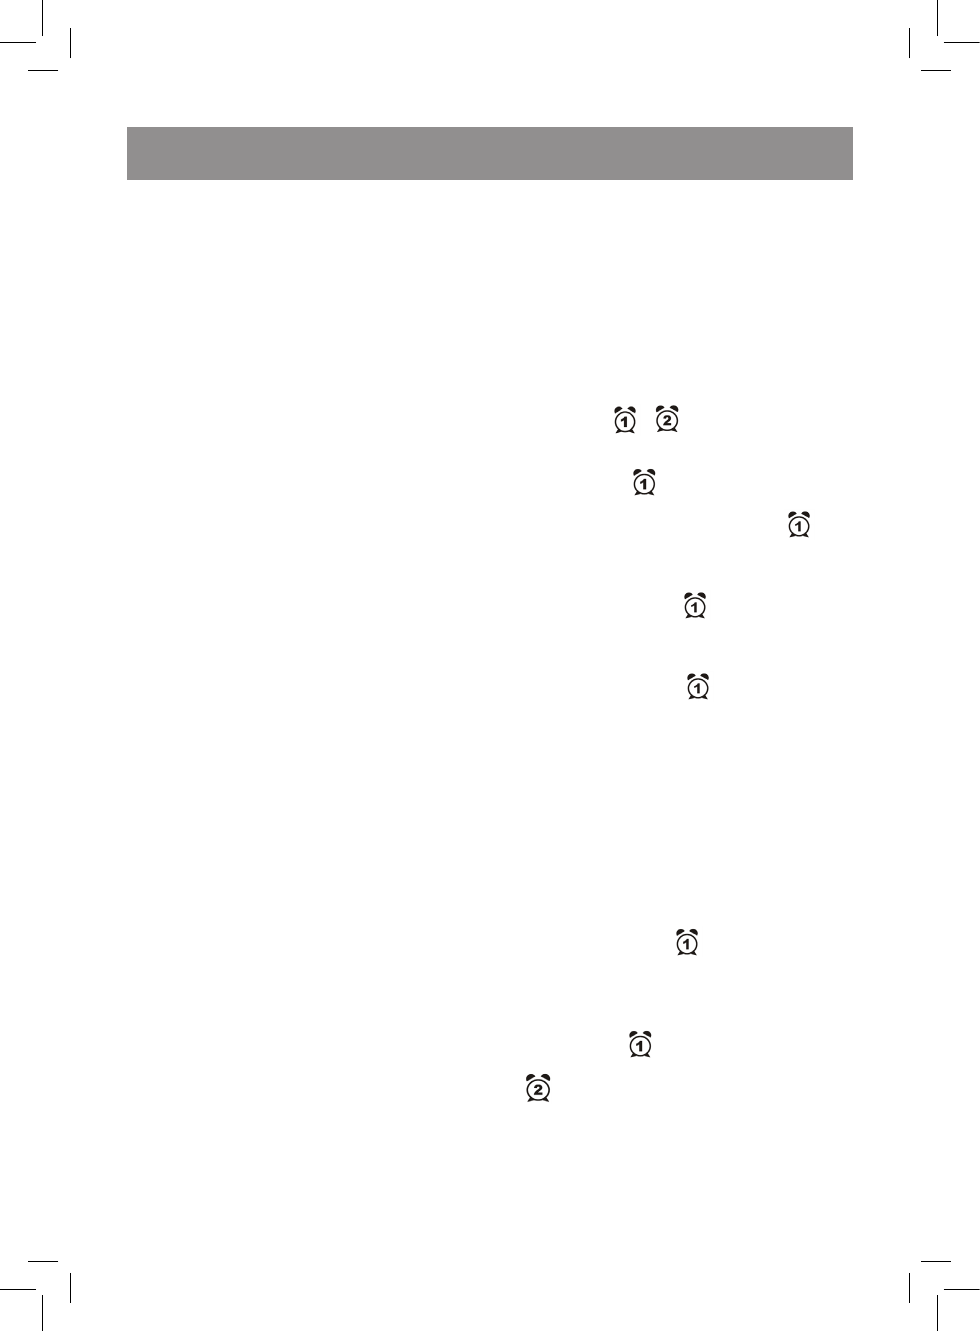
Alarm setup (
и
)
1.
Plug the device into the mains.
2.
To view the settings of the first alarm press
the button (5)
.
3.
In the mode of viewing the alarm settings,
again press and hold the button (5)
. The
hour digits will start flashing on the display.
4.
Use the buttons (8) and (9) to select the
necessary hour.
5.
Press the button (5)
. The minute digits
will start flashing on the display.
6.
Use the buttons (8) and (9) to select the nec-
essary minutes.
7.
Press the button (5)
.
The alarm signal
symbols will start flashing on the display.
Use the buttons (8) and (9) to select the
necessary alarm signal. sounds of nature
(NATURE), sound signal (BUZZER) or radio
(RADIO).
8.
If you have selected «sounds of nature»
(NATURE) signal type, press the button (5)
and using the buttons (8) and (9) select
the sound type: brook (BROOK), bubbles
(BUBBLE) or forest sounds (FOREST).
9.
If you have selected «sounds of nature»
(NATURE) or radio (RADIO) signal type,
press the button (5)
. Digital parameters
of the volume level shall appear on the dis-
play. Using the buttons (8) and (9) select the
alarm desired volume level.
10.
To finish the setting of the first alarm, press
the button (5)
.
11.
Repeat steps 2-10 for the second alarm (6)
.
Note:
–
If during 60 seconds the buttons (8)
and (9) are not pressed, the device will
switch to the current time mode.
4
VT-3519 IM.indd 4
25.12.2013 10:57:04


