Мясорубки Bosch MFW 45000 - инструкция пользователя по применению, эксплуатации и установке на русском языке. Мы надеемся, она поможет вам решить возникшие у вас вопросы при эксплуатации техники.
Если остались вопросы, задайте их в комментариях после инструкции.
"Загружаем инструкцию", означает, что нужно подождать пока файл загрузится и можно будет его читать онлайн. Некоторые инструкции очень большие и время их появления зависит от вашей скорости интернета.


12
en
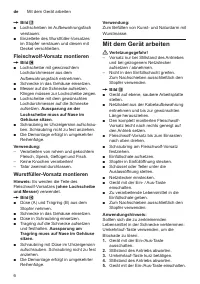
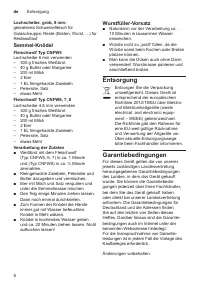
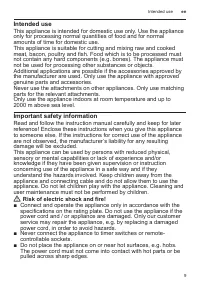
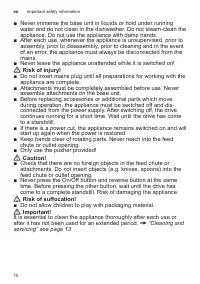
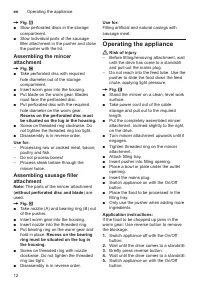
Operating the appliance
X
Fig.
B
■
Stow perforated discs in the storage
compartment.
■
Stow individual parts of the sausage
filler attachment in the pusher and close
the pusher with the lid.
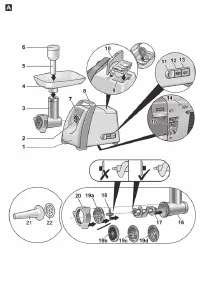
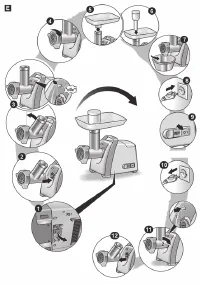
Assembling the mincer
attachment
X
Fig.
C
■
Take perforated disc with required
hole diameter out of the storage
compartment.
■
Insert worm gear into the housing.
■
Put blade on the worm gear. Blades
must face the perforated disc.
■
Put perforated disc with the required
hole diameter on the worm gear.
Recess on the perforated disc must
be situated on the lug in the housing.
■
Screw on threaded ring clockwise. Do
not tighten the threaded ring too tight.
■
Disassembly is in reverse order.
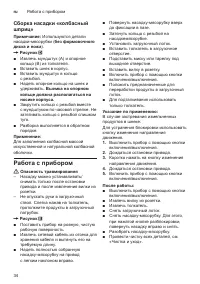
Use for:
– Processing raw or cooked meat, bacon,
poultry and fish.
– Do not process bones!
– Process steak tartare through the
mincer twice.
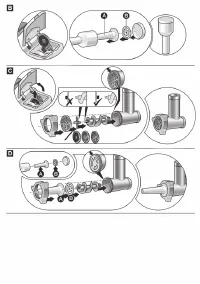
Assembling sausage filler
attachment
Note:
The parts of the mincer attachment
(
without perforated disc and blade
) are
used.
X
Fig.
D
■
Take nozzle (A) and bearing ring (B) out
of the pusher.
■
Insert worm gear into the housing.
■
Insert nozzle into the threaded ring.
■
Put bearing ring on the worm gear and
hold in place.
Recess on the bearing
ring must be situated on the lug in
the housing.
■
Screw on threaded ring with nozzle
clockwise. Do not tighten the threaded
ring too tight.
■
Disassembly is in reverse order.
Use for:
Filling artificial and natural casings with
sausage meat.
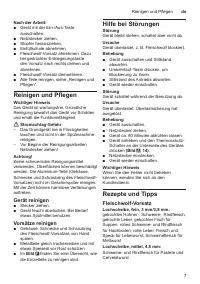
Operating the appliance
W
Risk of injury
– Before fitting/removing attachment, wait
until the drive has come to a standstill
and pull out the mains plug.
– Do not reach into the feed tube. Use the
pusher to slide the food down the feed
chute, applying light pressure.
X
Fig.
E
■
Stand the mincer on a clean, level work
surface.
■
Take power cord out of the cable
storage and pull out to the required
length.
■
Put the completely assembled mincer
attachment, inclined slightly to the right,
on the drive.
■
Turn mincer attachment upwards until it
engages.
■
Tighten threaded ring on the mincer
attachment.
■
Attach filling tray.
■
Insert pusher into filling opening.
■
Place a bowl or plate under the outlet
opening.
■
Insert the mains plug.
■
Switch appliance on with the On/Off
button.
■
Place the food to be processed in the
filling tray.
■
Only use the pusher when adding more
ingredients.
Application instructions:
If the food to be chopped up jams in the
worm gear: Use reverse button to remove
the blockage.
1.
Switch appliance off with the On/Off
button.
2.
Wait until the drive comes to a standstill.
3.
Briefly press reverse button.
4.
Wait until the drive comes to a standstill.
5.
Switch appliance on with the On/Off
button.
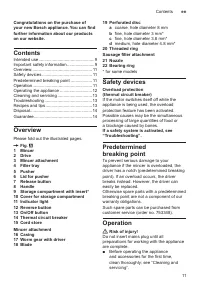
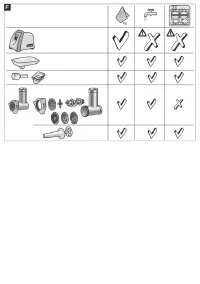
Содержание
- 30 Использование по назначению
- 31 Опасность поражения током и возгорания!
- 33 Сборка насадки-мясорубки
- 34 Работа с прибором
- 35 Чистка и уход; Чистка прибора; Помощь при устранении
- 36 Рецепты и рекомендации; Хлебные клецки; Насадка «колбасный шприц»
- 39 No 261-ФЗ, законодательства о техническом регулировании


