
Морозильные камеры Kraft KF-HS180W - инструкция пользователя по применению, эксплуатации и установке на русском языке. Мы надеемся, она поможет вам решить возникшие у вас вопросы при эксплуатации техники.
Если остались вопросы, задайте их в комментариях после инструкции.
"Загружаем инструкцию", означает, что нужно подождать пока файл загрузится и можно будет его читать онлайн. Некоторые инструкции очень большие и время их появления зависит от вашей скорости интернета.


30
ВЕРТИКАЛЬНАЯ МОРОЗИЛЬНАЯ КАМЕРА
UPRIGHT FREEZER
ИНСТРУКЦИЯ ПО ЭКСПЛУАТАЦИИ • USER GUIDE
TRANSPORTATION AND SETTING
Transportation
• Do not subject the device to extreme temperatures. An abrupt change in temperature
(for example, bringing the device from a frost into a warm room) can cause
condensation inside the device and impair its performance.
• When transporting, the angle of inclination of the freezer heater cannot exceed
45 degrees vertically
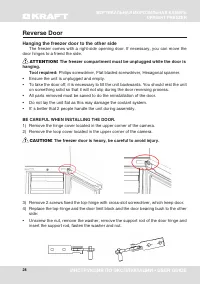
• Do not turn, lay down or shake the freezer. Hold the door while moving.
• When moving the freezer, it must be held behind the walls and bottom of the chamber.
Under no circumstances can you hold the camera by the top surface.
• Before operating the freezer, remove all packing materials. Remove the protective
film from the lid and body of the freezer.
Do Not
allow children to play with the packaging material, there is a danger
of suffocation with packaging material and polyethylene!
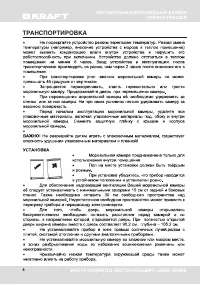
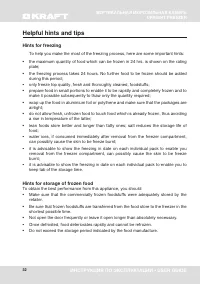
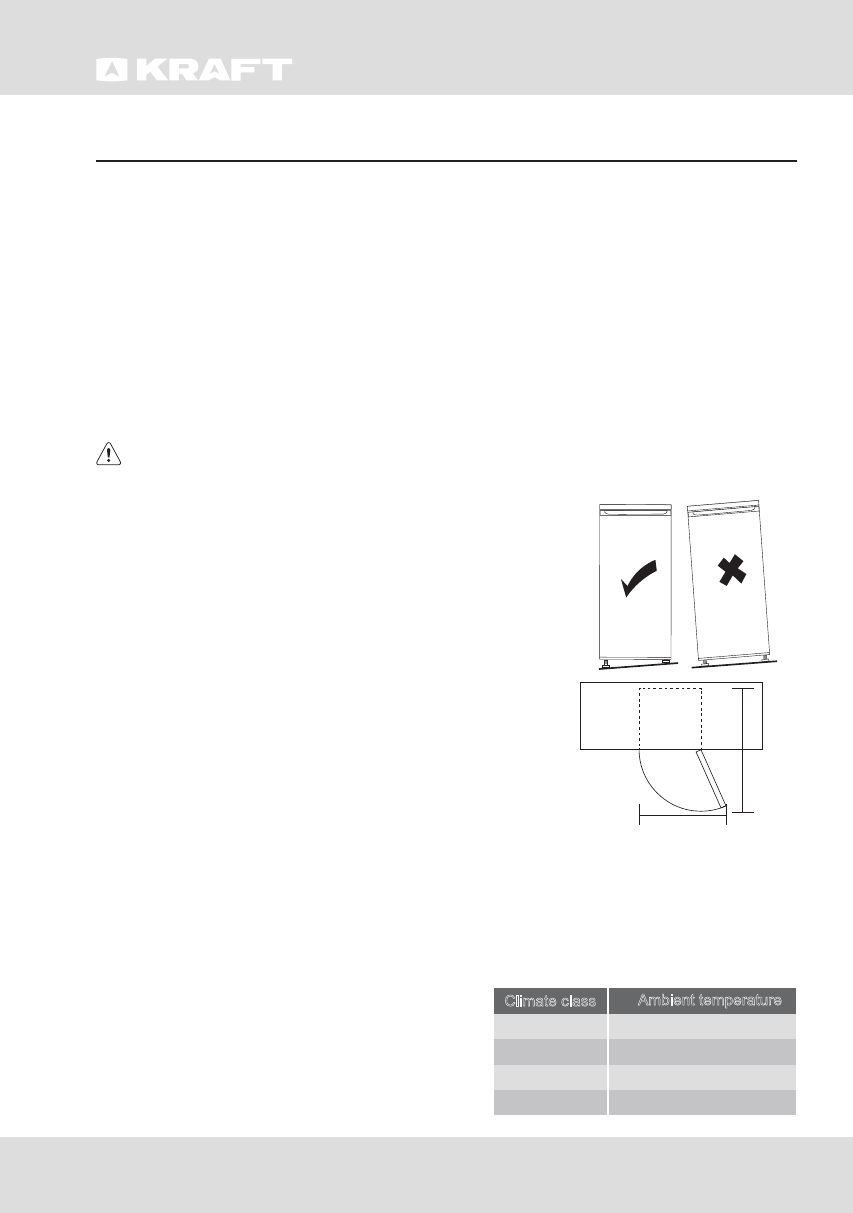
Positioning
• The freezer compartment is intended for indoor use
only.
• The floor at the installation site must be firm and level.
• When installing, make sure that the device is in a stable
position and is set to level.
• To ensure proper ventilation of your freezer, it should be
installed with a minimum clearance of 10 cm from the
back and side walls. You must also leave 30 cm of free
space above the freezer. Insufficient free space can
lead to overheating of the device and excessive energy
consumption.
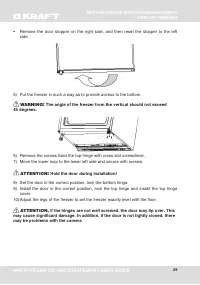
• In order for the freezer door to open without impediments,
it is necessary to leave a distance in front of the chamber
and on the side in the direction of which the door opens.
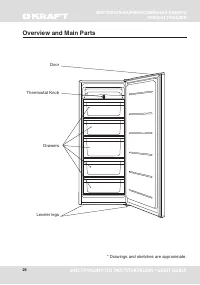
When the door is fully open, the width of the chamber with the door is 90.2 cm, depth
is 105.2 cm.
• Avoid prolonged exposure of the appliance to direct sunlight.
• Regularly examine the drain in the refrigerator for defrosted water. If necessary, clean
the drain. If the drain is blocked, water will collect in te bottom of the appliance.
• Extremely low temperature may adversely
affect the operation of the freezer.
• Install this appliance at a location where
the ambient temperature corresponds to
the climate class indicated on the rating
plate of the appliance:
Installation
Space
Requirement
Select a location without direct exposure to sunlight;
Select a location with enough space for the refrigerator doors to open
easily;
Select a location with level (or nearly level) flooring;
Allow sufficient space to install the refrigerator on a flat surface;
Allow clearance to the right, left, back and top when installing. This
Keep at lest 50mm gap at two sides and back.
will help reduce power consumption and keep your energy bills lower.
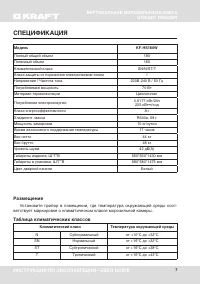
Install this appliance at a location where the ambi ent temperature corresponds to the climate class
indicated on the rating plate of the appliance:
Positioning
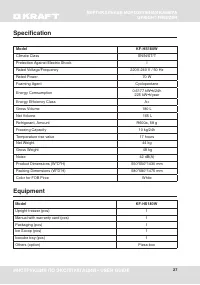
Climate class
Ambient temperature
SN
N
ST
T
o
o
+10 C to +32 C
o
o
+16 C to +32 C
o
o
+16 C to +38 C
o
o
+16 C to +43 C
The appliance should be installed well away from s ources of heat such as radiat ors, boilers, direct sunlight
etc. Ensure that air can circulate freely around the back of the cabinet. To ensure best performance, if the
appliance is positioned below an overhanging wall unit, the minimum d istance between the top of the cabi-
net and the wall unit must be at least 100 mm. Ideally, however, the appliance should not be positioned
below overhanging wall units. Accurate leveling is ensured by one or more adjustable feet at the base of
the cabinet.
Location
Warning!
It must be possible to disconnect the appliance from the mains power supply; the plug must
therefore be easily accessible after install ation.
Before plugging in, ensure that the voltage and frequency shown on the rating plate correspond to your
domestic power supply. The appliance must be earthed. The power supply cable plug is provided with a
contact for this purpose. If the domestic power supply socket is not earthed, connect the appliance to a
separate earth in compliance with current regulations, consulting a qualified electrician.
The manufacturer declines all responsibility if the above safety precautions are not observed.
This appliance complies with the E.E.C. Directives.
Electrical connection
7


