Мониторы ASUS vw192_q2738 - инструкция пользователя по применению, эксплуатации и установке на русском языке. Мы надеемся, она поможет вам решить возникшие у вас вопросы при эксплуатации техники.
Если остались вопросы, задайте их в комментариях после инструкции.
"Загружаем инструкцию", означает, что нужно подождать пока файл загрузится и можно будет его читать онлайн. Некоторые инструкции очень большие и время их появления зависит от вашей скорости интернета.


3
3
3
3
3
Q u i c k S t a r t G u i d e
Q u i c k S t a r t G u i d e
Q u i c k S t a r t G u i d e
Q u i c k S t a r t G u i d e
Q u i c k S t a r t G u i d e
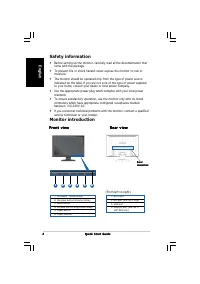
En
g
li
s
h
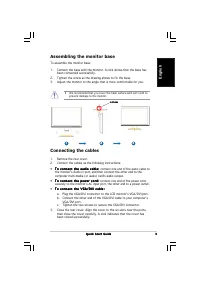
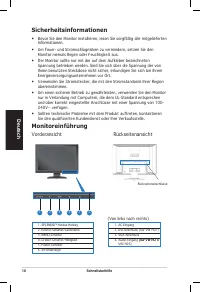
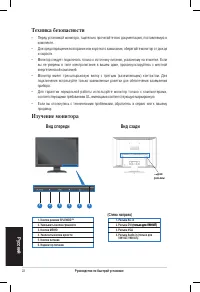
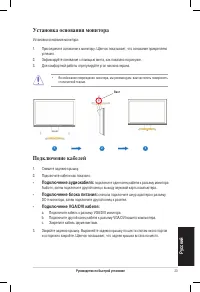
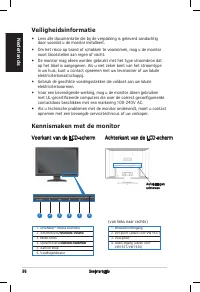
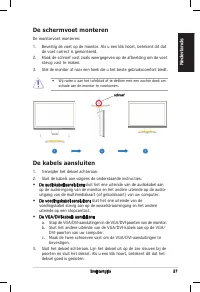
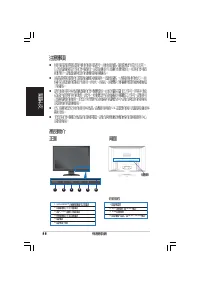
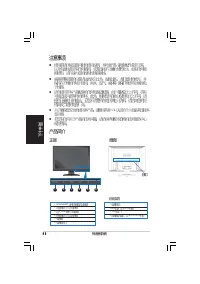
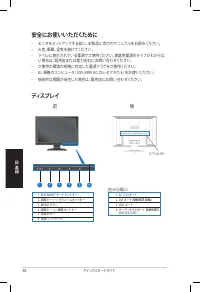
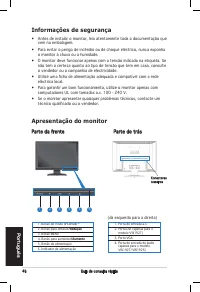
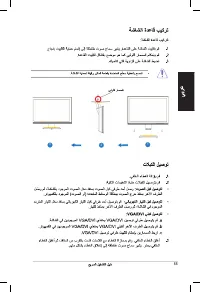
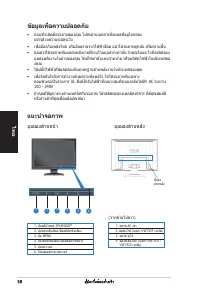
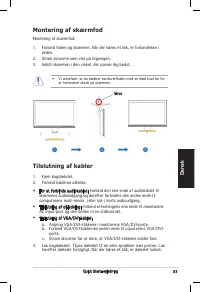
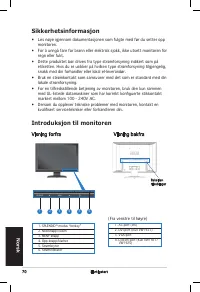
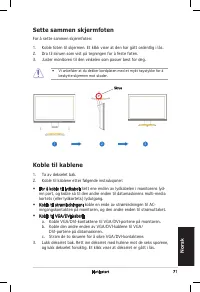
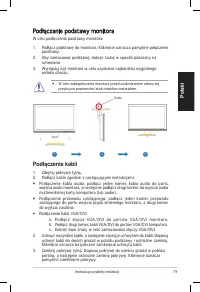
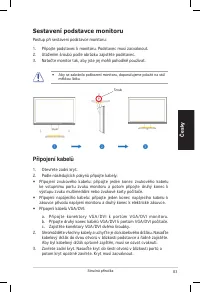
Connecting the cables
1.
Remove the rear cover.
2.
Connect the cables as the following instructions:
• T o c o n n e c t t h e a u d i o c a b l e :
T o c o n n e c t t h e a u d i o c a b l e :
T o c o n n e c t t h e a u d i o c a b l e :
T o c o n n e c t t h e a u d i o c a b l e :
T o c o n n e c t t h e a u d i o c a b l e : connect one end of the audio cable to
the monitor’s Audio-in port, and then connect the other end to the
computer multi-media (or audio) card’s audio output.
• T o c o n n e c t t h e p o w e r c o r d :
T o c o n n e c t t h e p o w e r c o r d :
T o c o n n e c t t h e p o w e r c o r d :
T o c o n n e c t t h e p o w e r c o r d :
T o c o n n e c t t h e p o w e r c o r d : connect one end of the power cord
securely to the monitor’s AC input port, the other end to a power outlet.
• T o c o n n e c t t h e V G A / D V I c a b l e :
T o c o n n e c t t h e V G A / D V I c a b l e :
T o c o n n e c t t h e V G A / D V I c a b l e :
T o c o n n e c t t h e V G A / D V I c a b l e :
T o c o n n e c t t h e V G A / D V I c a b l e :
a. Plug the VGA/DVI connector to the LCD monitor’s VGA/DVI port.
b. Connect the other end of the VGA/DVI cable to your computer’s
VGA/DVI port.
c.
Tighten the two screws to secure the VGA/DVI connector.
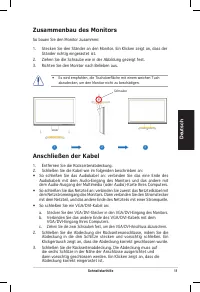
3.
Close the rear cover. Align the cover to the six slots near the ports,
then close the cover carefully. A click indicates that the cover has
been closed successfully.
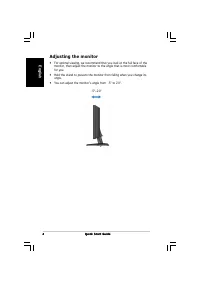
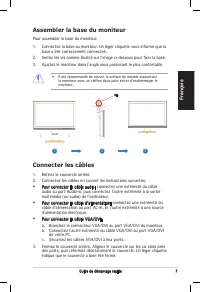
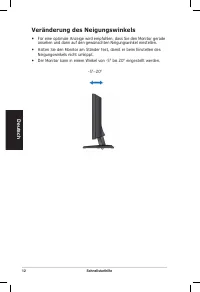
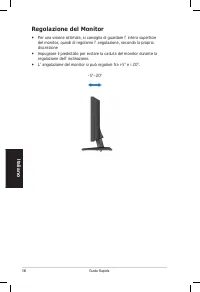
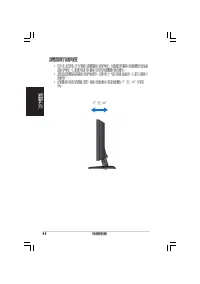
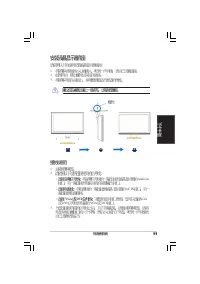
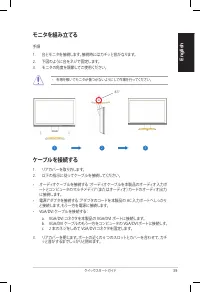
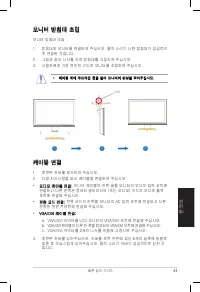
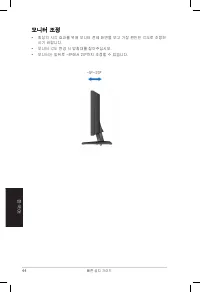
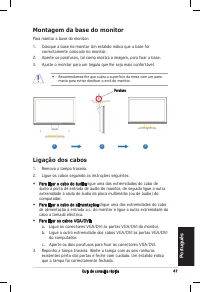
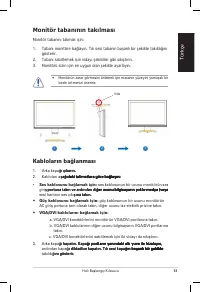
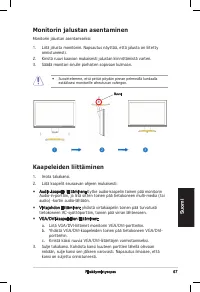
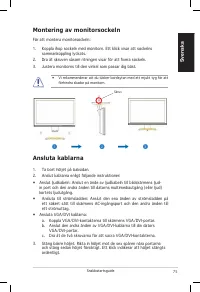
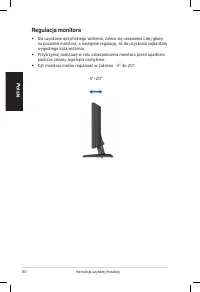
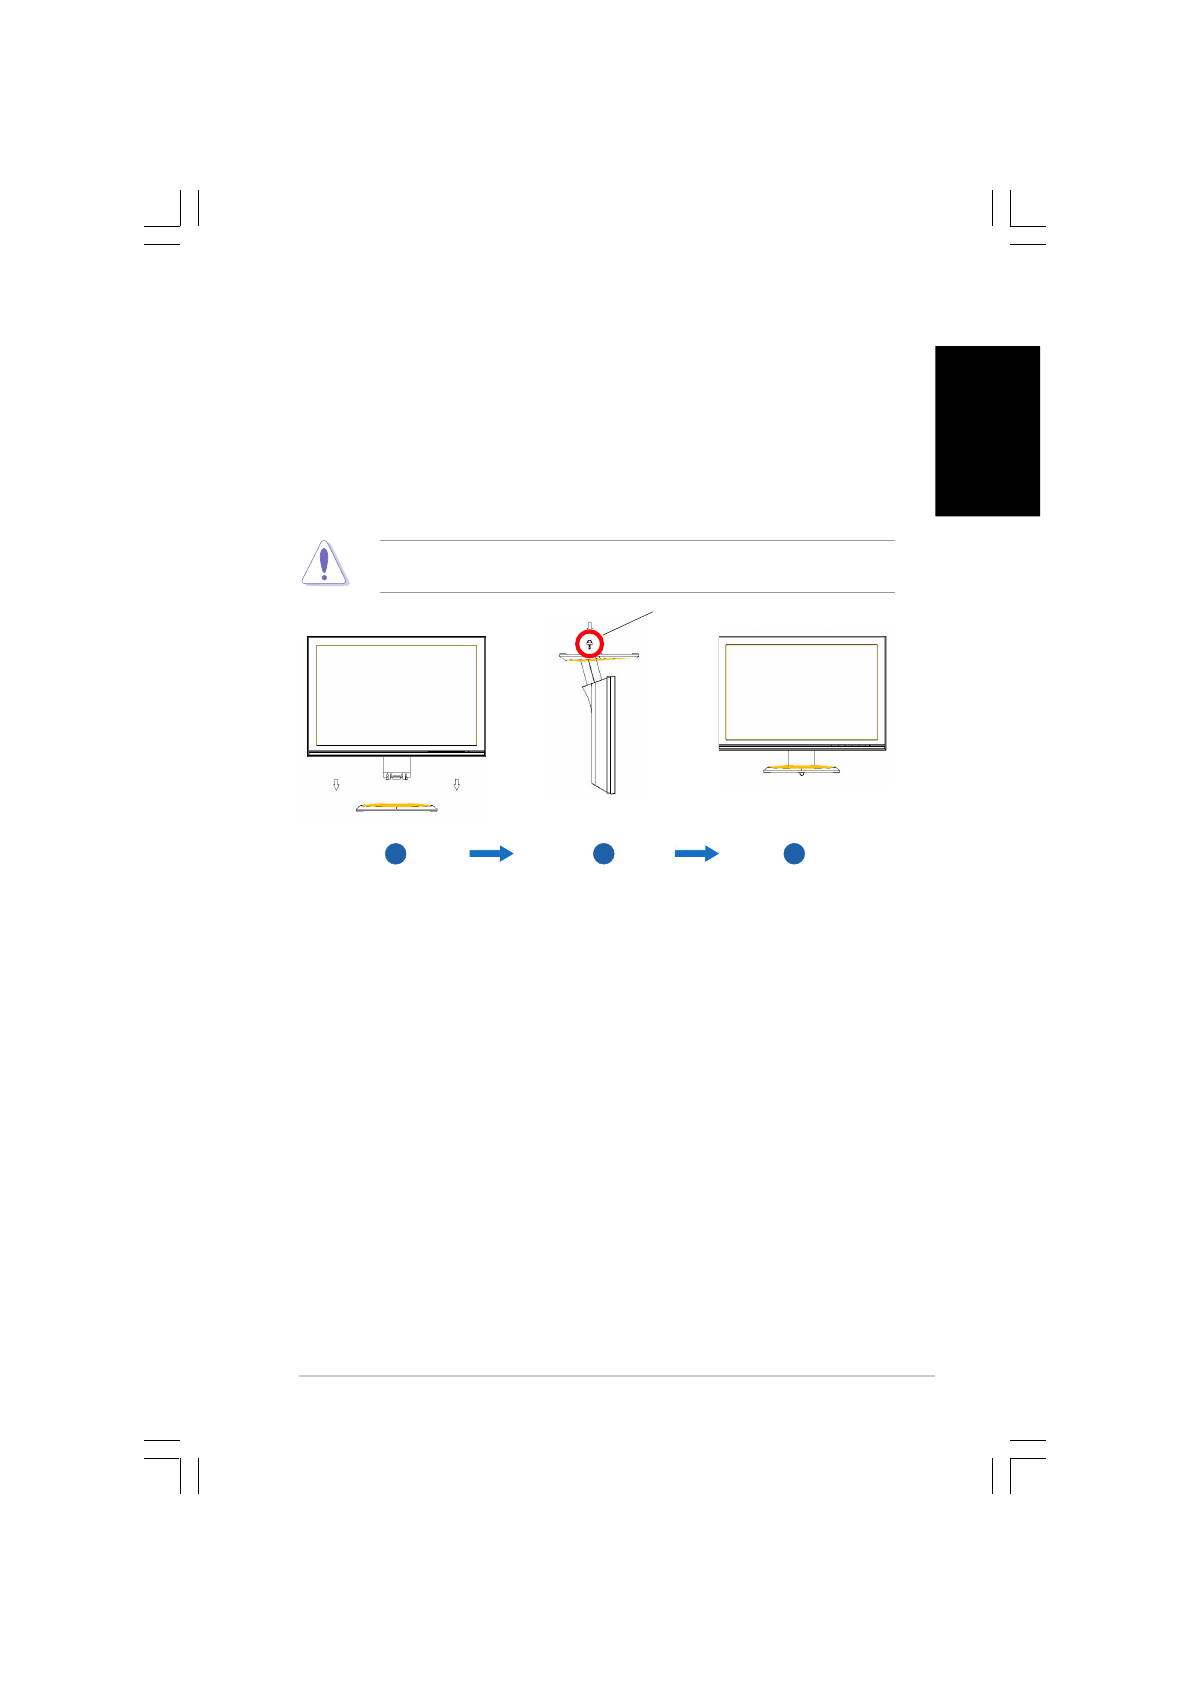
Assembling the monitor base
To assemble the monitor base:
1.
Connect the base with the monitor. A click shows that the base has
been connected successfully.
2.
Tighten the screw as the drawing shows to fix the base.
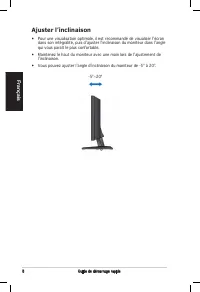
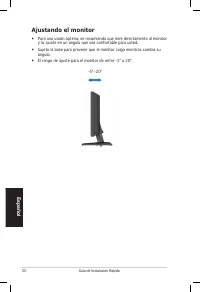
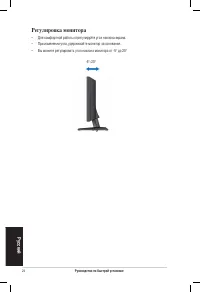
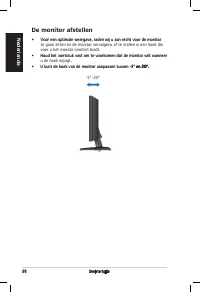
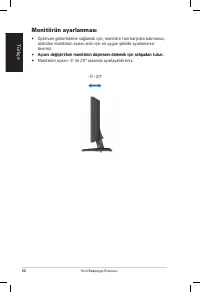
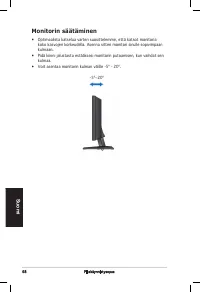
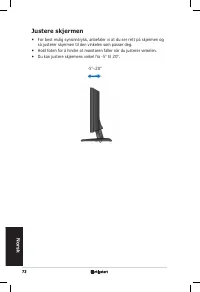
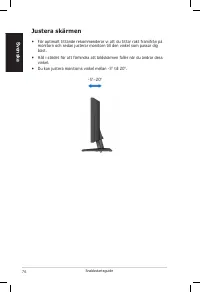
3.
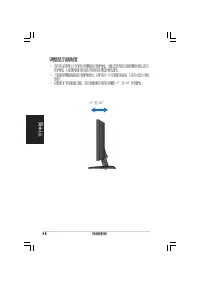
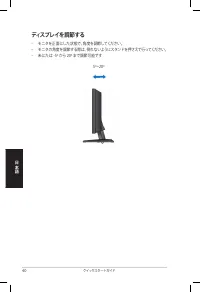
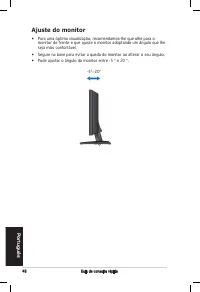
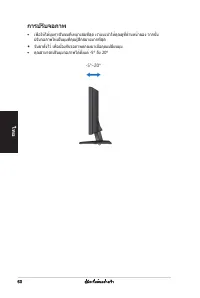
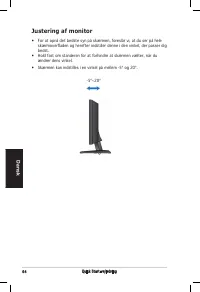
Adjust the monitor to the angle that is most comfortable for you.
•
We recommend that you cover the table surface with soft cloth to
prevent damage to the monitor.
3
3
3
3
3
2
2
2
2
2
1
1
1
1
1
s c r e w
s c r e w
s c r e w
s c r e w
s c r e w


