Микроволновые печи VITEK VT-1684 SR - инструкция пользователя по применению, эксплуатации и установке на русском языке. Мы надеемся, она поможет вам решить возникшие у вас вопросы при эксплуатации техники.
Если остались вопросы, задайте их в комментариях после инструкции.
"Загружаем инструкцию", означает, что нужно подождать пока файл загрузится и можно будет его читать онлайн. Некоторые инструкции очень большие и время их появления зависит от вашей скорости интернета.
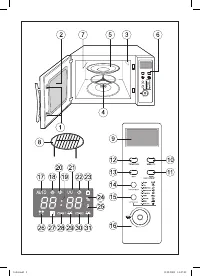

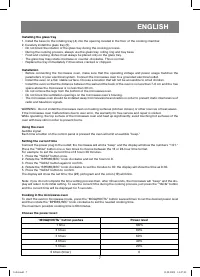


Installing the glass tray
1. Install the base for the rotating tray (4) into the opening located in the floor of the cooking chamber.
2. Carefully install the glass tray (5).
• Do not block the rotation of the glass tray during the cooking process.
• During the cooking process, always use the glass tray, rolling ring and tray base.
• Food and cooking dishes must always be placed only on the glass tray.
• The glass tray may rotate clockwise or counter-clockwise. This is normal.
• Replace the tray immediately if it becomes cracked or chipped.
Installation
• Before connecting the microwave oven, make sure that the operating voltage and power usage matches the
parameters of your electrical system. Connect the microwave oven to a grounded electrical outlet.
• Install the oven on a flat, stable surface. Choose a location that will not be accessible to small children.
• Install the oven so that the distance between the wall and the back of the oven is no less than 7-8 cm and the free
space above the microwave is no less than 30 cm.
• Do not remove the legs from the bottom of the microwave oven.
• Do not block the ventilation openings on the microwave oven's housing.
• The microwave oven should be installed away from televisions and radios in order to prevent static interference of
radio and television signals.
WARNING: Do not install the microwave oven on heating surfaces (kitchen stoves) or other sources of heat waves.
If the microwave oven malfunctions due to user error, the warranty for free service and repair is voided.
While operating, the top surface of the microwave oven and heat up significantly; avoid touching hot surfaces of the
oven with bare skin in order to prevent burns.
Using the oven
Audible signal
Each time a button on the control panel is pressed the oven will emit an audible "beep."
Setting the current time
Connect the power plug to the outlet; the microwave will emit a "beep" and the display will show the numbers "1:01."
Press the "ЧАСЫ" button one or two times to choose between the 12 or 24-hour time format.
For example: to set the current time of 8 hours 30 minutes.
1. Press the "ЧАСЫ" button once.
2. Rotate the "ВРЕМЯ/ВЕС" knob clockwise and set the hours to 8.
3. Press the "ЧАСЫ" button again to confirm.
4. Rotate the "ВРЕМЯ/ВЕС" knob clockwise to set the minutes to 30; the display will show the time as 8:30.
5. Press the "ЧАСЫ" button to confirm.
The display will show the set time; the (22) pictogram and the colon (19) will blink.
Note: if you do not complete the time setting process then, after 30 seconds, the microwave will "beep" and the dis-
play will return to its initial setting. To see the current time during the cooking process, just press the "ЧАСЫ" button
and the current time will be displayed for 5 seconds.
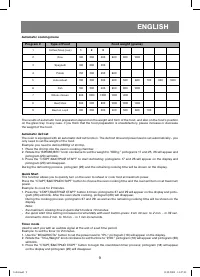
Cooking in the microwave oven
To start the oven in microwave mode, press the "МОЩНОСТЬ" button several times to set the desired power level
and then rotate the "ВРЕМЯ/ВЕС" knob clockwise to set the needed cooking time.
The maximum possible cooking time is 60 minutes.
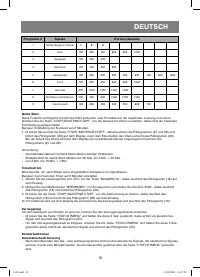
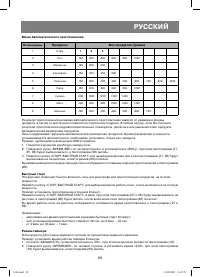
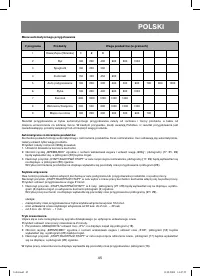
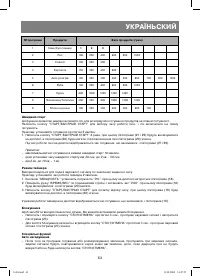
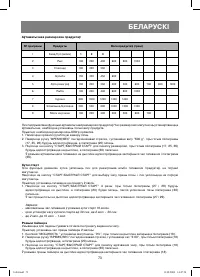
Choose the power level:
7
ENGLISH
"МОЩНОСТЬ" button pushes
Power level
1 time
100%
2 times
80%
3 times
60%
4 times
40%
5 times
20%
6 times (timer)
0
1684.indd 7
1684.indd 7
13.08.2009 14:47:49
13.08.2009 14:47:49
Содержание
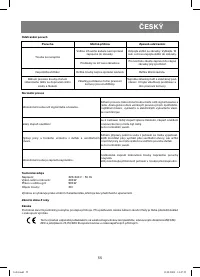
- 23 Если возгорание произошло:
- 24 Проверка посуды перед использованием в микроволновой печи; стеклянный стакан с холодной водой.
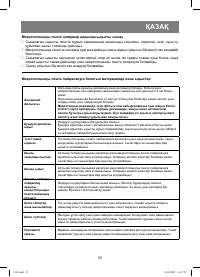
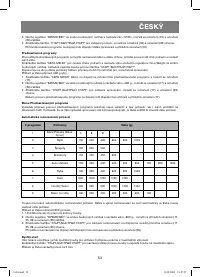
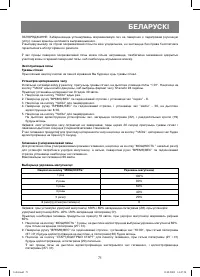
- 25 Описание; роликовая; Кнопка «МОЩНОСТЬ»; Выбор формата времени 12 или 24 часа, установка времени.
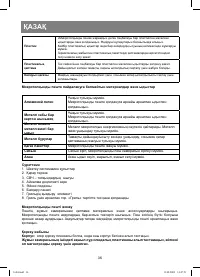
- 27 появления помех при приёме теле и радио сигналов.; Установка текущего времени; несколько; Выберите уровень мощности:; раза, на дисплее отобразится выбранный уровень мощности 60%, при; Уровень мощности
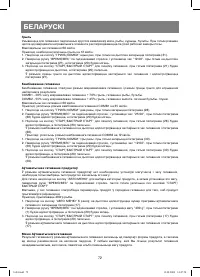
- 29 для выбора времени работы печи, и печь включиться на полную; Режим таймера; по часовой стрелке, и установите время «2:00», при этом пиктограмма; Продукты
- 30 для начала отсчета времени при этом пиктограмма (18); Блокировка; - Для снятия блокировки нажмите и удерживайте кнопку «СТОП/ОТМЕНА»; Остановка печи во время процесса приготовления пищи; подтеки жидкости, удалите их влажной салфеткой.
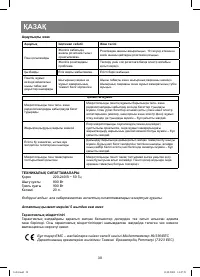
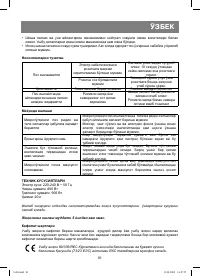
- 31 Напряжение питания:
- 82 RUS; жылдың маусым айында (алтыншы ай) жасалғанын білдіреді


