
Метеостанции First 2460-5 BA - инструкция пользователя по применению, эксплуатации и установке на русском языке. Мы надеемся, она поможет вам решить возникшие у вас вопросы при эксплуатации техники.
Если остались вопросы, задайте их в комментариях после инструкции.
"Загружаем инструкцию", означает, что нужно подождать пока файл загрузится и можно будет его читать онлайн. Некоторые инструкции очень большие и время их появления зависит от вашей скорости интернета.
2
3
ENGLISH
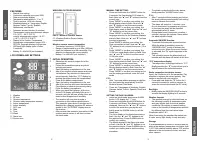
FEATURES:
• Manual time setting.
• Continuous calendar up to year 2099.
• Date and weekday display.
• Temperature alternatively in °C or °F.
• Time in optional 12/24 hour format.
• Weekday display in 7 languages: English,
German, Italian, French, Spanish,
Netherlands, and Danish
• Automatic snooze function (5 minutes).
• Thermometer: Indoor measurement ranges:
0°C (32°F) ~ 50°C (122°C)
outdoor measurement ranges: -19.9°C
(-3.8°F) ~ 59.9°C (139.8°F)
• Display Hi/Lo Outdoor Temperature
• Hygrometer: measurement range: 20% ~
95% RH. Separate display of indoor use.
• LED back light display (auto off after
5 seconds).
• Battery: 2 x AAA /LR6 (not Included).
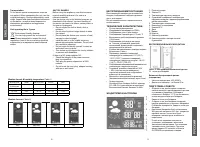
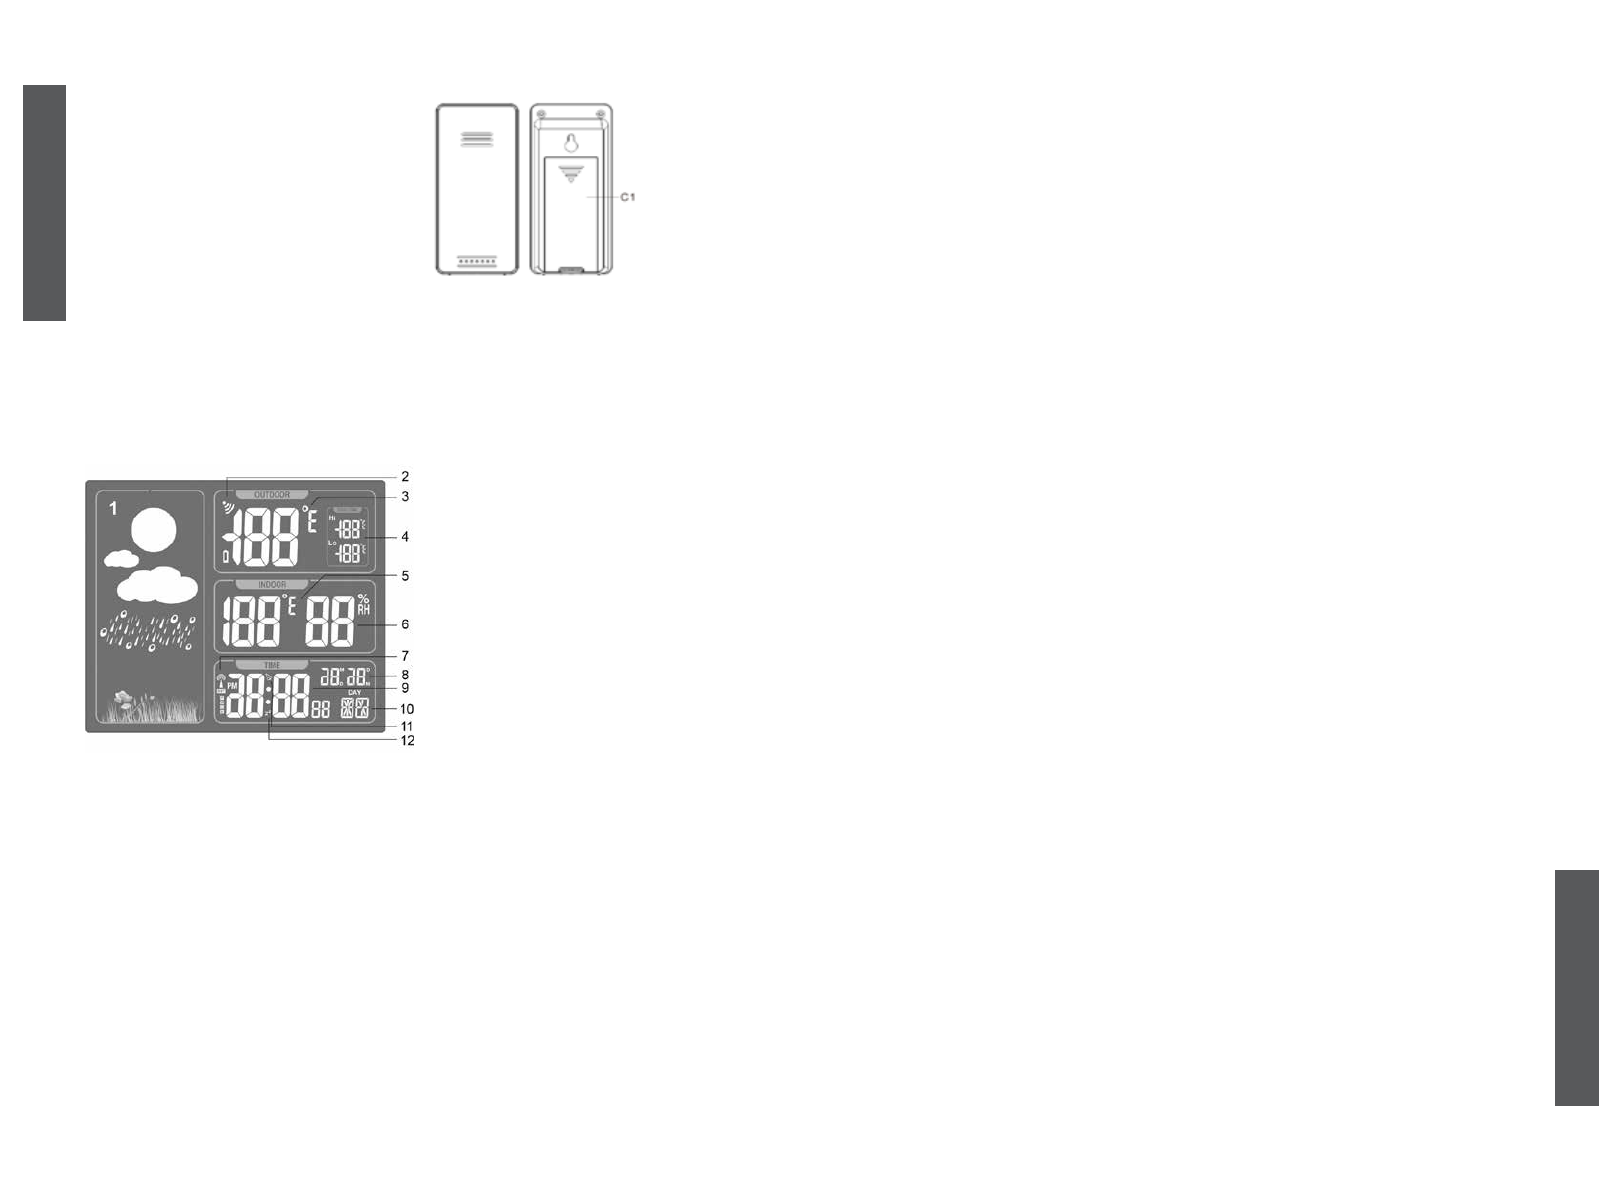
LCD SCREEN AND SETTINGS:
1. Weather
2.
RF icon
3. Outdoor temperature
4. Outdoor today temperature memory
5.
Indoor temperature
6. Indoor humidity
7. RCC icon
8. Date
9. Time
10. Week
11. Alarm icon
12. Snooze icon
WIRELESS OUTDOOR SENSOR
Part C –Wireless Outdoor Sensor
C1: Wireless Outdoor Sensor battery
compartment
Wireless remote sensor (transmitter)
• Transmitter frequency: 433.92 MHz.
• Range of transmission is up to 60m (200feet).
• Insert the batteries in to the transmitter. Pay
attention to observe the correct polarity.
• Battery: 2 x AAA /LR6 (not Included).
INITIAL OPERATION:
• Obstacles can severely impair the of the
transmission
• Protect the transmitter against any direct
sunlight penetration
• Open the battery compartment on the rear
side of the outdoor remote sensor and insert
the batteries. Pay attention to observe the
correct polarity. Select the °C/°F display by
pushing the button inside the compartment.
Close in the battery compartment
• Open the battery compartment on the rear
side of the receiver and insert the batteries.
Pay attention to observe the correct polarity.
Close the battery compartment.
• When you insert the batteries, all the icon
on the LCD display will briefly light up for 3
seconds, and you will hear a beep tone, and
detect indoor temperature & humidity.
• The receiver will now start to make a
connection to the outdoor remote sensor.
This operation takes about 3 minutes and is
displayed by a flashing reception RF antenna
symbol in the “OUTDOOR” display area on
the receiver.
• After receiver has created a connection to the
outdoor remote sensor, it will then b enters
the clock mode.
ENGLISH
MANUAL TIME SETTING:
• Press and hold down the “MODE” button for
2 seconds, the Year display 2012 starts to
flash. Now use “▲” and “▼” buttons to set the
correct year.
• Press “MODE” to confirm your setting, the
Month display starts to flash. Now use “▲”
and “▼” buttons to set the correct month.
• Press “MODE” to confirm your setting, the
Date display starts to flash. Now use “▲” and
“▼“ buttons to set the correct date.
• Press “MODE” to confirm your setting, the
language selection for the Weekday displays
starts to flash. Now use “▲” and “▼“ buttons
to select a language.
• Press“MODE”to confirm your setting, the
Time zones start to flash, Now use” ▲” and
“▼” buttons to set a correct time zone (-12 to
+12).
• Press “MODE” to confirm your setting, the
12/24 hour mode display starts to flash. Now
use “▲” and “▼“ buttons to set the correct
12/24 hour mode.
• Press “MODE” to confirm your setting, the
Hour display starts to flash. Now use “▲” and
“▼“ buttons to set the correct hour.
• Press “MODE” to confirm your setting, the
Minute displays starts to flash. Now use “▲”
and “▼“ buttons to set the correct minute.
• Press “MODE” to confirm your setting and to
end the setting procedures, enter the clock
mode.
F.Y.I.:
• After 7 seconds without pressing any button,
the clock switches automatically from Set
Mode to Normal Time Mode.
• There are 7 languages of Weekday: English,
German, Italian, French, Spanish, Dutch and
Danish.
SETTING THE DAILY ALARMS:
• under the clock mode, press once ALARM
button, LCD display the “
” icon.
• Press and hold down the ALARM button for
2 seconds until Alarm Time flashing icon is
displayed. Now use the “▲” and “▼“ buttons
to select the alarm time you require and
briefly press the ALARM button to set this
Alarm time.
• The Hour display of the Alarm time starts to
flash. Use the “▲” and “▼“ buttons to set
the required hour. Press ALARM button to
confirm your setting
• The Minute display of the Alarm time starts
to flash. Use the “▲” and “▼“ buttons to set
the required minute. Press ALARM button to
confirm your setting and to end the setting
procedure.
• To activate or deactivate the daily alarms,
briefly press the “ALARM” button once.
F.Y.I.:
• After 7 seconds without pressing any button
the clock switches automatically from setting
mode to Normal clock mode.
• The alarm will sound for 1 minutes if you
do not deactivate it by pressing any button.
In this case the alarm will be repeated
automatically after 24 hours.
• Rising alarm sound (crescendo, duration: 1
minutes) changes the volume 4 times whilst
the alarm signal is heard.
Automatic SNOOZE function:
• To activate the automatic snooze function:
While the alarm is sounding, press the
“SNOOZE/LIGHT” button to activate the
snooze function. When the snooze function
is activated, the “Zz” symbol appears in the
display.
• This operation moves the alarm back by 5
minutes and the alarm will restart at this time.
°C/°F temperature display
• The temperature is displayed either in °C/°F.
Briefly pressing the “▼” button allows you to
switch between the individual modes.
Radio connection to outdoor sensor:
Insert the 2 batteries in to the transmitter, Pay
attention to observe the correct polarity. One
sensor is suplied with your receiver
• Press and hold down the “▼“ button for 2
seconds to search for outdoor sensors (to
erase the current data inside the RC clock).
Backlight:
• Briefly press the SNOOZE/LIGHT button to
activate the display lighting for 5 seconds.
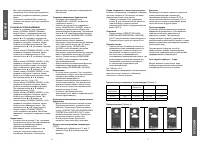
Weather forecast
• The weather forecast is calculated base on
the following humidity & temperature data
and may deviate from the actual weather
conditions if the station in central heating
room or the humidity & temperature record is
big different from the real natural state.
Please see table 1 & 2
When forecasting the weather, the station has
4 icons: sunny, light cloudy, cloudy and rainy
Storage
It is recommended to store in a covered and dry
place at an ambient temperature not higher than
+ 40°C with relative humidity above 70% and the
absence in the environment of dust, acid and
other vapours.
Характеристики

Остались вопросы?Не нашли свой ответ в руководстве или возникли другие проблемы? Задайте свой вопрос в форме ниже с подробным описанием вашей ситуации, чтобы другие люди и специалисты смогли дать на него ответ. Если вы знаете как решить проблему другого человека, пожалуйста, подскажите ему :)


