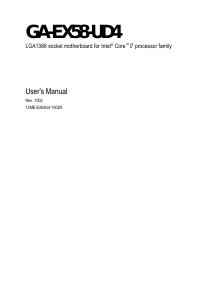
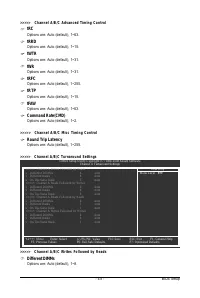
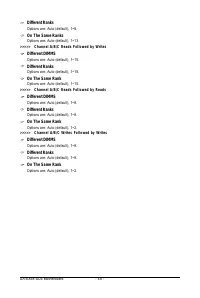
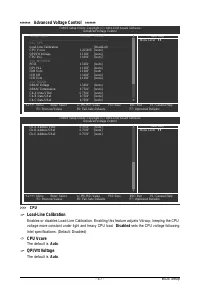
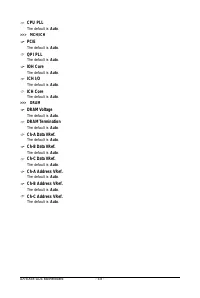
Материнские платы GIGABYTE GA EX58 UD4 rev 1 0 - инструкция пользователя по применению, эксплуатации и установке на русском языке. Мы надеемся, она поможет вам решить возникшие у вас вопросы при эксплуатации техники.
Если остались вопросы, задайте их в комментариях после инструкции.
"Загружаем инструкцию", означает, что нужно подождать пока файл загрузится и можно будет его читать онлайн. Некоторые инструкции очень большие и время их появления зависит от вашей скорости интернета.


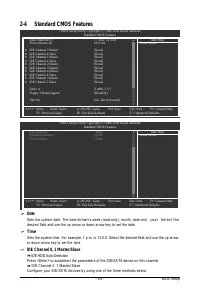


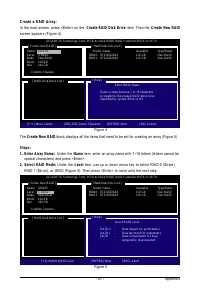
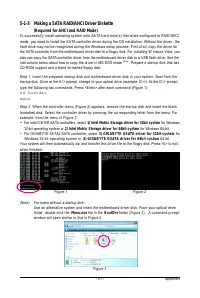
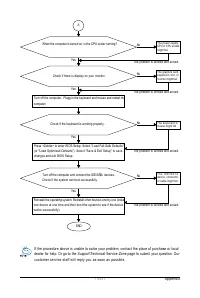


Hardware Installation
- 19 -
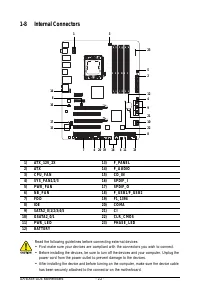
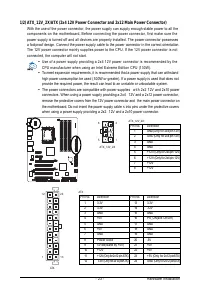
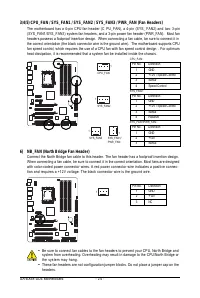
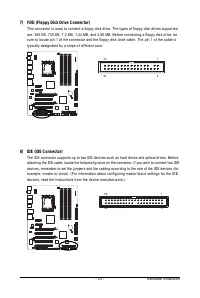
1-6
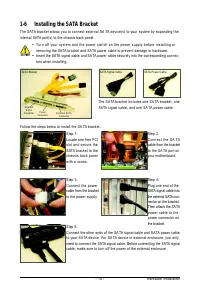
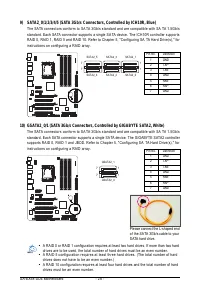
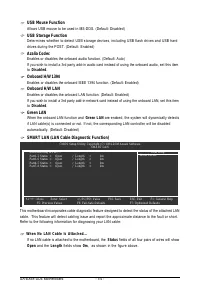
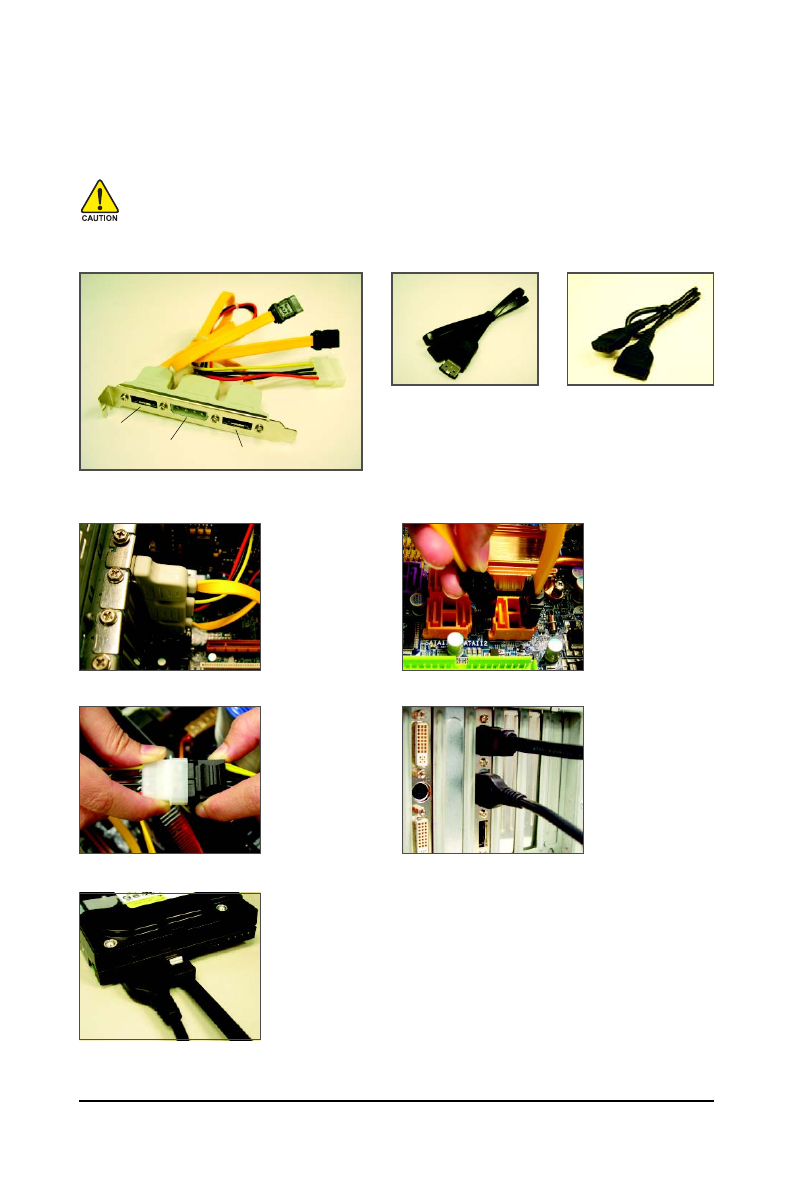
Installing the SATA Bracket
The SATA bracket allows you to connect external SA TA device(s) to your system by expanding the
internal SATA port(s) to the chassis back panel.
•
Turn off your system and the power switch on the power supply before installing or
removing the SATA bracket and SA TA power cable to prevent damage to hardware.
•
Insert the SATA signal cable and SATA power cable securely into the corresponding connec-
tors when installing.
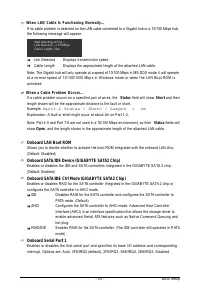
The SATA bracket includes one SA TA bracket, one
SATA signal cable, and one SA TA power cable.
SATA Power Cable
SATA Signal Cable
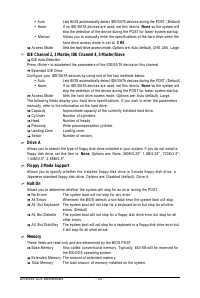
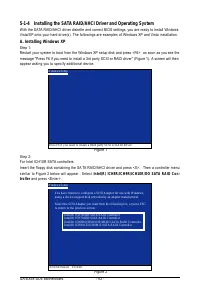
Step 1:
Locate one free PCI
slot and secure the
SATA bracket to the
chassis back panel
with a screw.
Follow the steps below to install the SA TA bracket:
Step 2:
C o n n e c t t h e S A TA
cable from the bracket
to the SA TA port on
your motherboard.
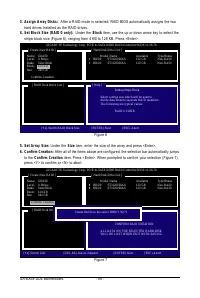
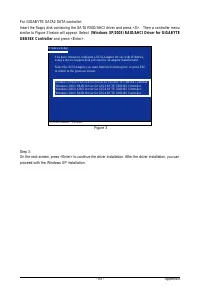
Step 3:
Connect the power
cable from the bracket
to the power supply.
Step 4:
Plug one end of the
SATA signal cable into
the external SATA con-
nector on the bracket.
Then attach the SATA
power cable to the
power connector on
the bracket.
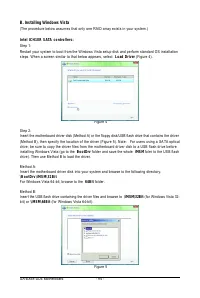
Step 5:
Connect the other ends of the SA TA signal cable and SA TA power cable
to your SATA device. For SA TA device in external enclosure, you only
need to connect the SATA signal cable. Before connecting the SATA signal
cable, make sure to turn off the power of the external enclosure.
SATA Bracket
External
S A T A
Connector
Power
Connector
External SATA
Connector


