Материнские платы GIGABYTE GA 945G DS3 rev 2 0 - инструкция пользователя по применению, эксплуатации и установке на русском языке. Мы надеемся, она поможет вам решить возникшие у вас вопросы при эксплуатации техники.
Если остались вопросы, задайте их в комментариях после инструкции.
"Загружаем инструкцию", означает, что нужно подождать пока файл загрузится и можно будет его читать онлайн. Некоторые инструкции очень большие и время их появления зависит от вашей скорости интернета.
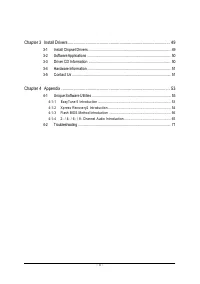


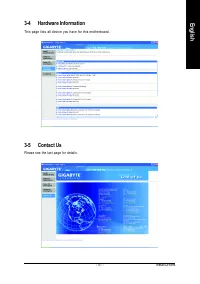


Appendix
- 61 -
English
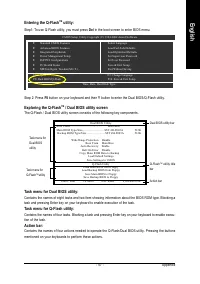
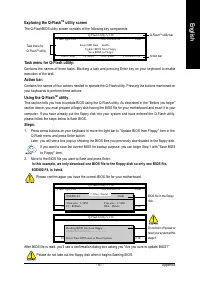
Exploring the Q-Flash
TM
utility screen
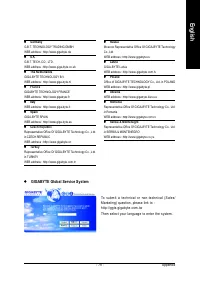
The Q-FlashBIOS utility screen consists of the following key components.
Task menu for Q-Flash utility:
Contains the names of three tasks. Blocking a task and pressing Enter key on your keyboard to enable
execution of the task.
Action bar:
Contains the names of four actions needed to operate the Q-Flash utility. Pressing the buttons mentioned on
your keyboards to perform these actions.
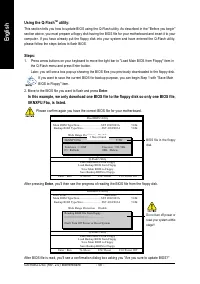
Using the Q-Flash
TM
utility:
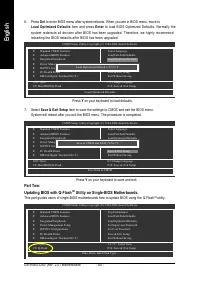
This section tells you how to update BIOS using the Q-Flash utility. As described in the "Before you begin"
section above, you must prepare a floppy disk having the BIOS file for your motherboard and insert it to your
computer. If you have already put the floppy disk into your system and have entered the Q-Flash utility,
please follow the steps below to flash BIOS.
Steps:
1. Press arrow buttons on your keyboard to move the light bar to "Update BIOS from Floppy" item in the
Q-Flash menu and press Enter button.
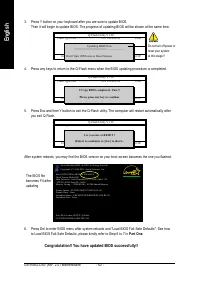
Later, you will see a box pop up showing the BIOS files you previously downloaded to the floppy disk.
If you want to save the current BIOS for backup purpose, you can begin Step 1 with "Save BIOS
to Floppy" item.
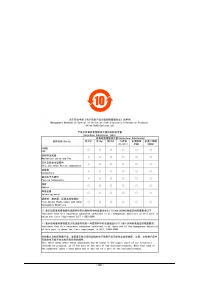
2. Move to the BIOS file you want to flash and press Enter.
In this example, we only download one BIOS file to the floppy disk so only one BIOS file,
8GE800.F4, is listed.
Please confirm again you have the correct BIOS file for your motherboard.
Q-Flash Utility V1.30
Flash Type/Size.................................SST 49LF003A
256K
Keep DMI Data
Enable
Update BIOS from Floppy
Save BIOS to Floppy
Enter : Run
:Move ESC:Reset F10:Power Off
1 file(s) found
8GE800.F4
256K
Total size : 1.39M
Free size : 1.14M
F5 : Refresh
DEL : Delete
BIOS file in the floppy
disk.
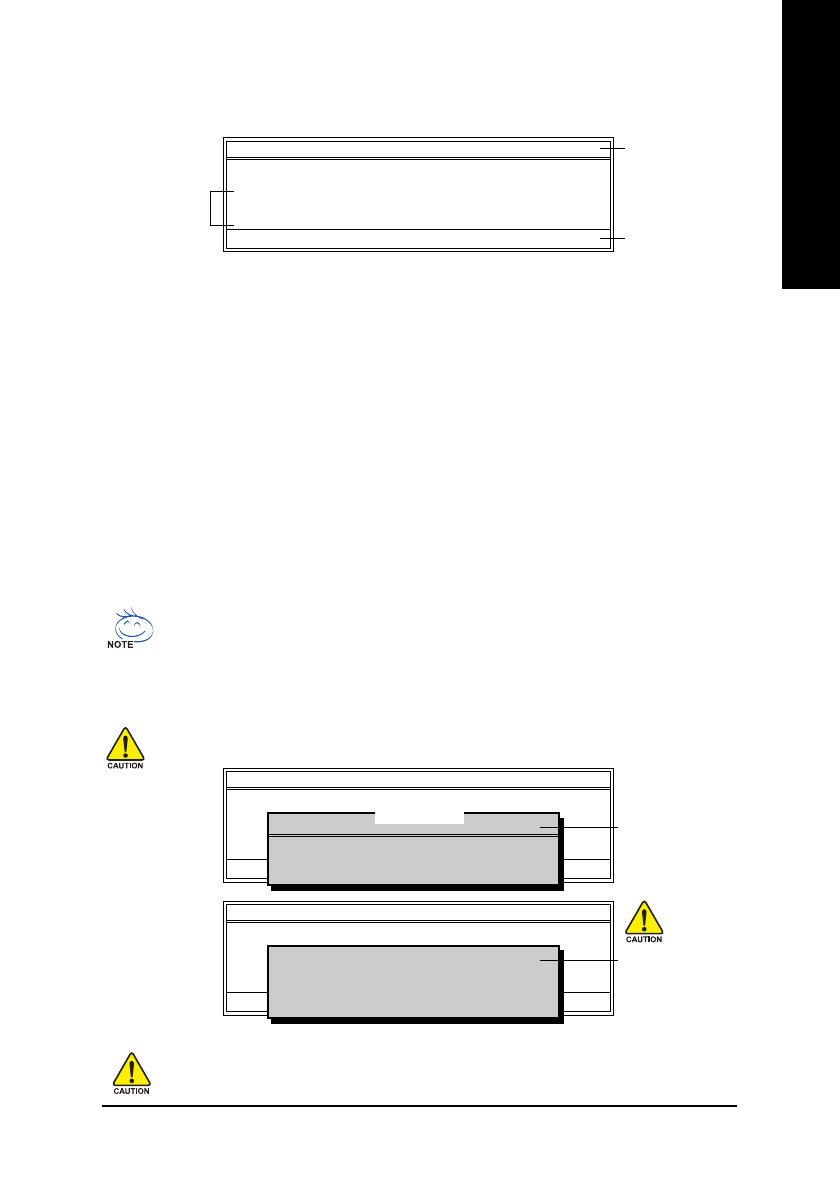
Q-Flash Utility V1.30
Flash Type/Size.................................SST 49LF003A
256K
Keep DMI Data
Enable
Update BIOS from Floppy
Save BIOS to Floppy
Enter : Run
:Move ESC:Reset F10:Power Off
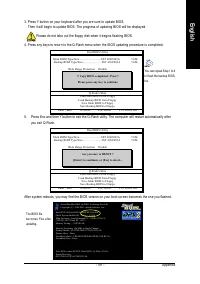
Reading BIOS file from floppy ...
>>>>>>>>>>>>>>.....................
Don't Turn Off Power or Reset System
Do not turn off power or
reset your system at this
stage!!
After BIOS file is read, you'll see a confirmation dialog box asking you "Are you sure to update BIOS?"
Please do not take out the floppy disk when it begins flashing BIOS.
Q-Flash Utility V1.30
Flash Type/Size.................................SST 49LF003A
256K
Keep DMI Data
Enable
Update BIOS from Floppy
Save BIOS to Floppy
Enter : Run
:Move ESC:Reset F10:Power Off
Task menu for
Q-Flash
TM
utility
Q-Flash
TM
utility bar
Action bar


