Материнские платы GIGABYTE GA 8I865G775 G RH - инструкция пользователя по применению, эксплуатации и установке на русском языке. Мы надеемся, она поможет вам решить возникшие у вас вопросы при эксплуатации техники.
Если остались вопросы, задайте их в комментариях после инструкции.
"Загружаем инструкцию", означает, что нужно подождать пока файл загрузится и можно будет его читать онлайн. Некоторые инструкции очень большие и время их появления зависит от вашей скорости интернета.

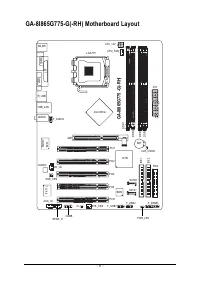

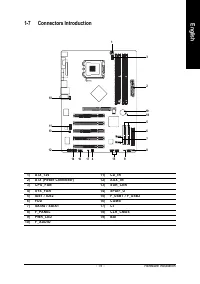


GA-8I865G775-G(-RH) Motherboard
- 16 -
English
Before installing the memory modules, please comply with the following conditions:
1. Please make sure that the memory used is supported by the motherboard. It is recommended that
m e m o r y o f s i m i l a r c a p a c i t y , s p e c i f i c a t i o n s a n d b r a n d b e u s e d .
2 . B e f o r e i n s t a l l i n g o r r e m o v i n g m e m o r y m o d u l e s , p l e a s e m a k e s u r e t h a t t h e c o m p u t e r
p o w e r i s s w i t c h e d o f f t o p r e v e n t h a r d w a r e d a m a g e .
3 . M e m o r y m o d u l e s h a v e a f o o l p r o o f i n s e r t i o n d e s i g n . A m e m o r y m o d u l e c a n b e
installed in only one direction. If you are unable to insert the module, please switch the
d i r e c t i o n .
1-4
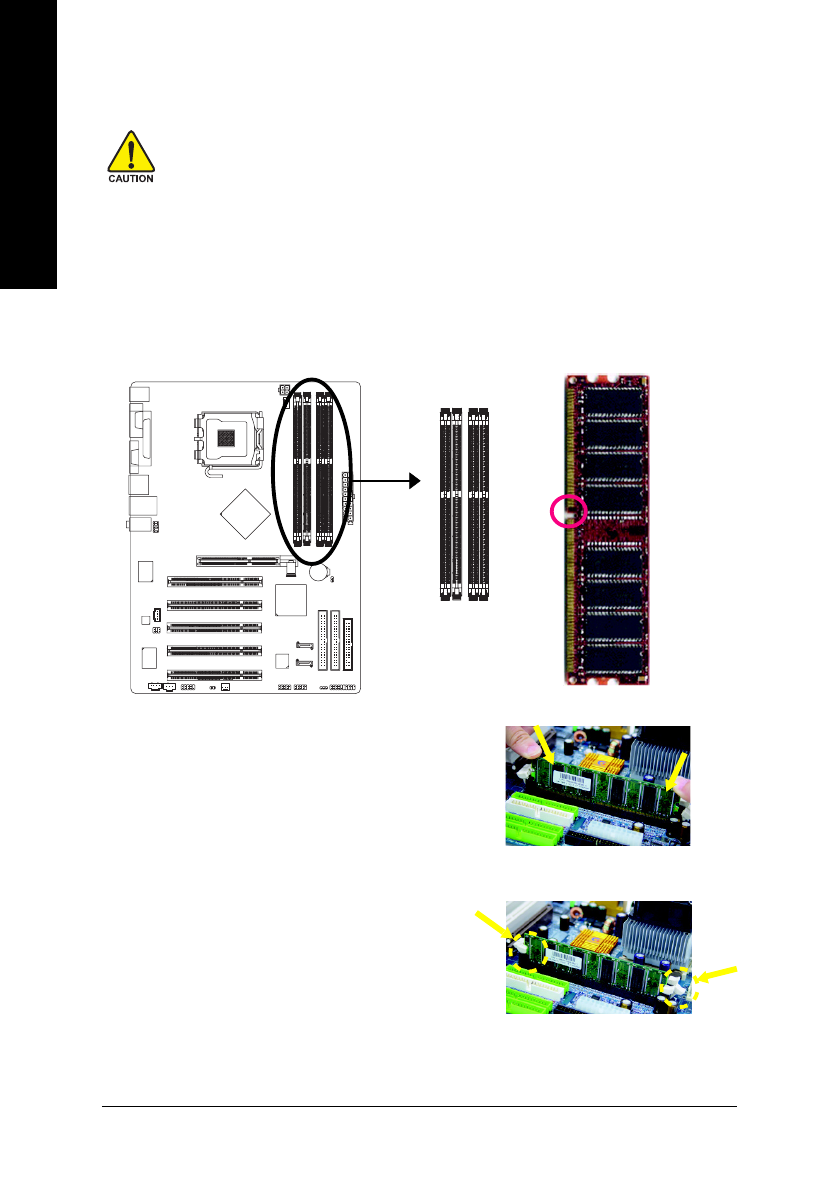
Installation of Memory
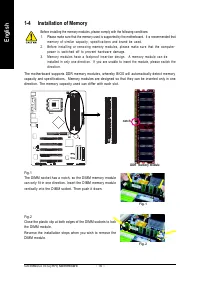
The motherboard supports DDR memory modules, whereby BIOS will automatically detect memory
capacity and specifications. Memory modules are designed so that they can be inserted only in one
direction. The memory capacity used can differ with each slot.
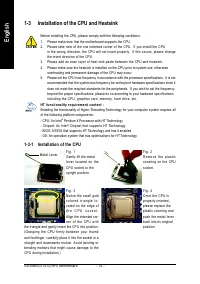
DDR memory module
notch
Fig. 1
The DIMM socket has a notch, so the DIMM memory module
can only fit in one direction. Insert the DIMM memory module
vertically into the DIMM socket. Then push it down.
Fig. 2
Close the plastic clip at both edges of the DIMM sockets to lock
the DIMM module.
Reverse the installation steps when you wish to remove the
DIMM module.
Fig. 1
Fig. 2


