Материнские платы GIGABYTE A520 - инструкция пользователя по применению, эксплуатации и установке на русском языке. Мы надеемся, она поможет вам решить возникшие у вас вопросы при эксплуатации техники.
Если остались вопросы, задайте их в комментариях после инструкции.
"Загружаем инструкцию", означает, что нужно подождать пока файл загрузится и можно будет его читать онлайн. Некоторые инструкции очень большие и время их появления зависит от вашей скорости интернета.


- 10 -
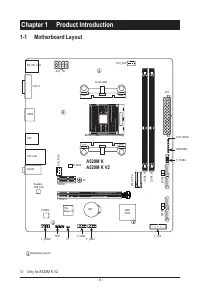
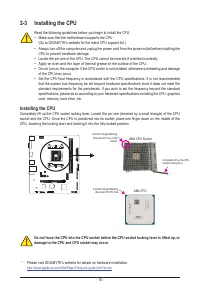
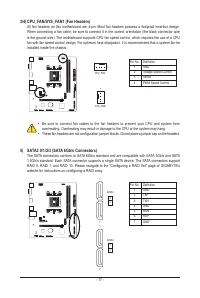
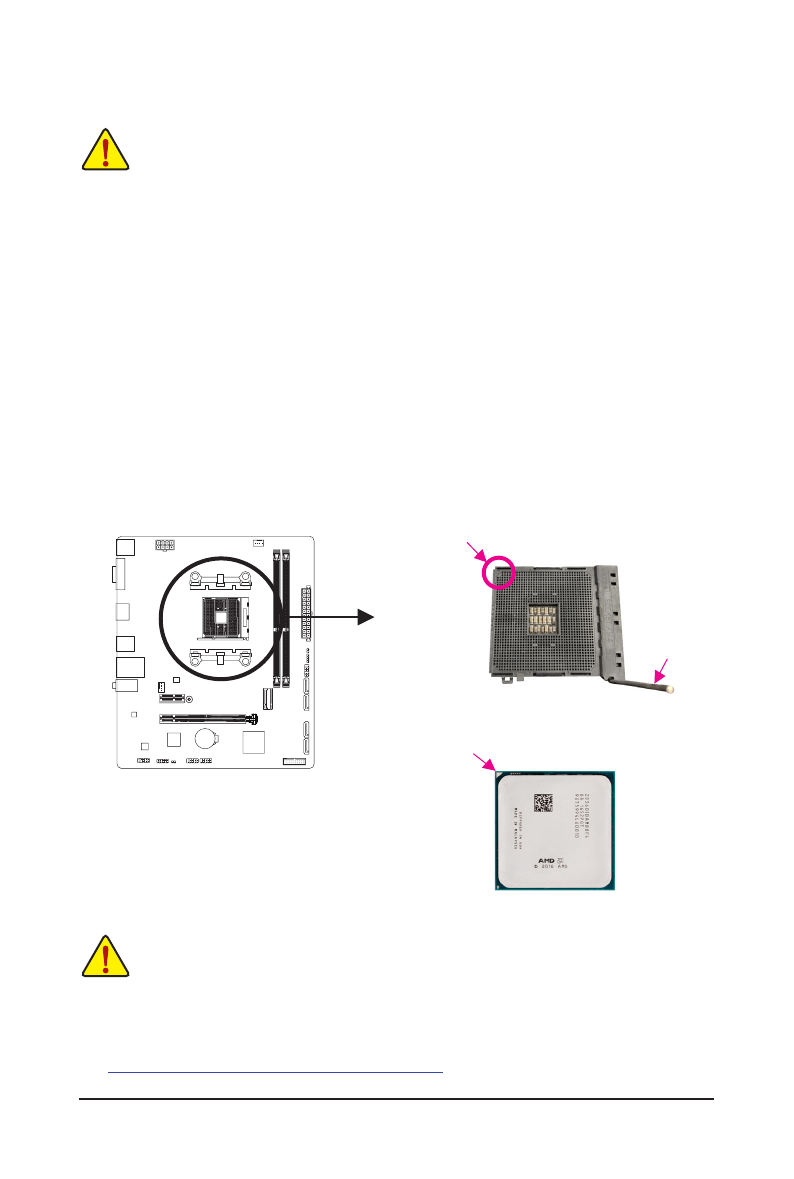
2-3 Installing the CPU
Read the following guidelines before you begin to install the CPU:
•
Make sure that the motherboard supports the CPU.
(Go to GIGABYTE's website for the latest CPU support list.)
•
Always turn off the computer and unplug the power cord from the power outlet before installing the
CPU to prevent hardware damage.
•
Locate the pin one of the CPU. The CPU cannot be inserted if oriented incorrectly.
•
Apply an even and thin layer of thermal grease on the surface of the CPU.
•
Do not turn on the computer if the CPU cooler is not installed, otherwise overheating and damage
of the CPU may occur.
•
Set the CPU host frequency in accordance with the CPU specifications. It is not recommended
that the system bus frequency be set beyond hardware specifications since it does not meet the
standard requirements for the peripherals. If you wish to set the frequency beyond the standard
specifications, please do so according to your hardware specifications including the CPU, graphics
card, memory, hard drive, etc.
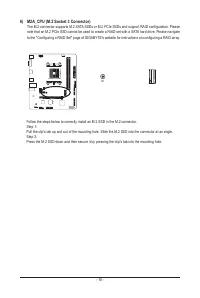
Installing the CPU
Completely lift up the CPU socket locking lever. Locate the pin one (denoted by a small triangle) of the CPU
socket and the CPU. Once the CPU is positioned into its socket, place one finger down on the middle of the
CPU, lowering the locking lever and latching it into the fully locked position.
Do not force the CPU into the CPU socket before the CPU socket locking lever is lifted up, or
damage to the CPU and CPU socket may occur.
&
Please visit GIGABYTE's website for details on hardware installation.
http://www.gigabyte.com/WebPage/210/quick-guide.html?m=sw
AM4 CPU
A Small Triangle Marking
Denotes CPU Pin One
AM4 CPU Socket
A Small Triangle Marking
Denotes Pin One of the
Socket
Completely lift up the CPU
socket locking lever
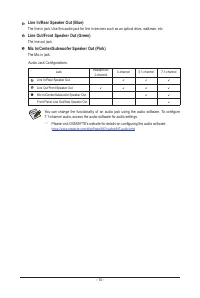
Характеристики

Остались вопросы?Не нашли свой ответ в руководстве или возникли другие проблемы? Задайте свой вопрос в форме ниже с подробным описанием вашей ситуации, чтобы другие люди и специалисты смогли дать на него ответ. Если вы знаете как решить проблему другого человека, пожалуйста, подскажите ему :)


