Машинки для стрижки VITEK VT-1352 - инструкция пользователя по применению, эксплуатации и установке на русском языке. Мы надеемся, она поможет вам решить возникшие у вас вопросы при эксплуатации техники.
Если остались вопросы, задайте их в комментариях после инструкции.
"Загружаем инструкцию", означает, что нужно подождать пока файл загрузится и можно будет его читать онлайн. Некоторые инструкции очень большие и время их появления зависит от вашей скорости интернета.

25
ENGLISH
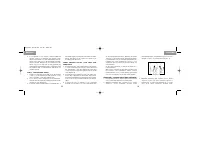
POWER SCREW
-
The power screw permits you to adjust the power. It
has been adjust before leaving the factory.
However, if the voltage in your home is low, you may
need to re-adjust it.
-
To adjust, use a screwdriver or a thin coin to turn
power screw in clockwise direction until the arm
strikes the coil, making a noise. Then slowly turn
power screw out (counter-clockwise) just until
noise stops. This is maximum power setting.
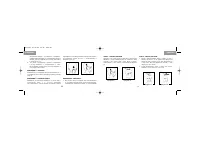
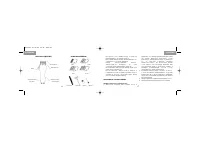
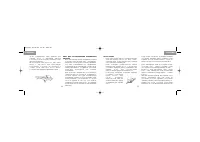
BLADE LEVER
-
The lever is conveniently located near your thumb
(if you're right-handed) so it can easily be adjusted
while the clipper is in your hand.
-
The lever adds versatility to your clipper by allowing
you to gradually change the closeness of your cut
without an attachment comb.
-
When the lever is in the uppermost position, the
blades will give you the closest cut and leave the
hair very short. Pushing the lever downward gradu-
ally increases the cutting length.
-
In its lowest position, the lever will leave the hair
approximately
the
same
length as a N1 comb.
-
The lever will also extend the
use of your blades since a dif-
ferent cutting edge is used in
each , setting.
4
1352.qxd 07.02.03 11:16 Page 8
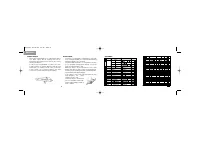
Содержание
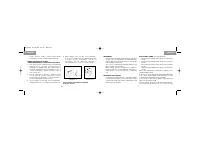
- 3 BLADE ALIGNMENT
- 5 IMPORTANT SAFEGUARDS
- 6 РУССКИЙ; УСЛОВИЯ ГАРАНТИЙНОГО ОБСЛУЖИВАНИЯ; INSTRUCTIONS FOR HAIR CUTTING
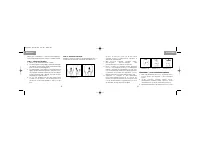
- 7 REMINDERS; Рисунок 7
- 8 ОПЕРАЦИЯ 5 - ОКОНЧАТЕЛЬНАЯ ОТДЕЛКА; STEP 1 - NAPE OF THE NECK; Diagram 2
- 9 По мере проведения стрижки поднимайте; ОПЕРАЦИЯ 3 - СТРИЖКА СБОКУ; Используя приспособление для расчесывания; STEP 3 - SIDE OF THE HEAD; Using comb attachment 9mm or 12mm, cut top of
- 10 STEP 5 - THE FINISHING TOUCH; Рисунок 1
- 11 Diagram 7
- 12 УКАЗАНИЯ ПО СТРИЖКЕ ВОЛОС; Прежде чем начать стрижку волос; ПРИСПОСОБЛЕНИЯ
- 13 ВАЖНЫЕ МЕРЫ ПРЕДОСТОРОЖНОСТИ; Во избежание поражения электрическим током:; РЕГУЛИРОВКА НОЖЕЙ
- 14 РЫЧАГ НОЖЕЙ


