Машинки для стрижки Saturn ST-HC8021 - инструкция пользователя по применению, эксплуатации и установке на русском языке. Мы надеемся, она поможет вам решить возникшие у вас вопросы при эксплуатации техники.
Если остались вопросы, задайте их в комментариях после инструкции.
"Загружаем инструкцию", означает, что нужно подождать пока файл загрузится и можно будет его читать онлайн. Некоторые инструкции очень большие и время их появления зависит от вашей скорости интернета.

4
5
GETTING STARTED
CHARGING YOUR PRERSONAL
GROOMER
Before using your personal groomer for
the first time, charge for 8 hours.
Ensure the product is switched off.
Place your personal groomer into the
charging stand, connect the charging
adaptor to the product and then to the
mains. The charging indicator will light up.
If the product is not going to be used
for an extended period time(2-
3mouths),unplug it from the
mains and store. Fully recharge your
personal groomer when you would like to
use it again.
To preserve the life of your batteries,
let them run out every six months then
encharge for 14-16 hours .
HOW TO MATCH THE APPLIANCE
Ways of matching appliance
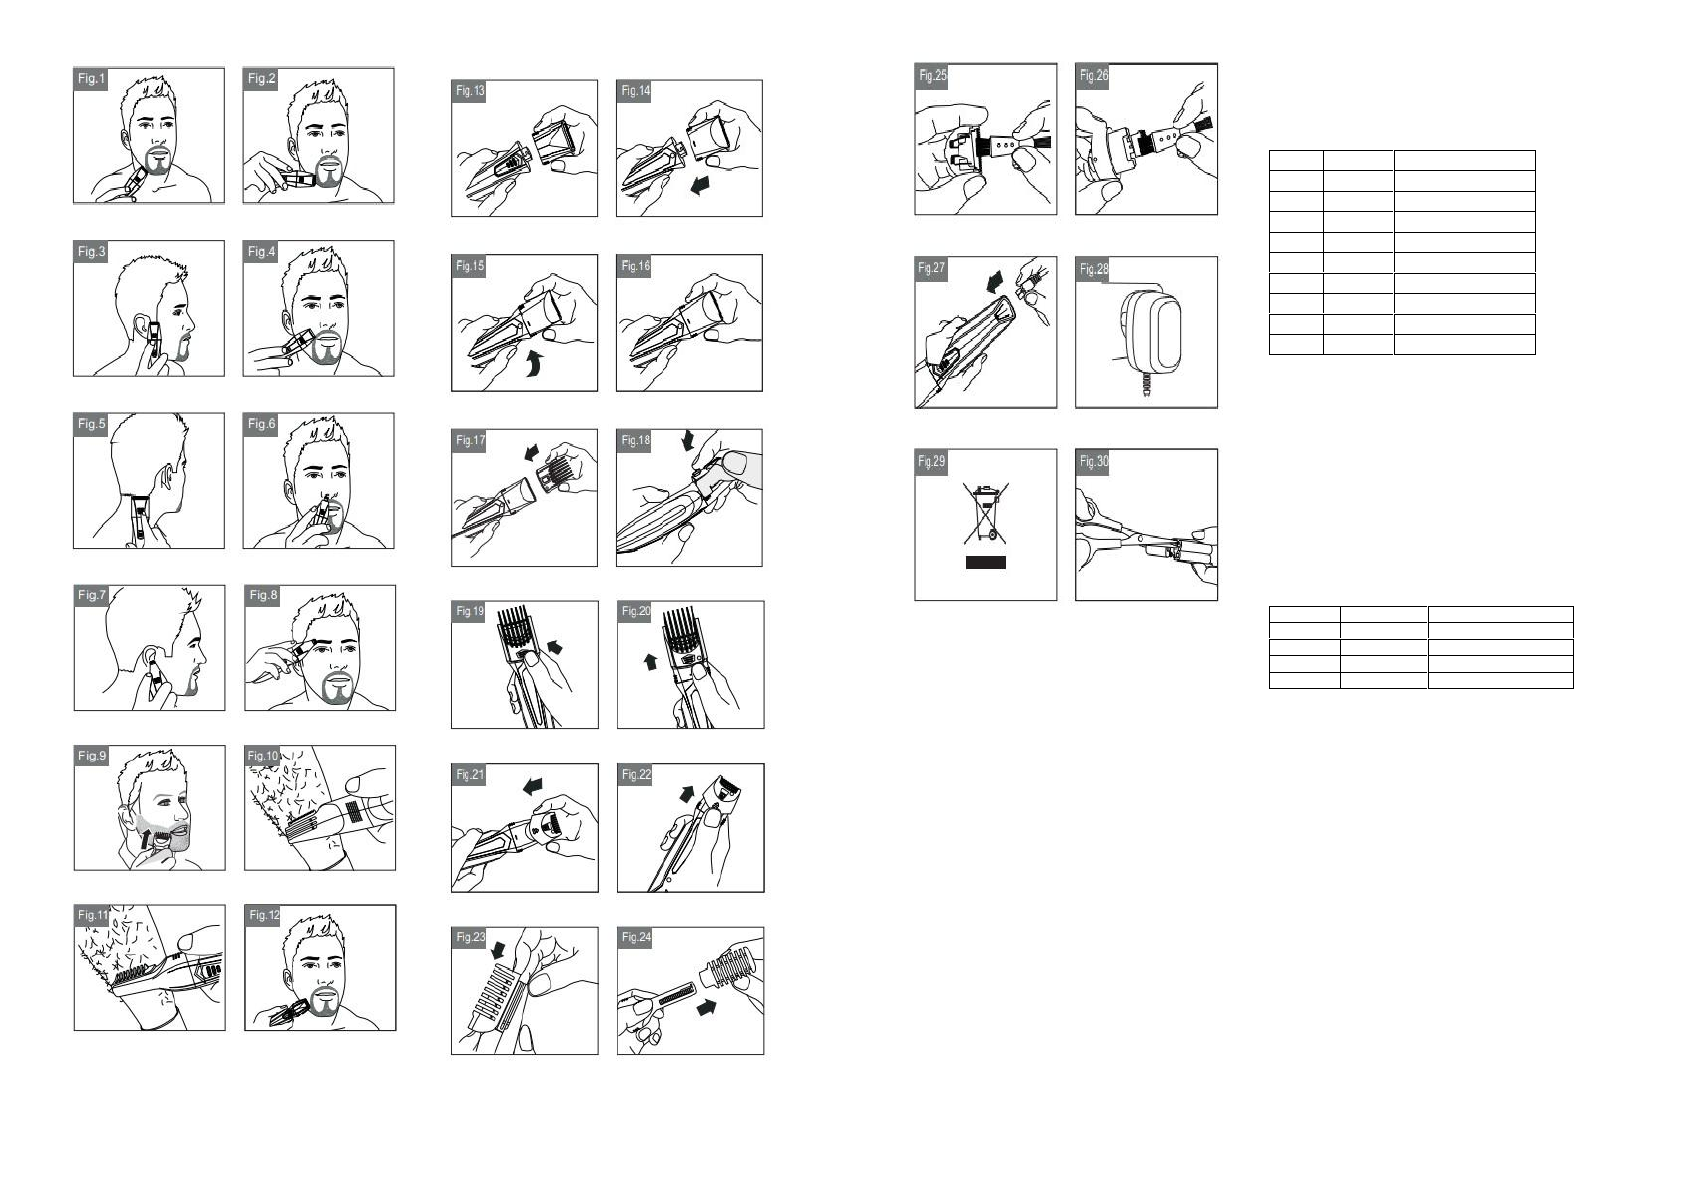
When changing the parts, first use the
finger put the part in the right position,
directing to the body (Fig.13).
Or like this ,turn around the body (Fig.14).
Then inserting it diagonally. and here
there is a sign, it appears the point
aligned with the lock. (Fig.15)
Later, turning around the appliance by
clockwise. then the point will be aligned
with the lock.(Fig.16)
Ways of matching positioning comb
No.
Level
Length (mm)
1
1-2
12
2
2-3
13.5
3
3-4
15
4
4-5
16.5
5
5-6
18
6
6-7
19.5
7
7-8
21
8
8-9
22.5
9
9-10
24
Put the positioning comb attachment
balancely, then by sliding downwards
(Fig.17)
Next when sliding here, there is one sign,
then connecting the positioning with
the sign.(Fig.18) when changing the
positioning comb's level
(
with 9 levels: as
chart shows, pressing the button, keep
pressing it until you wanna stop. it can up
and down by pressing the button (Fig.19)
Then when removing the positioning
comb, just put the finger in the
pic shows position, then push out upwards
(Fig.20).
No.
Level
Length (mm)
1
1
3.5
2
2
4
3
3
4.5
4
4
5
Put the armpit positioning comb with 3
levels attachment balancely, then by
sliding downwards, as pic shows.(Fig.23)
Remove out of the armpit positioning
comb upwards , as the pic shows.(Fig.24)
Ways of cleaning the appliance
When cleaning the appliance, just
separate the appliance ,as the pic shows.
Then use the cleaning brush, clear the
dust by cleaning the inside parts.(Fig.25-
26)
Ways of charging the appliance
Here, there are two methods to charge the
appliance.one is inserting the
appliance plug directly into the body.
Another one is put the appliance body into
the stand well(downwards) before
charging it.(Fig.27)
The charging on the adaptor indicates
that the appliance is charging.(Fig. 28)


