Машинки для стрижки Saturn ST-HC7387 - инструкция пользователя по применению, эксплуатации и установке на русском языке. Мы надеемся, она поможет вам решить возникшие у вас вопросы при эксплуатации техники.
Если остались вопросы, задайте их в комментариях после инструкции.
"Загружаем инструкцию", означает, что нужно подождать пока файл загрузится и можно будет его читать онлайн. Некоторые инструкции очень большие и время их появления зависит от вашей скорости интернета.


4
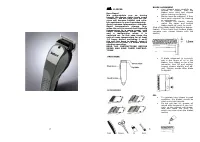
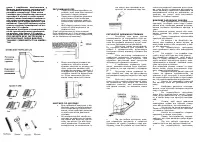
BLADE LEVER
·
The lever is conveniently located
near your thumb (If you’re right-
handed), so it can easily be ad-
justed while the clipper is in your
hand.
·
The lever adds versatility to your
clipper by allowing you to gradu-
ally change the closeness of your
cut without an attachment
comb.
·
When the lever is in the upper-
most position, the blades will
give you the closest cut and
leave the hair very short. Push-
ing the lever downward gradual-
ly increases the cutting length.
·
In its lowest position, the lever
will leave the hair approximately
the same length as a No. 1
comb.
·
The lever will also extend the
use of your blades, since a dif-
ferent cutting edge is used in
each setting.
·
In addition, if extremely heavy
hair cutting has jammed the
blades, it will help you remove
hair that has become wedged
between the two blades without
removing the blades.
·
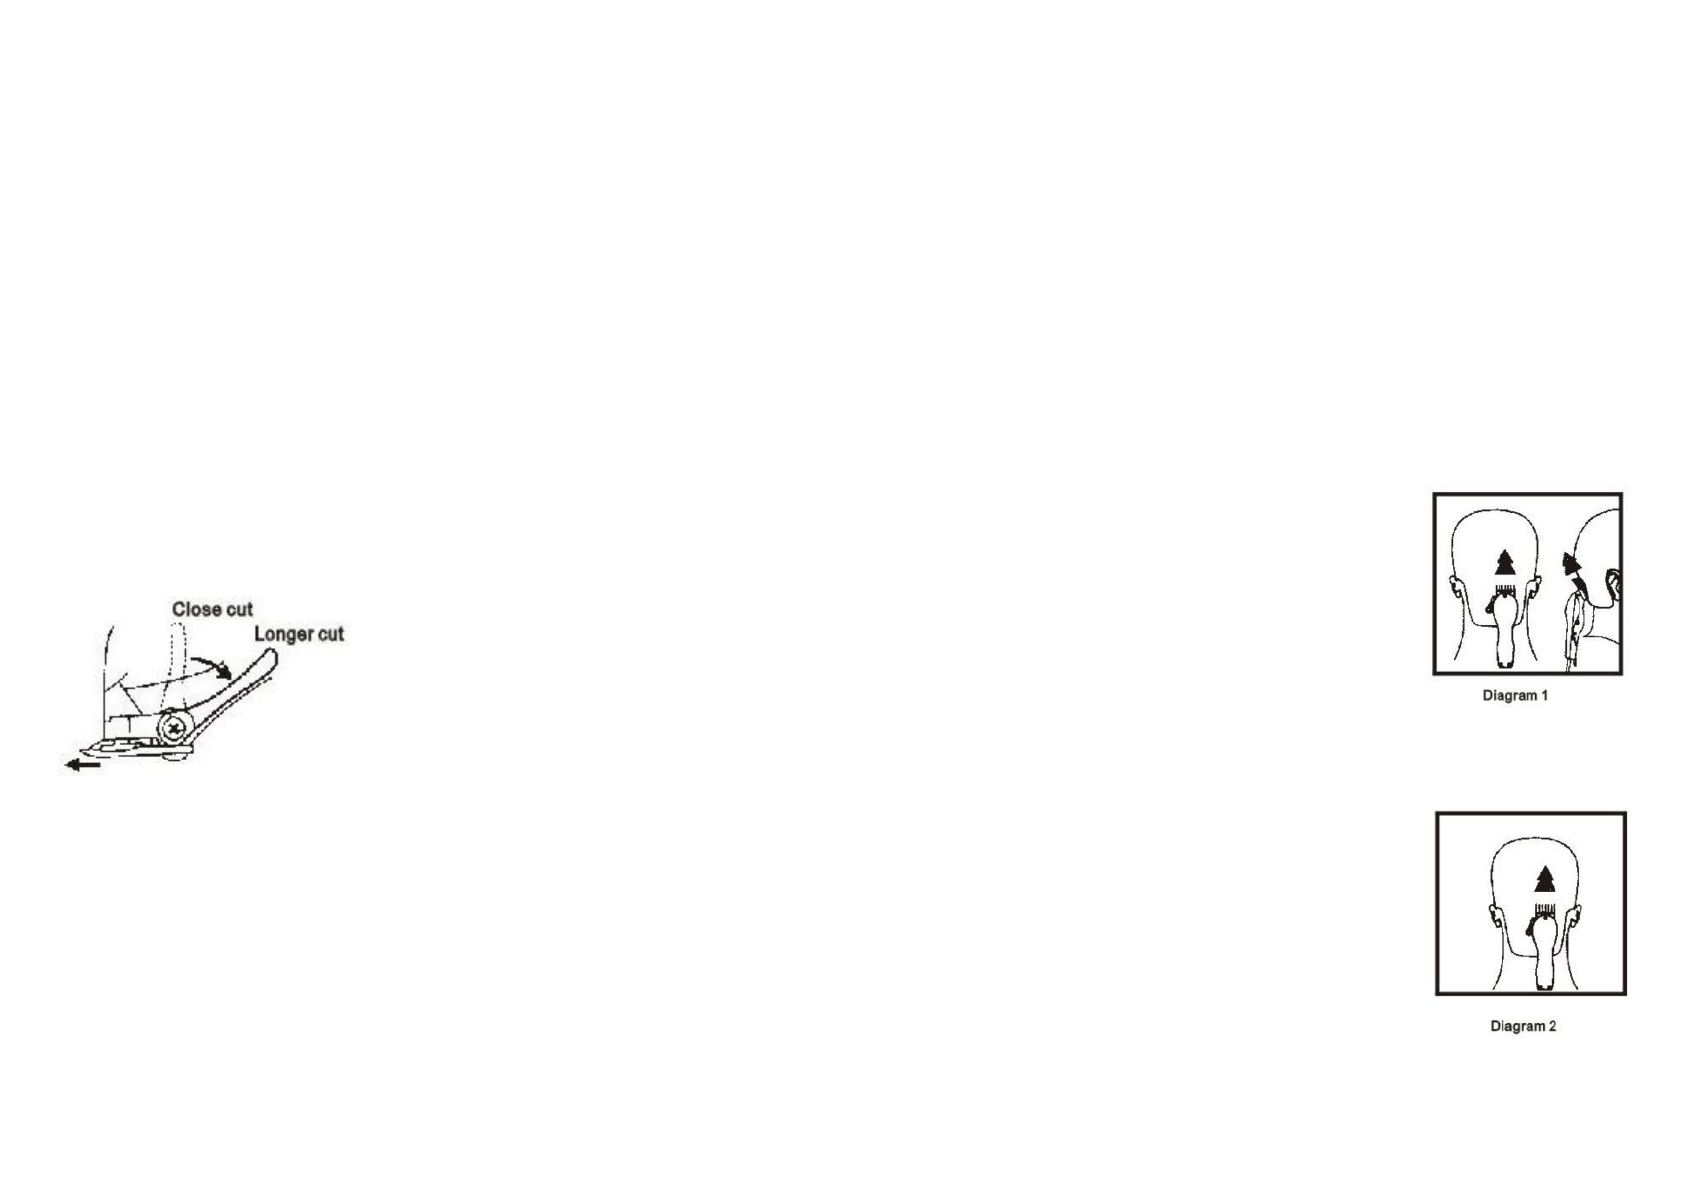
While the clipper is running, rap-
idly move the lever from “close
cut” to “longer cut” a couple of
times. Doing this each time after
you have finished using your
clipper, will help to keep the
blades clear of cut hair. If your
clipper stops cutting and this
does not help, your cutting
blades are blunt. Replace them
with new blades.
IMPORTANT SAFEGUARDS
·
When using electrical appliances,
especially when children are pre-
sent, basic safety precautions
should always be followed, in-
cluding the following:
To reduce the risk of death or injury from
electric shock:
·
Unplug this appliance before
cleaning.
·
Do not place or store appliance,
where it can fall or be pulled into
a tub or sink.
·
Do not use, while bathing or in a
shower.
·
Do not place in or drop into wa-
ter or other liquid.
·
Do not reach for an appliance
that has fallen into water. Un-
plug immediately.
To reduce the risk of burns, electrocution,
fire or injury to persons.
·
Use this appliance only for its in-
tended use, as described in this
manual. Do not use attach-
ments, not recommended by the
manufacturer.
·
This appliance should never be
left unattended, when plugged
in.
·
Close supervision is necessary,
when this appliance is used by,
on or near children or invalids.
·
Never operate this appliance, if
it has a damaged cord or plug, if
it is not working properly.
·
Keep the cord away from heated
surfaces.
·
Do not pull, twist or wrap line
cord around appliance.
·
Never drop or insert any object
into any opening on this appli-
ance.
·
Before use, make certain blades
are aligned properly.
·
Do not place appliance on any
surface, while it is operating.
·
Do not use this appliance with a
damaged or broken comb nor
with teeth missing from the
blades, as injury may occur.
INSTRUCTIONS FOR HAIR CUTTING
Before starting the hair cut:
1.
Inspect the clipper, making sure
that it is free of oil between the
cutting blade teeth and turn the
unit on to distribute the oil and
to make sure it is running
smoothly. Wipe off any excess
oil. This should be done after
each use. While using the unit,
untwist the cord from time to
time to avoid tangling.
2.
Seat the person so their head is
approximately at your eye level.
This allows ease of visibility,
while cutting and a relaxed con-
trol of the unit.
3.
Before cutting always first comb
5
the hair, so it is tangle free and
as it is naturally worn.
4.
Place a towel around the neck
and shoulders of the person hav-
ing the haircut.
REMINDERS
·
Cut the hair in a relaxed
and slow manner. Use
short strokes only to
work gradually over the
entire head.
·
Always take off a little
hair at a time, you can
always trim off addi-
tional hair later.
·
As you work, comb the
hair frequently back in-
to the style to which
you are cutting.
·
When cutting with this
hair clipper, it is better
to leave the hair dry,
not wet. With the hair
dry, it is much easier to
control the amount of
hair being cut.
BEGINNING THE HAIRCUT
Cutting hair requires practice, so it is
always better to leave the hair longer for
the first few haircuts, until you become
used to the length, to which each at-
tachment cuts the hair.
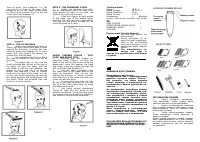
ATTACHMENT COMB
(see main dia-
gram)
·
Attachment Comb No. 1 leaves
3mm (1/8 inch) hair length.
·
Attachment Comb No. 2 leaves
6mm (1/4 inch) hair length.
·
Attachment Comb No. 3 leaves
9mm (3/8 inch) hair length.
·
Attachment Comb No. 4 leaves
12mm (1/2 inch) hair length.
Each comb attachment is marked accord-
ingly on its outside middle surface.
·
To attach a comb, hold it with
teeth showing, and slide it onto
and along the clipper blade, until
the front of the comb firmly
rests against the clipper blade.
·
To remove the comb, simply pull
the comb upward and away from
the clipper blade.
·
For even cutting, allow the comb
attachment / cutter to cut
through the hair. Do not force it
through. Also remember to comb
the hair frequently to remove
trimmed hair and to check for
uneven strands.
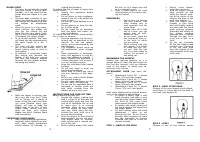
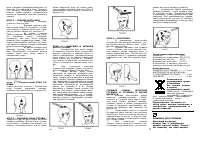
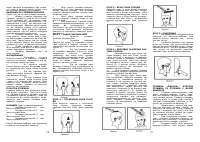
STEP 1 - NAPE OF THE NECK
1.
Attach comb attach-
ment 3mm or 6mm.
2.
Hold the clipper cutting
edge pointed up and
begin the haircut, start-
ing at the centre of the
head at the base of the
neck (see diagram 1).
3.
Hold the clipper com-
fortably in your hand
and hold lightly against
the head with the comb
teeth pointing upward.
Gradually and slowly lift
the clipper, working
upwards and outwards
through the hair, trim-
ming just a little at a
time.
4.
As you cut, gradually
lift the hair clipper head
towards you. Continue
to cut the back area
from the bottom of the
neck upwards to the top
of the ears.
STEP 2 - BACK OFTHE HEAD
Change to the next longest comb attach-
ment 9mm or 12mm and cut the back of
the head (see diagram 2).
STEP 3 - SIDE OF THE HEAD
Change to one of two shorter combs

