
Лобзики Makita JV101DWAE - инструкция пользователя по применению, эксплуатации и установке на русском языке. Мы надеемся, она поможет вам решить возникшие у вас вопросы при эксплуатации техники.
Если остались вопросы, задайте их в комментариях после инструкции.
"Загружаем инструкцию", означает, что нужно подождать пока файл загрузится и можно будет его читать онлайн. Некоторые инструкции очень большие и время их появления зависит от вашей скорости интернета.


8 ENGLISH
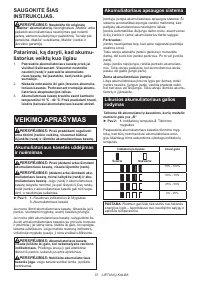
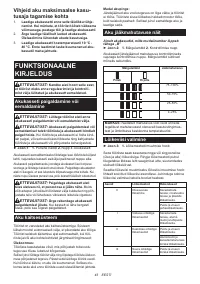
Position
Cutting action
Applications
0
Straight line cutting
action
For cutting mild
steel, stainless
steel and plastics.
For clean cuts in
wood and plywood.
I
Small orbit cutting
action
For cutting mild
steel, aluminum
and hard wood.
II
Medium orbit
cutting action
For cutting wood
and plywood.
For fast cutting in
aluminum and mild
steel.
III
Large orbit cutting
action
For fast cutting in
wood and plywood.
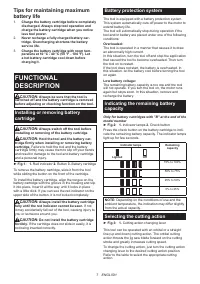
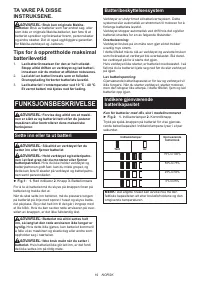
Switch action
CAUTION:
Before installing the battery cartridge into
the tool, always check to see that the switch trigger actuates
properly and returns to the "OFF" position when released.
CAUTION:
When not operating the tool,
depress the lock-off button from A side to lock the
switch trigger in the OFF position.
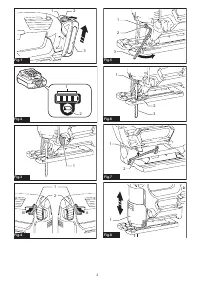
►
Fig.4:
1.
Lock-off button
2.
Switch trigger
To prevent the switch trigger from accidentally pulled,
the lock-off button is provided.
To start the tool, depress the lock-off button from B side
and pull the switch trigger.
Tool speed is increased by increasing pressure on the
switch trigger. Release the switch trigger to stop. After
use, always press in the lock-off button from A side.
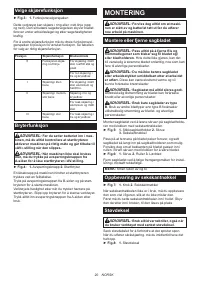
ASSEMBLY
CAUTION:
Always be sure that the tool is
switched off and the battery cartridge is removed
before carrying out any work on the tool.
Installing or removing jig saw blade
CAUTION:
Always clean out all chips or foreign
matter adhering to the jig saw blade and/or blade
holder.
Failure to do so may cause insufficient tighten
-
ing of the blade, resulting in a serious personal injury.
CAUTION:
Do not touch the jig saw blade or
the workpiece immediately after operation.
They
may be extremely hot and could burn your skin.
CAUTION:
Always secure the jig saw blade
firmly.
Insufficient tightening of the blade may cause
blade breakage or serious personal injury.
CAUTION:
Use only B type jig saw blades.
Using blades other than B type causes insufficient tight
-
ening of the blade, resulting in a serious personal injury.
To install the jig saw blade, loosen the bolt counterclock
-
wise on the jig saw blade holder with the hex wrench.
►
Fig.5:
1.
Jig saw blade holder
2.
Bolt
3.
Hex wrench
With the blade teeth facing forward, insert the jig saw
blade into the jig saw blade holder as far as it will go.
Make sure that the back edge of the blade fits into the
roller. Then tighten the bolt clockwise to secure the blade.
►
Fig.6:
1.
Bolt
2.
Roller
3.
Jig saw blade
To remove the jig saw blade, follow the installation
procedure in reverse.
NOTE:
Occasionally lubricate the roller.
Hex wrench storage
►
Fig.7:
1.
Hook
2.
Hex wrench
When not in use, store the hex wrench as shown in the
figure to keep it from being lost.
First, insert the hex wrench into the hole. Then push it
into the hook until it locked.
Dust cover
CAUTION:
Always wear safety goggles even
when operating the tool with the dust cover lowered.
Lower the dust cover to prevent chips from flying.
However, when making bevel cuts, raise it all the way.
►
Fig.8:
1.
Dust cover
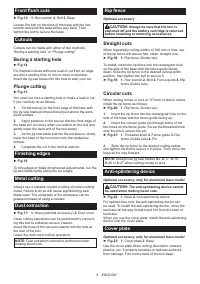
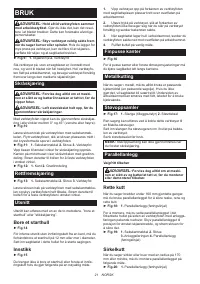
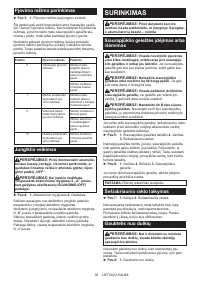
OPERATION
CAUTION:
Always hold the base flush with
the workpiece.
Failure to do so may cause jig saw
blade breakage, resulting in a serious injury.
CAUTION:
Advance the tool very slowly when
cutting curves or scrolling.
Forcing the tool may cause
a slanted cutting surface and jig saw blade breakage.
►
Fig.9:
1.
Cutting line
2.
Base
Turn the tool on without the jig saw blade making any
contact and wait until the blade attains full speed. Then
rest the base flat on the workpiece and gently move the
tool forward along the previously marked cutting line.
Bevel cutting
CAUTION:
Always be sure that the tool is
switched off and the battery cartridge is removed
before tilting the base.
CAUTION:
Raise the dust cover all the way
before making bevel cuts.
With the base tilted, you can make bevel cuts at any
angle between 0° and 45° (left or right).
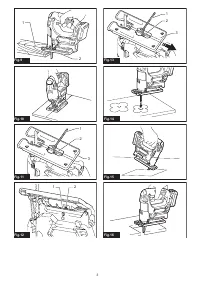
►
Fig.10
Loosen the bolt on the back of the base with the hex
wrench. Move the base so that the bolt is positioned in
the center of the cross-shaped slot in the base.
►
Fig.11:
1.
Hex wrench
2.
Bolt
3.
Base
Tilt the base until the desired bevel angle is obtained.
The edge of the motor housing indicates the bevel angle
by graduations. Then tighten the bolt to secure the base.
►
Fig.12:
1.
Edge
2.
Graduation
Характеристики

Остались вопросы?Не нашли свой ответ в руководстве или возникли другие проблемы? Задайте свой вопрос в форме ниже с подробным описанием вашей ситуации, чтобы другие люди и специалисты смогли дать на него ответ. Если вы знаете как решить проблему другого человека, пожалуйста, подскажите ему :)


