
Кондиционеры Tesla TT51EXC1-1832IA 119420 - инструкция пользователя по применению, эксплуатации и установке на русском языке. Мы надеемся, она поможет вам решить возникшие у вас вопросы при эксплуатации техники.
Если остались вопросы, задайте их в комментариях после инструкции.
"Загружаем инструкцию", означает, что нужно подождать пока файл загрузится и можно будет его читать онлайн. Некоторые инструкции очень большие и время их появления зависит от вашей скорости интернета.


41
ENG
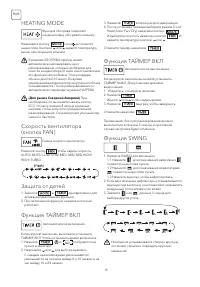
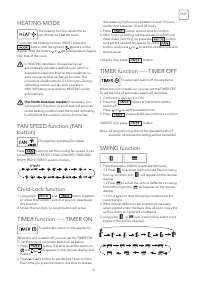
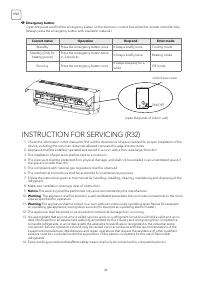
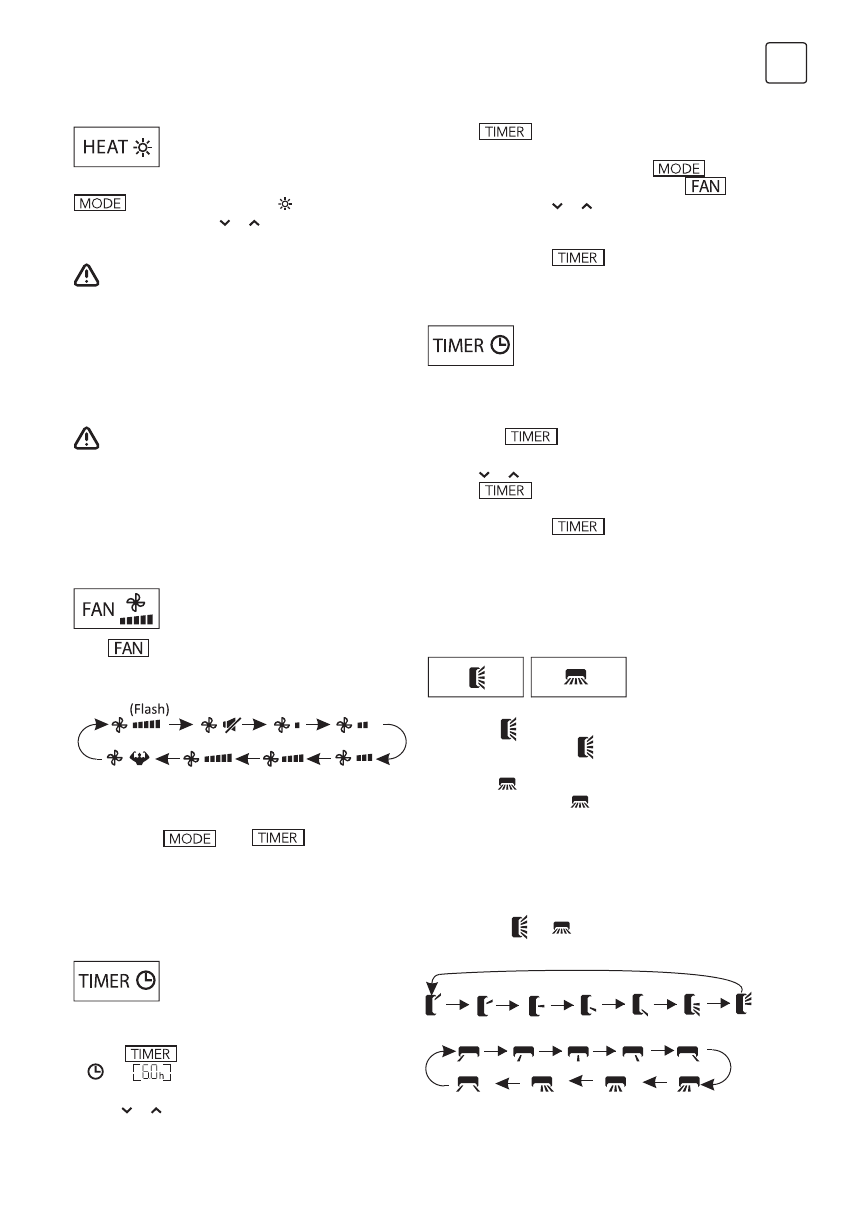
The heating function allows the air
conditioner to heat the room.
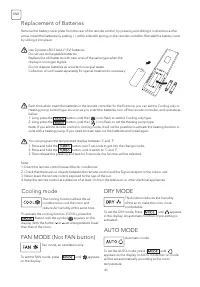
Change the operating fan speed.
To automatic switch on the appliance.
To automatic switch off the appliance.
To activate the heating function (HEAT), press the
button until the symbol appears on the
display. With the button or set a temperature higher
than that of the room.
Press
button to set the running fan speed, it can
be set to AUTO/ MUTE/ LOW/ LOW-MID / MID/ MID-
HIGH/ HIGH/ TURBO speed circularly.
When the unit is switch-off, you can set the TIMER ON.
To set the time of automatic switch-on as below:
1. Press
button first time to set the switch-on,
and
will appear on the remote display and
flashes.
2. Press or to button to set desired Timer-on time.
Each time you press the button, the time increases/
When the unit is switch-on, you can set the TIMER OFF.
To set the time of automatic switch-off, as below:
1. Confirm the appliance is ON.
2. Press the
button at first time to set the
switch-off.
Press or to set the needed timer.
3. Press
button at the second time to confirm.
CANCEL it by press
button.
Note: All programming should be operated within 5
seconds, otherwise the setting will be cancelled.
1. Press the button SWING to activate the louver,
1.1 Press to activate the horizontal flaps to swing
from up to down, the will appear on the remote
display.
1.2 Press
to active the vertical deflectors to swing
from left to right, the
will appear on the remote
display.
1.3 Do it again to stop the swing movement at the
current angle.
2. If the vertical deflectors are positioned manually
which placed under the flaps, they allow to move the
air flow direct to rightward or leftward.
3. Long press or
over 3 seconds to select more
angles of the airflow direction.
1. Long press
and
button together
to active this function, and do it again to deactivate
this function.
2. Under this function, no single button will active.
HEATING MODE
FAN SPEED function (FAN
button)
TIMER function ---- TIMER ON
TIMER function ---- TIMER OFF
SWING function
Child-Lock function
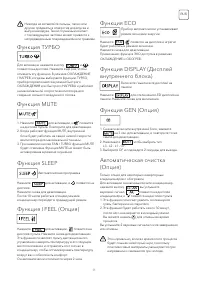
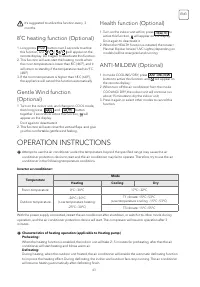
In HEATING operation, the appliance can
automatically activate a defrost cycle, which is
essential to clean the frost on the condenser so
as to recover its heat exchange function. This
procedure usually lasts for 2-10 minutes. During
defrosting, indoor unit fan stop operation.
After defrosting, it resumes to HEATING mode
automatically.
(For North American market)
If necessary, you
can press ECO button 10 times within 8 seconds
under heating mode to start the forced defrosting.
It will defrost the outdoor ice much more fast.
decreases by half an hour between 0 and 10 hours
and by one between 10 and 24 hours.
3. Press
button second time to confirm.
4. After Timer-on setting, set the needed mode (Cool/
Heat/ Auto/ Fan/ Dry), by press the
button.
And set the needed fan speed, by press
button. And press or to set the needed operation
temperature.
CANCEL it by press
button.
Содержание
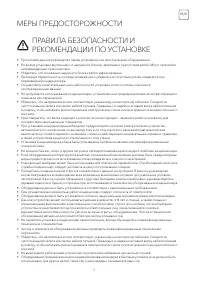
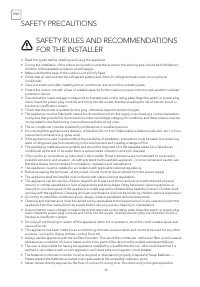
- 3 МЕРЫ ПРЕДОСТОРОЖНОСТИ
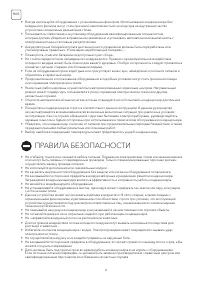
- 4 ПРАВИЛА БЕЗОПАСНОСТИ
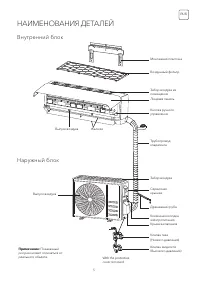
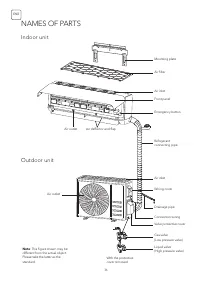
- 5 НАИМЕНОВАНИЯ ДЕТАЛЕЙ; Внутренний блок
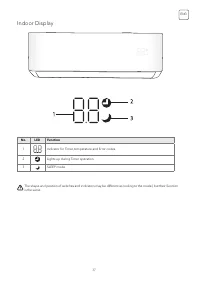
- 6 Дисплей внутреннего блока
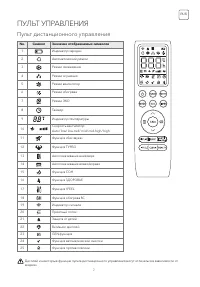
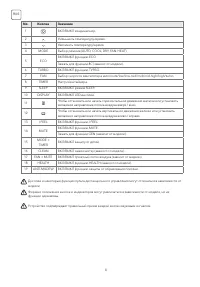
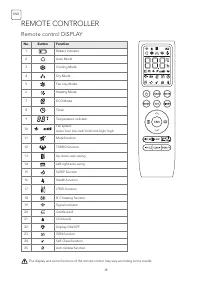
- 7 ПУЛЬТ УПРАВЛЕНИЯ; Пульт дистанционного управления
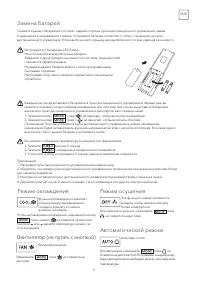
- 9 Замена батарей
- 10 HEATING MODE
- 11 Функция SLEEP
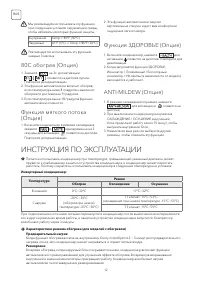
- 12 ИНСТРУКЦИЯ ПО ЭКСПЛУАТАЦИИ
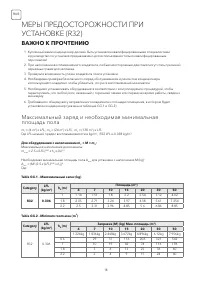
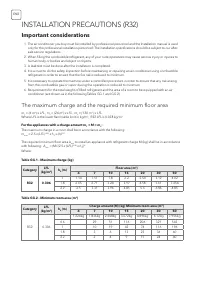
- 18 ВАЖНО К ПРОЧТЕНИЮ; Максимальный заряд и необходимая минимальная
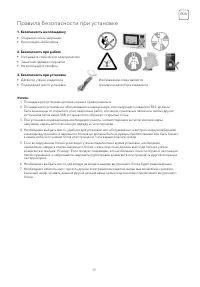
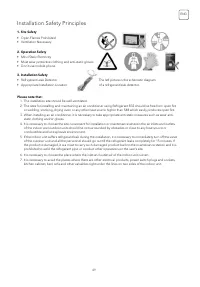
- 19 Правила безопасности при установке
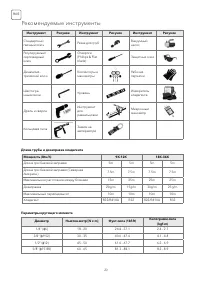
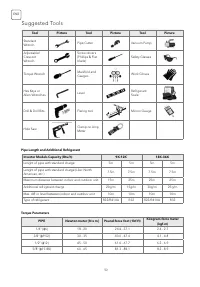
- 20 Рекомендуемые инструменты
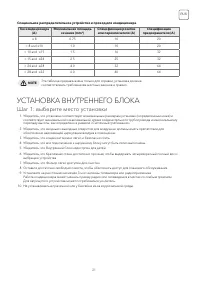
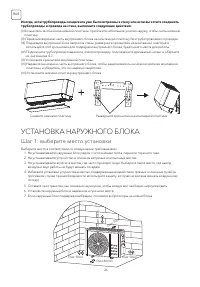
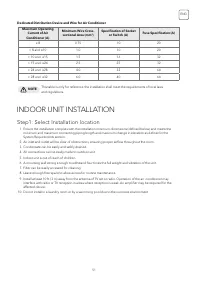
- 21 Шаг 1: выберите место установки; УСТАНОВКА ВНУТРЕННЕГО БЛОКА
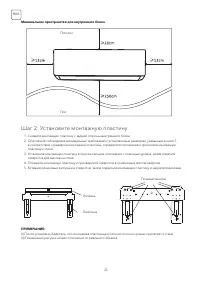
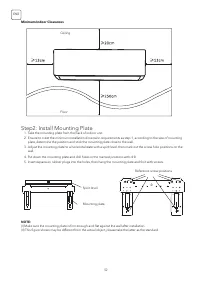
- 22 Шаг 2: Установите монтажную пластину
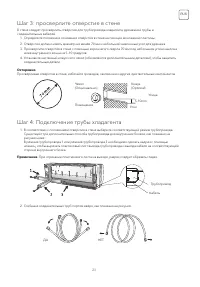
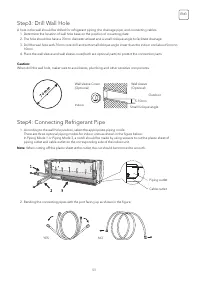
- 23 Шаг 3: просверлите отверстие в стене
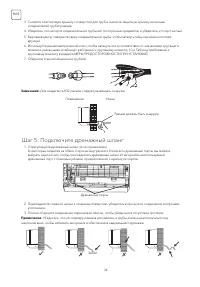
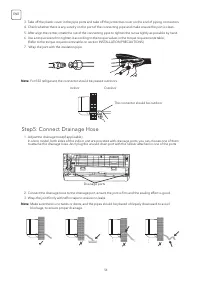
- 24 Шаг 5: Подключите дренажный шланг
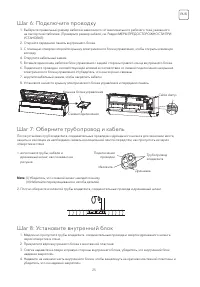
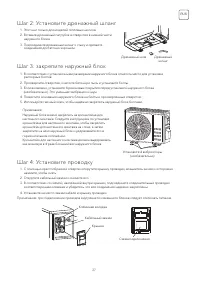
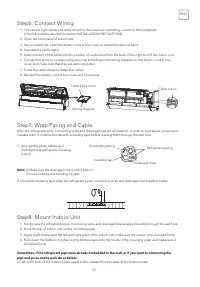
- 25 Шаг 6: Подключите проводку
- 26 УСТАНОВКА НАРУЖНОГО БЛОКА
- 27 Шаг 2: Установите дренажный шланг
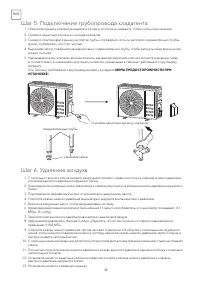
- 28 Шаг 5: Подключение трубопровода хладагента
- 29 Осмотры перед тестовым запуском
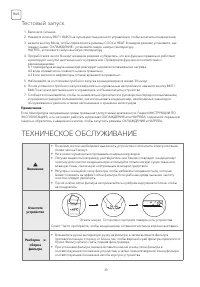
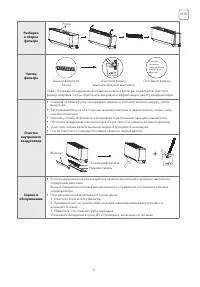
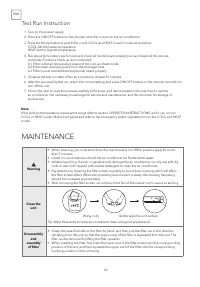
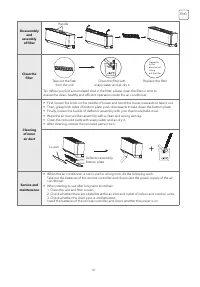
- 30 Тестовый запуск; ТЕХНИЧЕСКОЕ ОБСЛУЖИВАНИЕ
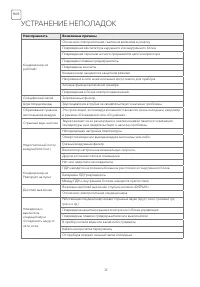
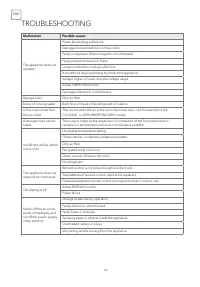
- 32 УСТРАНЕНИЕ НЕПОЛАДОК
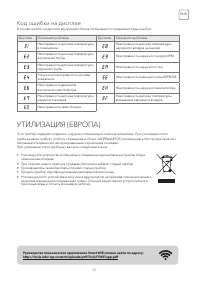
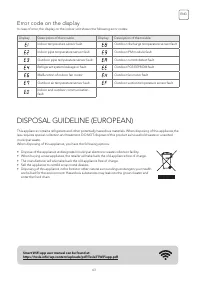
- 33 Код ошибки на дисплее


