
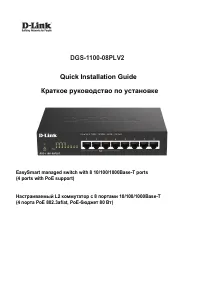
Коммутаторы D-Link DGS-1100-08PLV2/A1A - инструкция пользователя по применению, эксплуатации и установке на русском языке. Мы надеемся, она поможет вам решить возникшие у вас вопросы при эксплуатации техники.
Если остались вопросы, задайте их в комментариях после инструкции.
"Загружаем инструкцию", означает, что нужно подождать пока файл загрузится и можно будет его читать онлайн. Некоторые инструкции очень большие и время их появления зависит от вашей скорости интернета.

About This Guide
This guide gives step-by-step instructions for setting up
the D-Link DGS-1100-08PLV2 switch. Please note that the
model you have purchased may appear slightly different
from those shown in the illustrations.
Step 1 – Unpacking
Open the shipping carton and carefully unpack its
contents. Please consult the packing list to make sure
all items are present and undamaged. If any item is
missing or damaged, please contact your local D-Link
reseller for replacement.
E
N
G
LI
S
H
•
DGS-1100-08PLV2 switch
•
Wall mounting kit
•
4 rubber feet
•
Quick Installation Guide
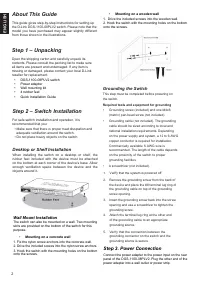
Step 2 – Switch Installation
For safe switch installation and operation, it is
recommended that you:
• Make sure that there is proper heat dissipation and
adequate ventilation around the switch.
• Do not place heavy objects on the switch
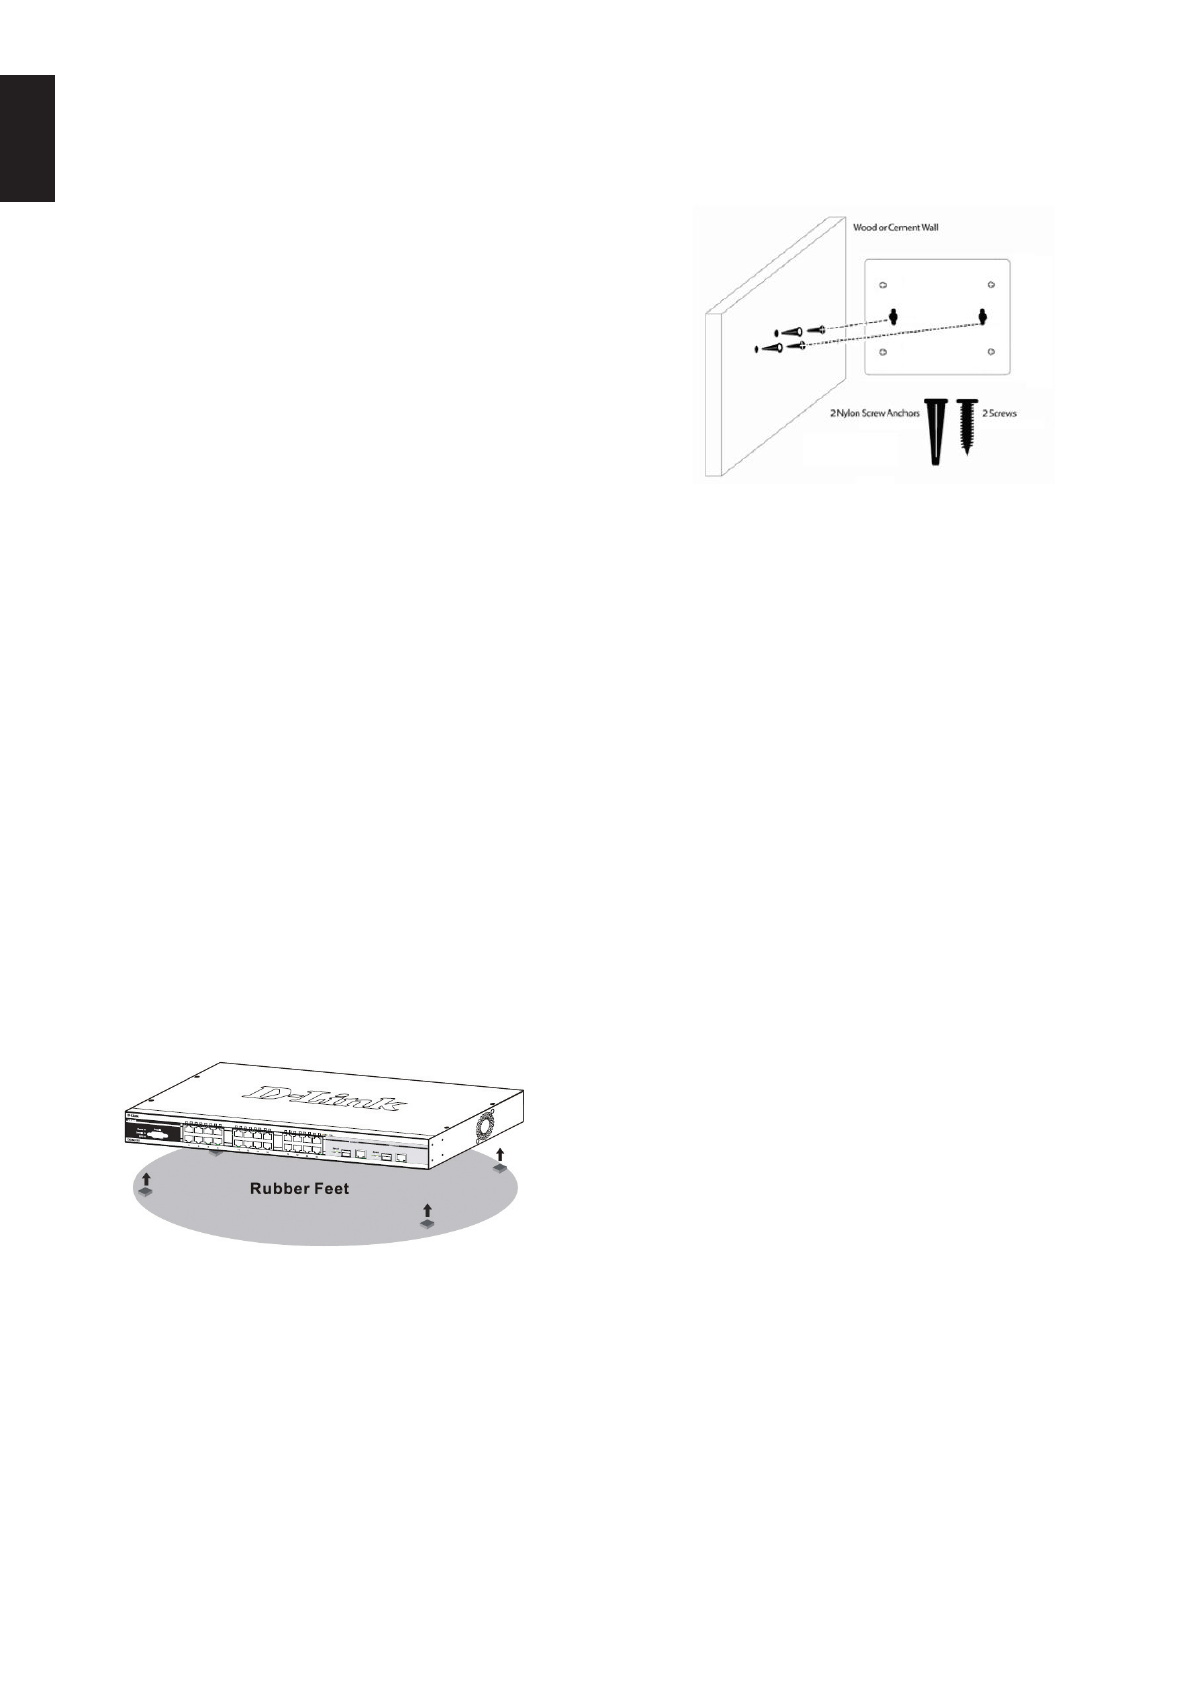
Desktop or Shelf Installation
When installing the switch on a desktop or shelf, the
rubber feet included with the device must be attached
on the bottom at each corner of the device’s base. Allow
enough ventilation space between the device and the
objects around it.
Wall Mount Installation
The switch can also be mounted on a wall. Two mounting
slots are provided on the bottom of the switch for this
purpose.
•
Mounting on a concrete wall
1. Fix the nylon screw anchors into the concrete wall.
2. Drive the included screws into the nylon screw anchors.
3. Hook the switch with the mounting holes on the bottom
onto the screws.
•
Mounting on a wooden wall
1. Drive the included screws into the wooden wall.
2. Hook the switch with the mounting holes on the bottom
onto the screws.
Step 3. Power Connection
Connect the power adapter to the power input on the rear
panel of the DGS-1100-08PLV2. Plug the other end of the
power adapter into a wall outlet or power strip.
Grounding the Switch
This step must be completed before powering on
the switch.
Required tools and equipment for grounding
•
Grounding screw (included) and one M4x6
(metric) pan-head screw (not included).
•
Grounding cable (not included). The grounding
cable should be sized according to local and
national installation requirements. Depending
on the power supply and system, a 12 to 6 AWG
copper conductor is required for installation.
Commercially available 6 AWG wire is
recommended. The length of the cable depends
on the proximity of the switch to proper
grounding facilities.
•
A screwdriver (not included).
1.
Verify that the system is powered off
2. Remove the grounding screw from the back of
the device and place the #8 terminal lug ring of
the grounding cable on top of the grounding
screw opening.
3. Insert the grounding screw back into the screw
opening and use a screwdriver to tighten the
grounding screw.
4. Attach the terminal lug ring at the other end
of the grounding cable to an appropriate
grounding source.
5. Verify that the connection between the
grounding connector on the switch and the
grounding source is secure.
2
•
Power adapter
Содержание
- 4 Правила и условия безопасной эксплуатации; с кратким руководством по установке.
- 5 О данном руководстве; Шаг 2. Установка коммутатора; Установка на стол или поверхность; Шаг 3. Подключение питания; Заземление коммутатора
- 8 официальных праздничных дней. Звонок бесплатный по всей России.; Техническая поддержка через Интернет:; Moldova; לארשי
Характеристики

Остались вопросы?Не нашли свой ответ в руководстве или возникли другие проблемы? Задайте свой вопрос в форме ниже с подробным описанием вашей ситуации, чтобы другие люди и специалисты смогли дать на него ответ. Если вы знаете как решить проблему другого человека, пожалуйста, подскажите ему :)


