
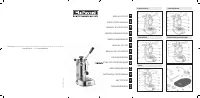
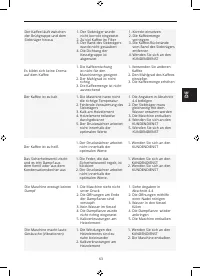
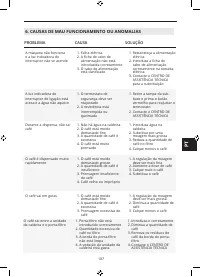
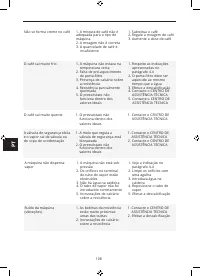
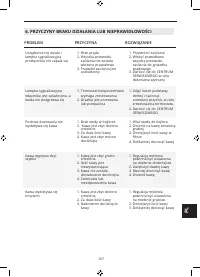
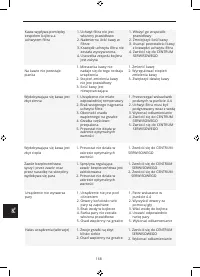
Кофемашина La Pavoni LPLPLQ01EU - инструкция пользователя по применению, эксплуатации и установке на русском языке. Мы надеемся, она поможет вам решить возникшие у вас вопросы при эксплуатации техники.
Если остались вопросы, задайте их в комментариях после инструкции.
"Загружаем инструкцию", означает, что нужно подождать пока файл загрузится и можно будет его читать онлайн. Некоторые инструкции очень большие и время их появления зависит от вашей скорости интернета.


26
27
EN
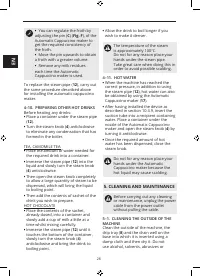
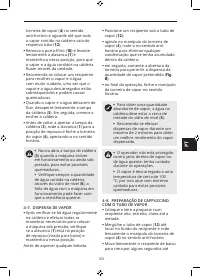
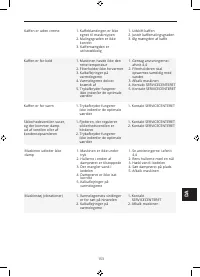
boiler should be about halfway up
the level glass (
5).
•
We recommend that you
dispense steam for a maximum
of 2 minutes to obtain maximum
steam delivery performance.
•
The user is not protected
against direct jets of steam or
hot water. Take great care when
carrying out these operations.
•
The temperature of the steam
is approximately 100°C. Take
great care when carrying out
this procedure, to avoid possible
scalding.
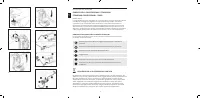
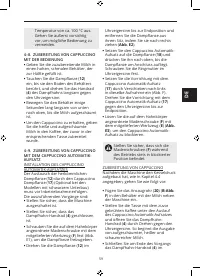
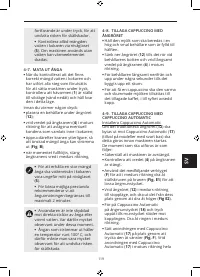
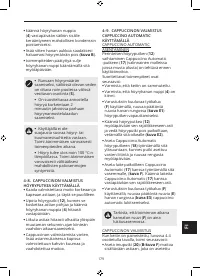
4–8. PREPARING A CAPPUCCINO WITH
THE STEAM PIPE
•
Half fill a tall narrow container with the
milk to be prepared.
•
Immerse the steam pipe (
12) until it
touches the bottom of the container
and slowly turn the steam knob (
4)
anticlockwise.
•
Move the container slowly up and
down for a few seconds until you
obtain a froth.
•
To make a cappuccino, add the hot
frothed milk to the coffee that is
already in the cup.
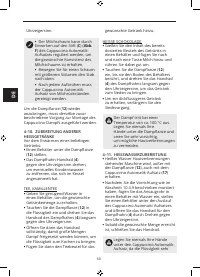
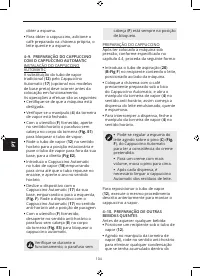
4–9. PREPARING A CAPPUCCINO WITH
THE AUTOMATIC CAPPUCCINO MAKER
INSTALLING THE AUTOMATIC
CAPPUCCINO MAKER
The traditional steam pipe (
12) should
be replaced with the Automatic
Cappuccino maker (
17) (an optional
accessory on the models with a black
base) before starting the machine.
Proceed as follows:
•
Make sure the machine is switched off
•
Make sure that the steam knob (
4) is
closed.
•
Using the tool (
F) provided, turn
the headless screw on the tap body
clockwise (
Fig. E1
) to release the steam
nozzle.
•
Turn the steam pipe (
12
) clockwise
until it stops. Then remove the steam
pipe from its seat by pulling it towards
the right (
Fig. E2
).
•
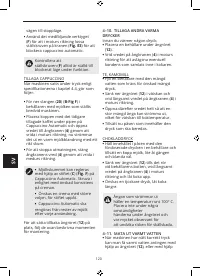
Insert the Automatic Cappuccino
maker onto the steam supply nozzle
(
18
), pushing it upwards until the
nozzle rests against the fitting. Then
tighten the locking ring by turning it
clockwise.
•
Insert the Automatic Cappuccino
maker (
17
) into its seat by pushing
it towards the left (
Fig. F
). Turn the
Automatic Cappuccino maker (
17)
anticlockwise until it stops.
•
Using the tool (
F) provided, turn the
headless screw on the tap body (
E)
anticlockwise (
Fig. E3) to lock the
automatic cappuccino maker in
position.
Make sure that the headless screw
(
F
) is always in the locked position
during operation.
CAPPUCCINO PREPARATION
After the machine has reached the
required pressure, as descried in section
4.4, proceed as follows:
•
Insert the suction tube (
20) (
B-Fig. F
)
into the milk container next to the
machine.
•
Place the cup containing the previously
prepared coffee under the nozzle of
the Automatic Cappuccino maker and
open the steam knob (
4
) by turning
it anticlockwise. This will start to
dispense hot milk, with abundant froth.
•
To stop dispensing, close the steam
knob (
4
) by turning it clockwise.
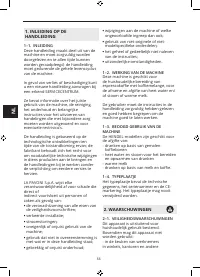
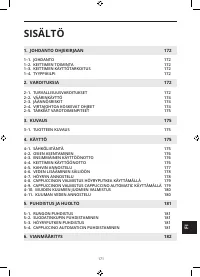
Содержание
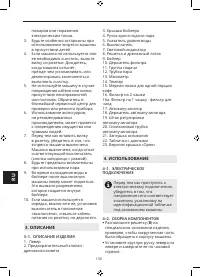
Характеристики

Остались вопросы?Не нашли свой ответ в руководстве или возникли другие проблемы? Задайте свой вопрос в форме ниже с подробным описанием вашей ситуации, чтобы другие люди и специалисты смогли дать на него ответ. Если вы знаете как решить проблему другого человека, пожалуйста, подскажите ему :)


