Измерительные приборы Skil 0550 - инструкция пользователя по применению, эксплуатации и установке на русском языке. Мы надеемся, она поможет вам решить возникшие у вас вопросы при эксплуатации техники.
Если остались вопросы, задайте их в комментариях после инструкции.
"Загружаем инструкцию", означает, что нужно подождать пока файл загрузится и можно будет его читать онлайн. Некоторые инструкции очень большие и время их появления зависит от вашей скорости интернета.
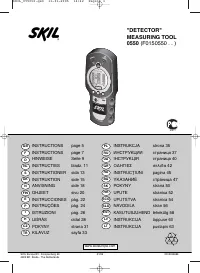

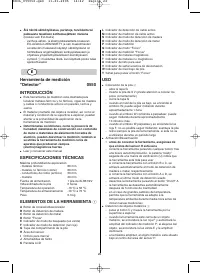

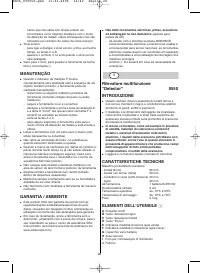


"Detector" measuring tool
0550
INTRODUCTION
●
This measuring tool is intended for locating ferrous and
non-ferrous metals, wooden beams and live wires/
conductors in walls, ceilings and floors
●
The material and size of the object to be located as well
as the material and condition of the surface to be scanned
may affect the scanning depth of the measuring tool
●
Under certain conditions, such as in case of
moisture, metal-containing building materials, or
aluminium-backed insulation materials, the
measuring results can be impaired; using the
measuring tool in the vicinity of appliances which
produce strong (electro)magnetic fields may also
impair the measuring results
●
Read and save this instruction manual
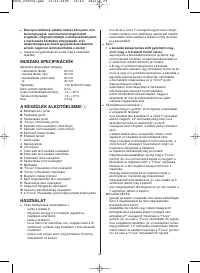
TECHNICAL SPECIFICATIONS
Maximum scanning depth
- ferrous metals
80 mm
- non-ferrous metals (copper)
60 mm
- copper conductors (live)
50 mm
- wood
20 mm
Power supply
1x 6LR61/9V battery
Estimated battery life
6 hours
Operating temperature
-10°C to 50°C
Storage temperature
-10°C to 70°C
Weight
0,3 kg
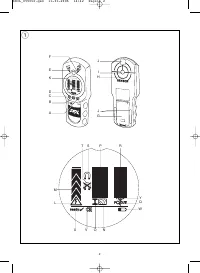
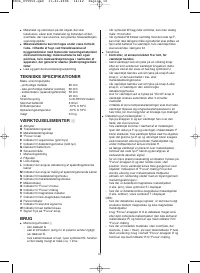
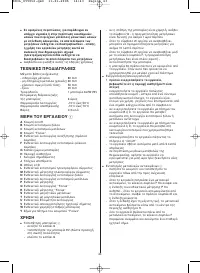
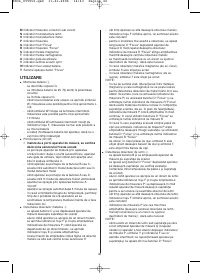
TOOL ELEMENTS
1
A
On/off button
B
Wood-detection button
C
Metal-detection button
D
"Focus" button
E
Search mode indicator (green light)
F
Detect mode indicator (red light)
G
Battery compartment cover
H
Sensor area
I
Marking opening
J
Felt pads
K
LCD display
L
Live wire detection indicator
M
Live wire measuring indicator
N
Wood-detection mode indicator
O
Metal-detection mode indicator
P
Measuring indicator
Q
"Focus" mode indicator
R
"Focus" measuring indicator
S
Magnetic metals indicator
T
Non-magnetic metals indicator
U
Ready-for-use indicator
V
Switched-off acoustic signal indicator
W
Low battery level indicator
Y
Signal for pressing "Focus" button
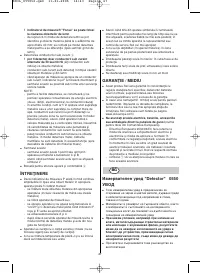
USE
●
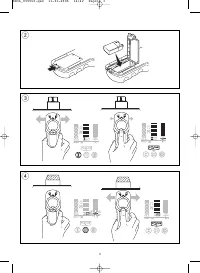
Mounting of battery
2
- open cover G
- insert 9V battery (pay attention to correct polarisation)
- close cover G
- when battery level is low, symbol W lights up;
measuring is still possible for approximately 1 hour
- when symbol W starts flashing, approximately
10 more minutes of measuring are possible
- when symbol W flashes together with red light F,
measuring is no longer possible; replace the battery
- always remove the battery from the tool, if the tool will
not be used for a long period
●
On/off
! before switching on the tool, ensure that sensor
area H is dry
- switch on the tool by pressing any button; after a brief
self-check the tool is ready for use indicated by a
check mark behind symbol U
- when switching on with button B or button C, the tool
will automatically be in the wood-detection mode or
metal-detection mode
- when switching on with button A or button D, the tool
will be in the detection mode last used
- switch off the tool by pressing "On/off" button A
- the tool automatically switches off after 5 minutes of
inactivity
- in case of severe temperature changes, allow the tool
to adjust to the ambient temperature for half an hour
before starting new measurements
●
Detecting metal objects
3
- press button C and move the tool over the surface to
be scanned
- when the tool comes close to a metal object, red light
F turns on and the amplitude of measuring indicator P
increases; when it moves away from the object, green
light E turns on and the amplitude decreases
- at maximum amplitude the metal object is located
below the centre of sensor area H
- as long as the tool is above the metal object, red light
F remains on and a steady acoustic signal sounds
- for a more precise localisation of the object, press
"Focus" button D and hold it in that position while
repeatedly moving the tool over the object; "Focus"
measuring indicator R has the greatest amplitude
over the centre of the metal object
- mark the location with a pencil through marking
opening I, if needed
- in case of magnetic metal objects (e.g. iron), symbol
S appears in display
- in case of non-magnetic metal objects (e.g. copper),
symbol T appears in display
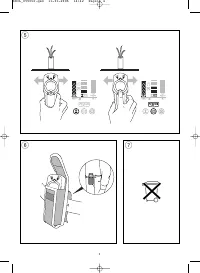
NOTES:
- in case of weak signals, the differentiation between
magnetic and non-magnetic metal objects cannot be
made
- for detecting very small or deeply embedded metal
objects (which do not activate measuring indicator P)
use "Focus" button D and observe "Focus" measuring
indicator R only
GB
5
SKIL_0550v2.qxd 11-01-2006 14:42 Pagina 5
Характеристики

Остались вопросы?Не нашли свой ответ в руководстве или возникли другие проблемы? Задайте свой вопрос в форме ниже с подробным описанием вашей ситуации, чтобы другие люди и специалисты смогли дать на него ответ. Если вы знаете как решить проблему другого человека, пожалуйста, подскажите ему :)


