Измерительные приборы Skil 0510 - инструкция пользователя по применению, эксплуатации и установке на русском языке. Мы надеемся, она поможет вам решить возникшие у вас вопросы при эксплуатации техники.
Если остались вопросы, задайте их в комментариях после инструкции.
"Загружаем инструкцию", означает, что нужно подождать пока файл загрузится и можно будет его читать онлайн. Некоторые инструкции очень большие и время их появления зависит от вашей скорости интернета.
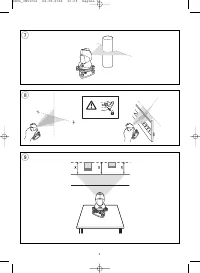
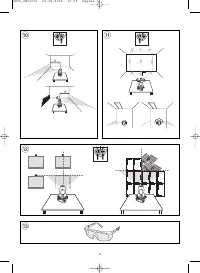


- adjust length of 3 legs with clips L
- adjust length of rod M with handle N
- lock rod M with knob P
- mount tool directly on tripod, or use extension rod Q
! ensure that the tool is firmly fixed to the tripod
MAINTENANCE
●
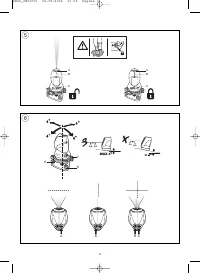
Always lock the self-leveling system after use and
during transportation by sliding switch C in the lock-
position
5
●
Do not expose the tool to continuous vibration or
extremely hot or cold temperatures
●
Always store the tool indoors in its protective carton/case
●
Always keep the tool free of dust, moisture and direct
sunlight
●
Clean the tool with a soft cotton cloth and glass cleaner
! always remove the batteries before cleaning the
lens
●
Do not disassemble or modify the tool in any way
●
Do not attempt to change any part of the laser lens
GUARANTEE / ENVIRONMENT
●
This Skil product is guaranteed in accordance with
statutory/country-specific regulations; damage due to
normal wear and tear, overload or improper handling will
be excluded from the guarantee
●
In case of a complaint, send the tool undismantled
together with proof of purchase to your dealer or the
nearest Skil service-station (addresses as well as the
service diagram of the tool are listed on
www.skileurope.com)
●
Do not dispose of electric tools, accessories and
packaging together with household waste material
(only for EU countries)
- in observance of European Directive 2002/96/EC on
waste of electric and electronic equipment and its
implementation in accordance with national law,
electric tools that have reached the end of their life
must be collected separately and returned to an
environmentally compatible recycling facility
- symbol
%
will remind you of this when the need for
disposing occurs
Niveau laser automatique
510
INTRODUCTION
●
Cet outil sert à définir et à vérifier la précision de lignes
horizontales, verticales ou croisées en projetant des
rayons laser à réglage automatique
●
Lisez soigneusement ce mode d'emploi ainsi que
l'étiquette d'avertissement située sur l'outil avant
d'utiliser l'outil
1
●
Prêtez attention aux consignes de sécurité et aux
avertissements; sinon, vous risquez d'endommager
gravement vos yeux
●
Conservez ce mode d'emploi pour vous y reporter à
l'avenir
SPECIFICATIONS TECHNIQUES
Type de laser
650 nm
Catégorie de laser
2
Puissance de sortie
< 1 mW
Alimentation
2 piles AA (LR6)/1,5 V
Température de fonctionnement
-10ºC à 55°C
Température de stockage
-20ºC à 60°C
Plage de niveau automatique
≤
± 4°
Poids
0,68 kg
Exactitude
+/- 1 mm/m
SECURITE
●
Ne projetez pas le rayon laser dans vos yeux
(rayonnement laser)
2
●
Ne dirigez pas le rayon laser vers des personnes ou
des animaux
●
Ne placez pas cet outil dans une position où le rayon
laser pourrait atteindre l'œil d'une personne,
volontairement ou non
●
N'utilisez pas d'outils optiques grossissants (loupes,
télescopes ou jumelles) pour voir le rayon laser
●
Veillez à ne pas enlever l'étiquette d'avertissement de
l'outil ni à l'endommager
●
N'utilisez pas cet outil en la présence de liquides
inflammables, de gaz ou de poussière
●
N'utilisez pas cet outil en la présence d'enfants
●
Cet outil ne doit pas être utilisé par des personnes de
moins de 16 ans
●
N'utilisez pas cet outil dans un but autre que ceux
mentionnés dans ce mode d'emploi
●
Utilisez seulement les accessoires d'origine prévus pour
cet outil
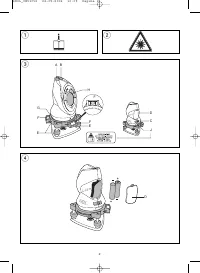
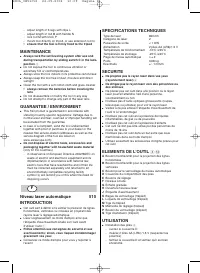
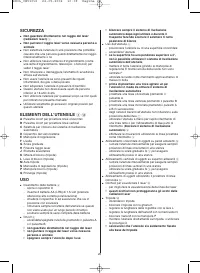
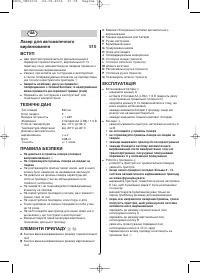
ELEMENTS DE L'OUTIL
3 $
A Bouton marche/arrêt pour la projection des lignes
horizontales
B Bouton marche/arrêt pour la projection des lignes
verticales
C Bouton pour le verrouillage du niveau automatique
D Couvercle du compartiment des piles
E Boutons de réglage
F Niveaux à bulle
G Échelle graduée
H Ouverture faisceau laser
J Étiquette d’avertissement
K Bague de verrouillage (trépied)
L Loquets de verrouillage (trépied)
M Tige du trépied
N Manivelle de réglage (trépied)
P Bouton de verrouillage (trépied)
Q Tige d’extension (trépied)
UTILISATION
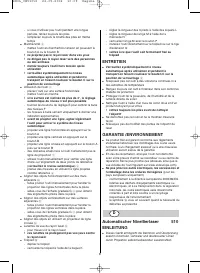
●
Installation des piles
4
- ouvrez le couvercle D
- insérez 2 piles AA (LR6) /1,5 V (respectez les
polarités)
- fermez le couvercle D et vérifiez qu’il est bien
enclenché
F
8
SKIL_IB510v2 22-09-2006 10:09 Pagina 8
Характеристики

Остались вопросы?Не нашли свой ответ в руководстве или возникли другие проблемы? Задайте свой вопрос в форме ниже с подробным описанием вашей ситуации, чтобы другие люди и специалисты смогли дать на него ответ. Если вы знаете как решить проблему другого человека, пожалуйста, подскажите ему :)


