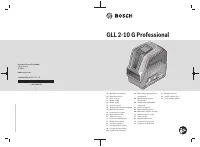
Измерительные приборы Bosch GLL 2-10 G - инструкция пользователя по применению, эксплуатации и установке на русском языке. Мы надеемся, она поможет вам решить возникшие у вас вопросы при эксплуатации техники.
Если остались вопросы, задайте их в комментариях после инструкции.
"Загружаем инструкцию", означает, что нужно подождать пока файл загрузится и можно будет его читать онлайн. Некоторые инструкции очень большие и время их появления зависит от вашей скорости интернета.


14
| English
ature, first allow the measuring tool to adjust to the ambi-
ent temperature and then always carry out an accuracy
check before continuing work (see "Accuracy Check of
the Measuring Tool", page 14).
The precision of the measuring tool may be compromised
if exposed to extreme temperatures or fluctuations in
temperature.
u
Avoid substantial knocks to the measuring tool and
avoid dropping it.
Always carry out an accuracy check
before continuing work if the measuring tool has been
subjected to severe external influences (see "Accuracy
Check of the Measuring Tool", page 14).
u
Switch the measuring tool off when transporting it.
The pendulum unit is locked when the tool is switched off,
as it can otherwise be damaged by big movements.
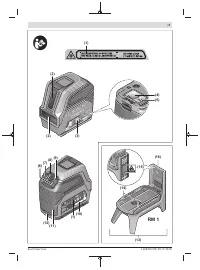
Switching On/Off
To
switch on
the measuring tool, slide the on/off switch
(3)
to the "
On
" position (for working with the pendulum lock)
or to the "
On
" position (for working with automatic level-
ling). The status indicator
(8)
lights up. As soon as it is
switched on, the measuring tool emits laser lines from the
outlet apertures
(2)
.
u
Do not direct the laser beam at persons or animals and
do not stare into the laser beam yourself (even from a
distance).
To
switch off
the measuring tool, slide the on/off switch
(3)
to the "
Off
" position. The status indicator
(8)
goes out. The
pendulum unit is locked when the tool is switched off.
u
Never leave the measuring tool unattended when
switched on, and ensure the measuring tool is
switched off after use.
Others may be blinded by the
laser beam.
If the maximum permitted operating temperature of
50
°C is
exceeded, the tool shuts down to protect the laser diode.
Once it has cooled down, the measuring tool is operational
again and can be switched back on.
Automatic shut-off
If no button on the measuring tool is pressed for approx.
120
min, the measuring tool will automatically switch itself
off to preserve battery life.
To switch the measuring tool back on after it has been auto-
matically switched off, you can either slide the on/off
switch
(3)
to the "
Off
" position first and then switch the
measuring tool back on, or press either the vertical mode
button
(6)
or the horizontal mode button
(7)
once.
To deactivate automatic shut-off, hold down the horizontal
mode button
(7)
for at least three seconds (with the measur-
ing tool switched on). If automatic shut-off is deactivated,
the laser lines will flash briefly as confirmation.
Note:
If the operating temperature exceeds 45 °C, automatic
shut-off can no longer be deactivated.
To activate the automatic shut-off function, switch the meas-
uring tool off and on again.
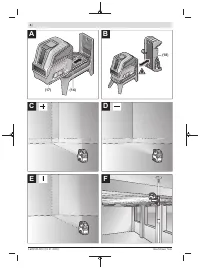
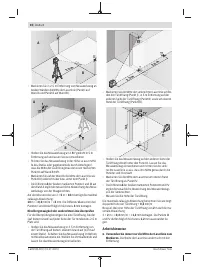
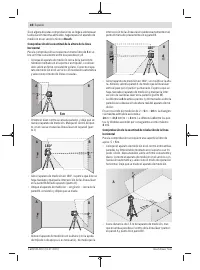
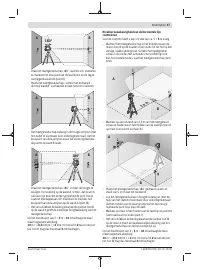
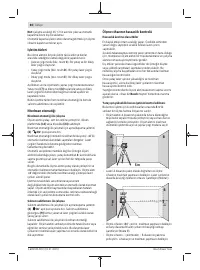
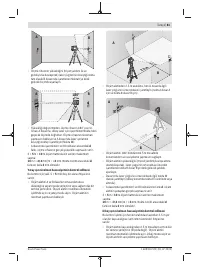
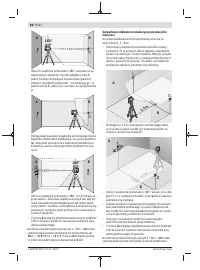
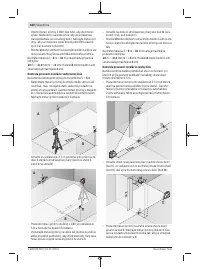
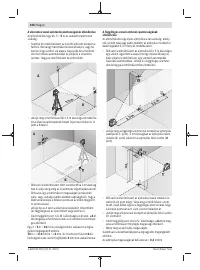
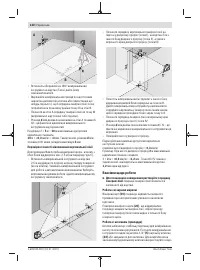
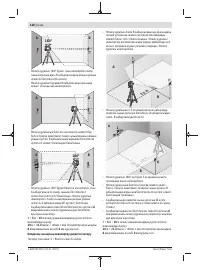
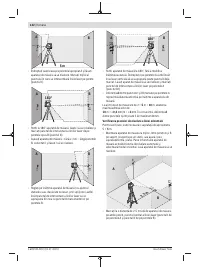
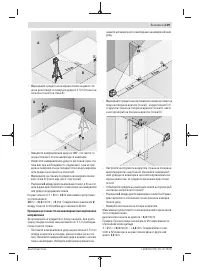
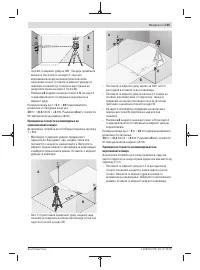
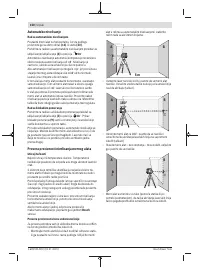
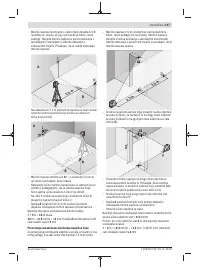
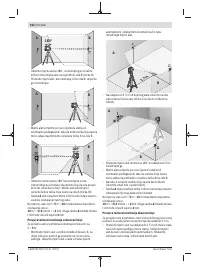
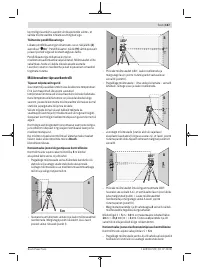
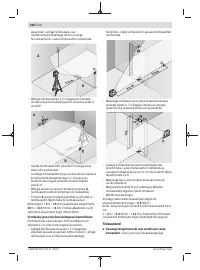
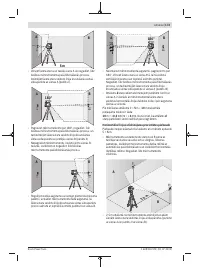
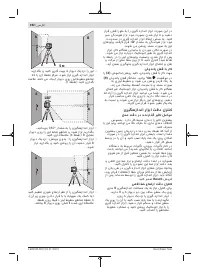
Operating Modes
The measuring tool has several operating modes, which you
can switch between at any time:
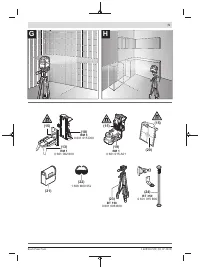
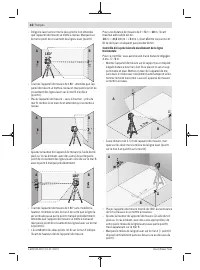
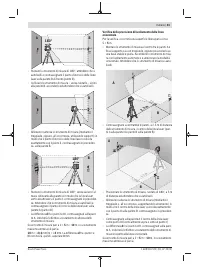
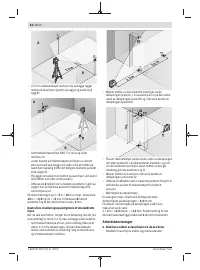
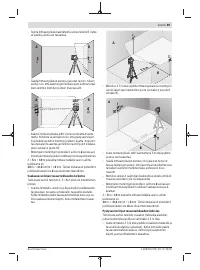
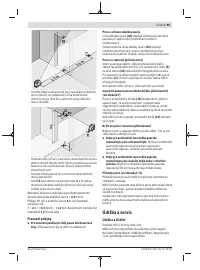
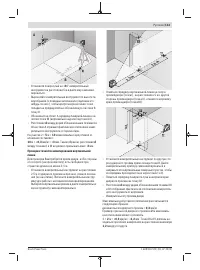
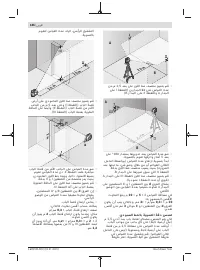
– Cross-line mode (see figure
C
): Generates one horizontal
and one vertical laser line
– Horizontal mode (see figure
D
): Generates one horizontal
laser line
– Vertical mode (see figure
E
): Generates one vertical laser
line
After switching on, the measuring tool is in cross-line operat-
ing mode. Using the buttons for horizontal mode
(7)
and ver-
tical mode
(6)
, you can switch the horizontal and vertical
laser lines on and off independently of one another.
All operating modes can be selected with both automatic lev-
elling or the pendulum lock.
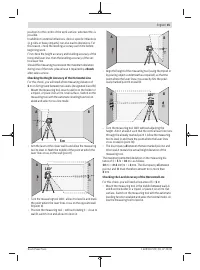
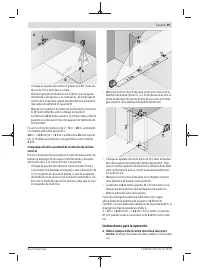
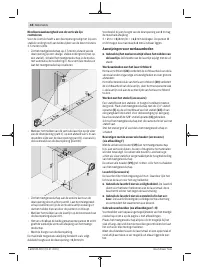
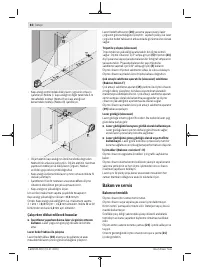
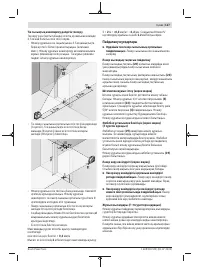
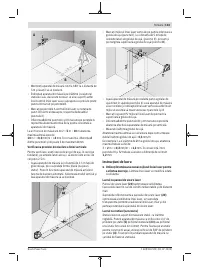
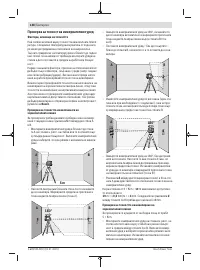
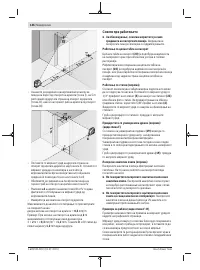
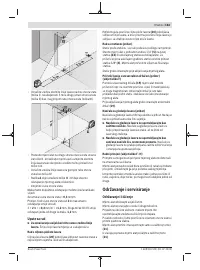
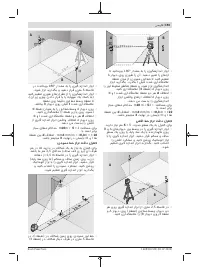
Automatic Levelling
Working with automatic levelling
Position the measuring tool on a level, firm surface or attach
it to the rotating mount
(13)
or the tripod
(23)
.
For work with automatic levelling, slide the on/off switch
(3)
to the "
On
" position.
The automatic levelling function automatically compensates
irregularities within the self-levelling range of ±
4
°. The level-
ling is finished as soon as the laser lines stop moving.
If automatic levelling is not possible, e.g. because the sur-
face on which the measuring tool stands deviates by more
than
4
° from the horizontal plane, the laser beams will flash
quickly.
If this is the case, set up the measuring tool in a level position
and wait for the self-levelling to take place. As soon as the
measuring tool is within the self-levelling range of ±
4
°, the
laser beams will light up continuously.
In case of ground vibrations or position changes during oper-
ation, the measuring tool is automatically levelled again.
Upon levelling, check the position of the laser beams with re-
gard to the reference points to avoid errors arising from a
change in the measuring tool's position.
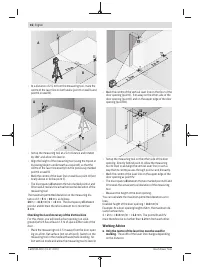
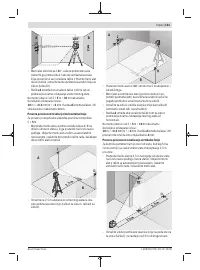
Working with the pendulum lock
For work with the pendulum lock, slide the on/off switch
(3)
to the "
On
" position. The pendulum lock indicator
(9)
lights up red and the laser lines continuously flash slowly.
For work with the pendulum lock, automatic levelling is
switched off. You can hold the measuring tool freely in your
hand or place it on a sloping surface. This means that the
laser beams are no longer levelled and no longer necessarily
run perpendicular to one another.
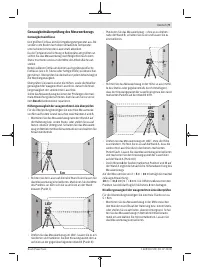
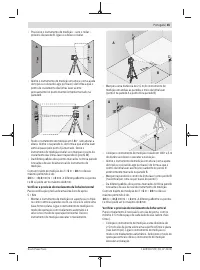
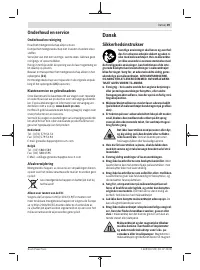
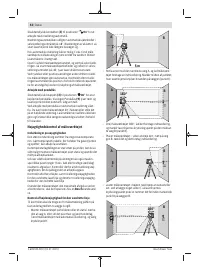
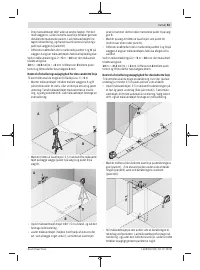
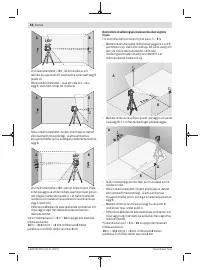
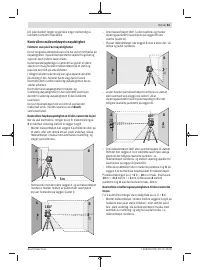
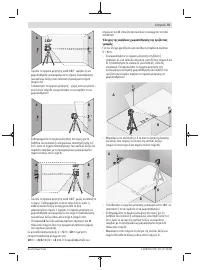
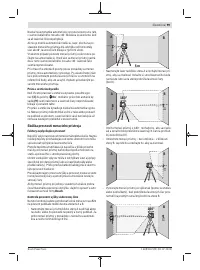
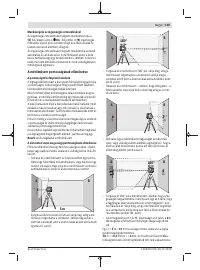
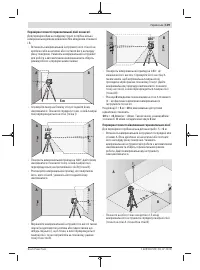
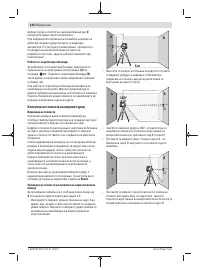
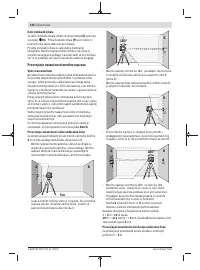
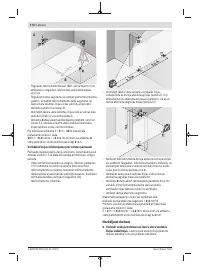
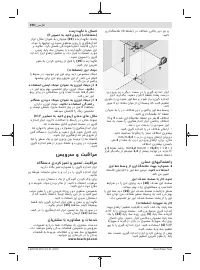
Accuracy Check of the Measuring Tool
Influences on Accuracy
The largest influence is exerted by the ambient temperature.
In particular, temperature differences that occur from the
ground upwards can refract the laser beam.
Since the temperature stratification is greatest at ground
level, you should mount the measuring tool on a tripod and
1 609 92A 5TD | (01.07.2020)
Bosch Power Tools
Характеристики

Остались вопросы?Не нашли свой ответ в руководстве или возникли другие проблемы? Задайте свой вопрос в форме ниже с подробным описанием вашей ситуации, чтобы другие люди и специалисты смогли дать на него ответ. Если вы знаете как решить проблему другого человека, пожалуйста, подскажите ему :)


