
Измерительные приборы ADA А00480 - инструкция пользователя по применению, эксплуатации и установке на русском языке. Мы надеемся, она поможет вам решить возникшие у вас вопросы при эксплуатации техники.
Если остались вопросы, задайте их в комментариях после инструкции.
"Загружаем инструкцию", означает, что нужно подождать пока файл загрузится и можно будет его читать онлайн. Некоторые инструкции очень большие и время их появления зависит от вашей скорости интернета.
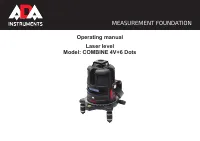


COMBINE
4V+6 Dots
Operation
1. Open battery compartment cover. Insert 4 batteries with proper polarity into the holder. Contacts of the holder (batteries)
or Li-batteries must coincide with contacts of the battery compartment. Close the battery cover.
2. Place the instrument on the tripod or floor. When using tripod, place the instrument on the tripod and screw the centering
screw into the center hole.
3. Switch On the instrument by rotating the switch 2 counterclockwise until its clicking position. Green LED will flash. If the
battery power is low, green color of the indicator will be changed into red.
4. The instrument works in slope mode in the first position of the switch (X). It is possible to project laser lines at any angle.
In the position ON the pendulum will be unlocked and laser lines will be automatically self-leveled.
5. If there is a sound signal and laser lines begin to blink while switching on the instrument, that means that the instrument is
out of range more than ±3°. Adjust the position of the instrument by means of the bubble level with the help of legs or tripod.
6. Aim the down point on the required point on the floor. Rotate the upper part of the instrument to adjust vertical lines.
Then adjust the position of the instrument with the help of fine adjustment screw.
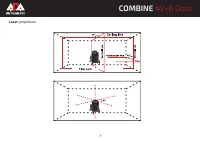
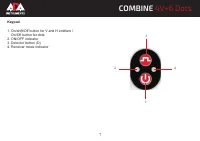
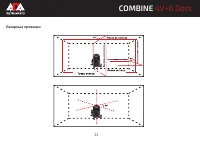
7. Laser level has several operating modes. Press button 1 to select laser lines. Variants of projections:
- horizontal beam and down point;
- horizontal beam and vertical beam, down point;
- horizontal beam and 3 vertical beams, down point.
- horizontal beam and 4 vertical beams, down point.
- upper laser dot, down point, 4 laser dots in horizontal plane.
IMPORTANT: LASER DOTS WORK SEPARATELY FROM LASER LINES.
Application of the detector
Application of the detector is a decisive advantage when working outside in sunny weather. Press button (3) to switch on
the detector mode. Follow instructions of detector application when detecting laser line.
8
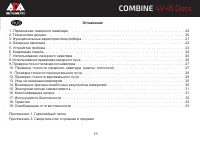
Содержание
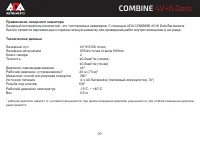
- 20 Применение лазерного нивелира
- 21 Функциональные характеристики прибора; Прибор проецирует
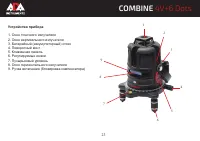
- 23 Устройство прибора; Окно точечного излучателя
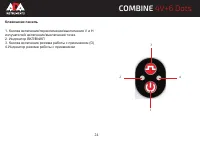
- 24 Клавишная панель; Индикатор режима работы с приемником
- 25 Использование лазерного нивелира; на штатив и вкрутите винт штатива в центровочное отверстие.
- 26 Использование приемника лазерного луча; Для включения этого режима нажмите кнопку (3) на клавишной панели.
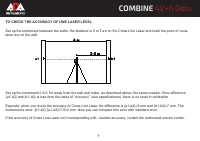
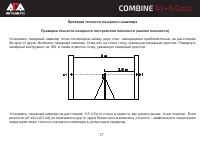
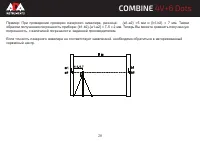
- 27 Проверка точности лазерного нивелира
- 28 образом полученная погрешность прибора:
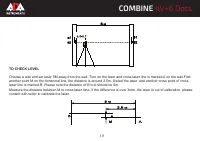
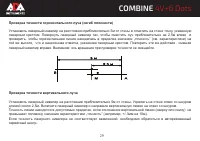
- 29 Проверка точности горизонтального луча (изгиб плоскости)
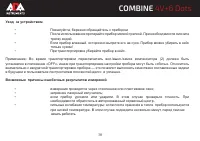
- 30 Уход за устройством
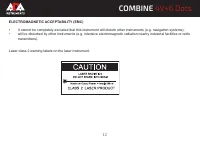
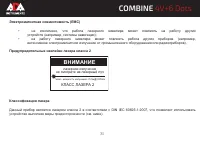
- 31 Предупредительные наклейки лазера класса 2; лазерное излучение; КЛАСС ЛАЗЕРА 2М; ВНИМАНИЕ
- 32 Инструкция по безопасности
- 33 Освобождение от ответственности; точность прибора и его работу.
- 34 жидкостей и посторонних предметов внутрь.
- 36 СВИДЕТЕЛЬСТВО О ПРИЕМКЕ И ПРОДАЖЕ; Цена
Характеристики

Остались вопросы?Не нашли свой ответ в руководстве или возникли другие проблемы? Задайте свой вопрос в форме ниже с подробным описанием вашей ситуации, чтобы другие люди и специалисты смогли дать на него ответ. Если вы знаете как решить проблему другого человека, пожалуйста, подскажите ему :)


