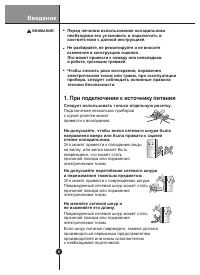
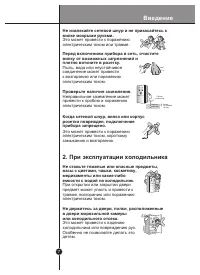
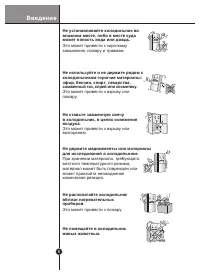
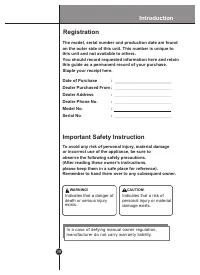
Холодильник LG GA-B379PVCA - инструкция пользователя по применению, эксплуатации и установке на русском языке. Мы надеемся, она поможет вам решить возникшие у вас вопросы при эксплуатации техники.
Если остались вопросы, задайте их в комментариях после инструкции.
"Загружаем инструкцию", означает, что нужно подождать пока файл загрузится и можно будет его читать онлайн. Некоторые инструкции очень большие и время их появления зависит от вашей скорости интернета.


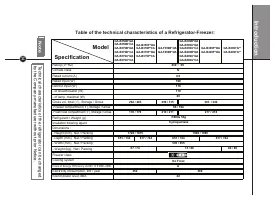


61
1
4
3
2
3
2
16
15
17
19
14
18
10
12
13
31
32
5
6
7
9
8
10
19
10
31
32
11
35
11
2
1
3
4
2.
5
5
6
8
7
10
9
3.
13
12
11
12
32
31
6.
15
14
18
14
15
17
16
17
16
35
3,4. For exterior
type display
2. For exterior
type display
4,5. For interior
type display
6. Only for exterior type display
32
4.
5.
19
1. Only for models with
exterior door handles
10
30
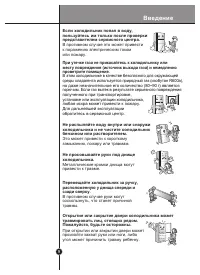
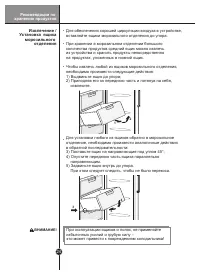
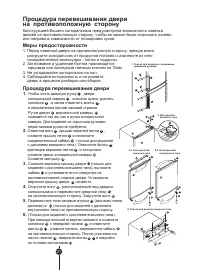
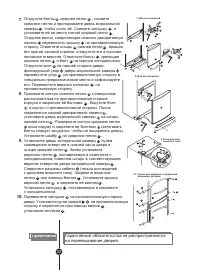
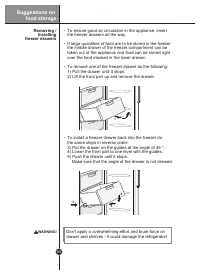
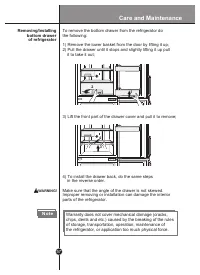
To Reverse the Doors
Precaution
1.
Before reversing the door, first of all,you should take out food and accessories
likeshelves or trays which are not fixed
in the fridge-freezer.
2.
Use Torque Wrench or Spanner of 10 mm to fix or remove the bolt
.
3. Do not lay the fridge-freezer down.
4. Be careful not to drop the doors in disassembling
or assenbling.
How to Reverse the Door
Your fridge-freezer is designed with reversible doors,so that they may open from either
the left or right hand side to suit your kitchen design.
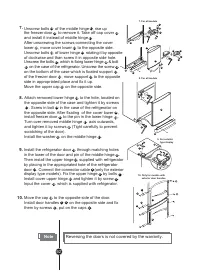
To remove door handle of the refrigerator door ,
first remove caps , and then unscrew screws in
a direction of counter-clockwise.
The handle of
the freezer door removes in the same order
.
You do not need to follow up the above procedure
for the hidden handle.
After unscrewing the screw of cover hinge on
the top , take off cap hinge and disconnect
cable (Only for the exterior display type models).
Unscrew bolts , which fasten upper hinge ,
and carefully take off the refrigerator’
s door .
Remove cap .
Remove cap cover of door (only for the exterior
display type models), pull out cable and install it
into the opening on the opposite side of the door
.
Set the cap cover of door in its place.
Screw out the screw located under the refrigerator
door and move it emphasis on to the opposite side.
Fixate the screw .
Move plastic caps (for all types display) and
(only for of interior type display models) to the
opposite side.
(Only for exterior type display).
Press by the (-) screwdriver and separate caps
of cover front and unscrew screws , remove
cover front, then move cable to the opposite side.
After installation cover front , screw by parts
and cover it by caps .
1.
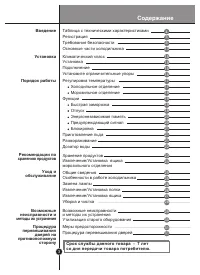
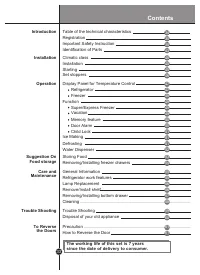
Содержание
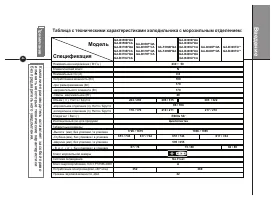
- 4 ри; Таблица; Спецификация; Модель
- 5 Требования безопасности
- 7 При эксплуатации холодильника
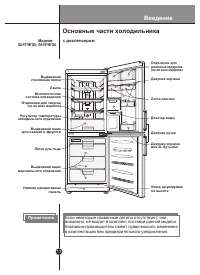
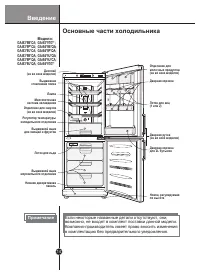
- 13 с диспенсером; Основные части холодильника; Примечание; Если некоторые названные детали отсутствуют, они,
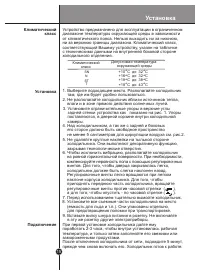
- 15 Установка; Климатический; Климатический
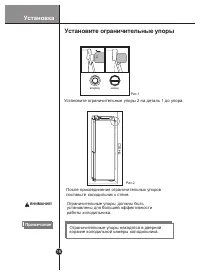
- 16 Установите ограничительные
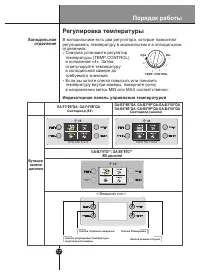
- 17 ЖК дисплей; Индикаторная панель управления температурой; Холодильное; Регулировка температуры; Порядок работы
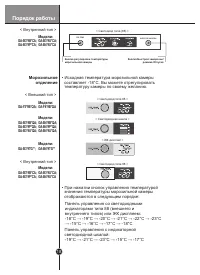
- 18 Морозильное; Модели; Порядок
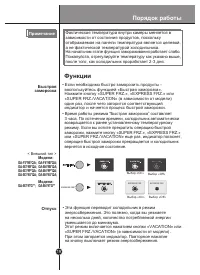
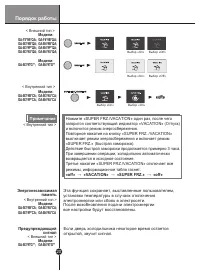
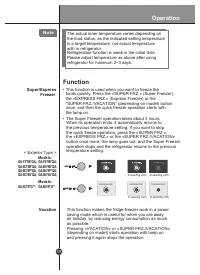
- 19 Функции; Быстрая
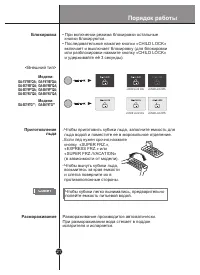
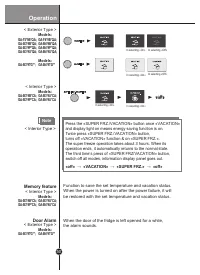
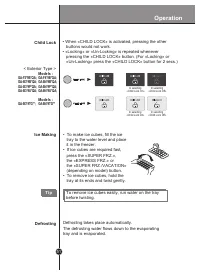
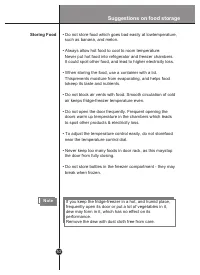
- 21 Блокировка; Совет; Размораживание
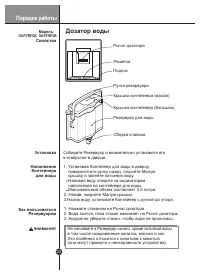
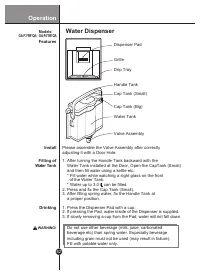
- 22 Дозатор воды
- 23 Рекомендации по
- 24 Установка ящика
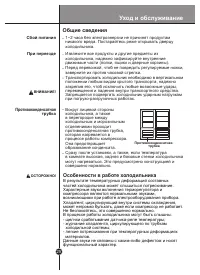
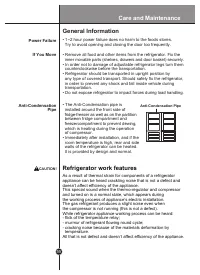
- 25 Общие сведения; Противоконденсатная; трубка; Особенности в работе холодильника; Уход и обслуживание
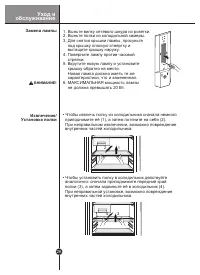
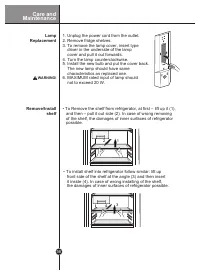
- 26 Уход и
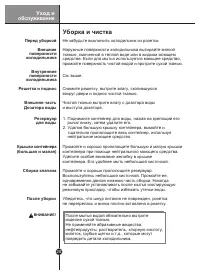
- 28 Уборка и чистка
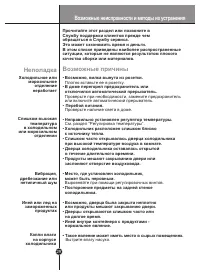
- 29 Возможные
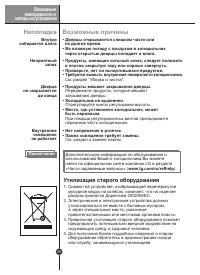
- 30 Утилизация
- 31 Меры предосторожности
- 32 Гарантийные обязательства не распространяются


