
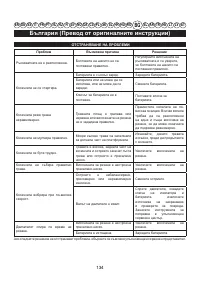
Газонокосилки Greenworks GD40LM46SP 40 В, с 1 АКБ 4 А*ч и ЗУ 2506807UB - инструкция пользователя по применению, эксплуатации и установке на русском языке. Мы надеемся, она поможет вам решить возникшие у вас вопросы при эксплуатации техники.
Если остались вопросы, задайте их в комментариях после инструкции.
"Загружаем инструкцию", означает, что нужно подождать пока файл загрузится и можно будет его читать онлайн. Некоторые инструкции очень большие и время их появления зависит от вашей скорости интернета.


English (Original Instructions)
EN
DE ES IT FR PT NL RU FI SV NO DA PL CS SK SL HR HU RO BG EL AR TR HE LT LV ET
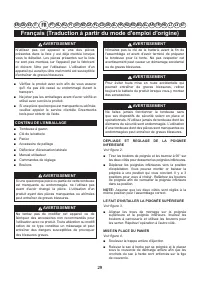
PACKING LIST
■
Lawn mower
■
Battery key
■
Grassbox
■
Mulching plug
■
Side discharge deflector
■
Operator’s manual
■
Knobs
■
Bolts
WARNING
If any parts are damaged or missing do not operate
this product until the parts are replaced. Using a
product with damaged or missing parts could result
in serious personal injury.
WARNING
Do not attempt to modify this product or create
accessories not recommended for use with this
product. Any such alteration or modification is misuse
and could result in a hazardous condition leading to
possible serious personal injury.
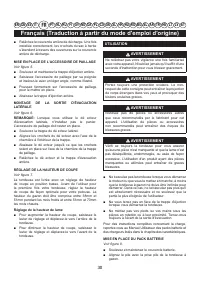
WARNING
Do not insert battery key until assembly is complete
and you are ready to mow. Failure to comply could
result in accidental starting and possible serious
personal injury.
WARNING
To prevent accidental starting that could cause
serious personal injury, always remove the battery
pack from the product when assembling parts.
WARNING
Never operate the mower without the proper safety
devices in place and working. Never operate the
mower with damaged safety devices. Operation of
this product with damaged or missing parts could
result in serious personal injury.
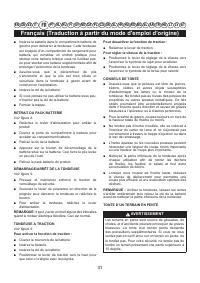
UNFOLDING AND ADJUSTING LOWER HANDLE
See figure 2.
■
Pull and rotate the handle knobs 90° on both sides
to loosen the lower handles on both sides.
■
Move the lower handles to the operating position.
You may raise or lower the handle to a position
comfortable for you. There are 3 positions for you to
choose. Release the handle knobs to lock the lower
handle into position.
NOTE:
Ensure both sides are set at the same position
for proper assembly.
INSTALLING THE UPPER HANDLE
See figure 3.
■
Align the mounting holes on the upper handle and the
lower handle. Insert the carriage bolts and use the
knobs to tighten them. Repeat the operation on the
other side.
INSTALLING THE GRASSBOX
See figure 4.
■
Lift the rear discharge door.
■
Lift the grass catcher by its handle and place under
the rear discharge door so that the hooks on the
grass catcher are seated on the door rod.
■
Release the rear discharge door. When installed co
rrectly, the hooks on the grass catcher will extend
through the openings on the rear discharge door.
INSTALLING THE MULCHING PLUG
See figure 5.
■
Lift and hold up the rear discharge door.
■
Grasp the mulching plug by its handle and insert it
at a slight angle, as shown.
■
Push the mulching plug securely into place.
■
Lower the rear discharge door.
INSTALLING SIDE DISCHARGE DEFLECTOR
See figure 6.
NOTE
: When using the side discharge deflector, do not
install the grassbox. The mulching plug should remain
installed.
■
Lift the side discharge door.
■
Align the hooks on the deflector with the hinge rod
on the underside of the door.
■
Lower the deflector until the hooks are secured on
the mulch door hinge rod.
■
Release the defl ector and side discharge door.
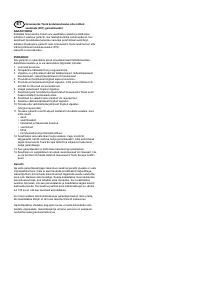
SETTING BLADE HEIGHT
See figure 7.
When shipped, the wheels on the mower are set to a
low-cutting position. Before using the mower for the first
time, adjust the cutting position to the height best suited
for your lawn. The average lawn should be between 38
mm and 51 mm during cool months and between 51
mm and 70 mm during hot months.
2


