
Газонокосилки Greenworks G40LM45 2500107UA - инструкция пользователя по применению, эксплуатации и установке на русском языке. Мы надеемся, она поможет вам решить возникшие у вас вопросы при эксплуатации техники.
Если остались вопросы, задайте их в комментариях после инструкции.
"Загружаем инструкцию", означает, что нужно подождать пока файл загрузится и можно будет его читать онлайн. Некоторые инструкции очень большие и время их появления зависит от вашей скорости интернета.


18
Deutsch (Übersetzung der originalen Anleitungen)
DE
FR EN
ES
IT
PT NL SV DA NO FI HU CS RU RO PL SL HR ET LT LV SK BG
18
English (Original instructions)
EN
FR
DE ES
IT
PT NL SV DA NO FI HU CS RU RO PL SL HR ET LT LV SK BG
is properly seated with shaft going through center
blade hole and the two blade posts inserted into their
respective holes on the blade. Make sure it is installed
with the curved ends pointing up toward the mower
deck and not down toward the ground. When seated
properly, the blade should be flat against the blade
holder.
9. Replace the blade insulator and spacer, then thread
the blade nut on the shaft and finger tighten.
NOTE: Make certain all parts are replaced in the exact
order in which they were removed.
10. Torque the blade nut down clockwise using a torque
wrench (not provided) to ensure the bolt is properly
tightened. The recommended torque for the blade nut
is 62.5~71.5 kgfcm (350-400 in.-lb.).
REPLACING WHEELS
See figure 12.
To ensure smooth operation of wheels, the wheel
assembly should be cleaned before storage.
1. Remove the opening pins and the washers.
2. Remove the wheel and replace with new wheel.
3. Replace the washers, pins and the wheel covers.
STORING THE MOWER
To lower the handle before storing:
1. Fully loosen the handle knobs on the sides of the
handle and fold the upper handle down.
2. Push inward on each side of the lower handle, and
lift the sides of the lower handle past the edges of the
handle mounting brackets. Avoid pinching or trapping
any cables.
REPLACING THE BATTERY
The mower battery is designed for maximum life; however,
like all batteries, it will eventually need to be replaced.
Charge the new battery pack before use.
To install a new battery:
1. Remove the isolator key.
2. Carefully unlock and remove the battery pack.
3. Install the new battery pack.
4. Take the old battery pack to a recycling center that
accepts lead acid/lithium ion batteries. Never dispose
of battery in fire or regular household trash.
WARNING
Do not at any time let brake fluids, gasoline, petroleum-
based products, penetrating oils, etc., come in contact
with plastic parts. Chemicals can damage, weaken, or
destroy plastic which may result in serious personal
injury.
Periodically check all nuts and bolts for proper tightness to
ensure safe operation of the mower.
Wipe the mower clean with a dry cloth occasionally. Do
not use water.
LUBRICATION
All of the bearings in this product are lubricated with a
suffi cient amount of high grade lubricant for the life of
the unit under normal operating conditions. Therefore, no
further bearing lubrication is required.
WARNING
Always protect hands by wearing heavy gloves and/or
wrapping the cutting edges of the blade with rags and
other material when performing blade maintenance.
Contact with the blade could result in serious personal
injury.
WARNING
Do not lubricate any of the wheel components.
Lubrication may cause the wheel components to fail
during use, which could result in serious personal injury
to the operator and/or mower or property damage.
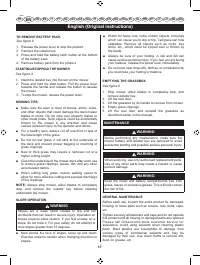
REPLACING THE CUTTING BLADE
See figure 10-11.
NOTE:
Only use authorised replacement blades. Replace
worn or damaged blades and bolts in sets to preserve
balance.
1. Stop the motor and remove the isolator key. Allow
blade to come to a complete stop.
2. Remove the battery pack.
3. Turn the mower on its side.
4. Wedge a block of wood between the blade and mower
deck to prevent the blade from turning.
5. Loosen the blade nut by turning it counterclockwise
(as viewed from bottom of mower) using a 15 mm
wrench or socket (not provided).
6. Remove the blade nut, spacer, blade insulator, and
blade.
7. Make certain the blade holder is pushed completely
against the motor shaft.
8. Place the new blade on the shaft. Ensure blade


