FIRST FA-2406-6 - Инструкция по эксплуатации
Настольные часы FIRST FA-2406-6 - инструкция пользователя по применению, эксплуатации и установке на русском языке. Мы надеемся, она поможет вам решить возникшие у вас вопросы при эксплуатации техники.
Если остались дополнительные вопросы — свяжитесь с нами через контактную форму.
DECLARATION OF CONFORMITY
Hereby, Timetron Warenhandelsgesellschaft m.b.H.,
Raimundgasse 1/8, 1020 Vienna, Austria declares that the radio
equipment type FA-2406-6 is in compliance with Directive
2014/53/EU. The full text of the EU declaration of conformity is
available at the following internet address: http://www.timetron.com
ENGLISH
INSTRUCTION MANUAL
GENERAL INFORMATION
This user manual accompanies this clock radio (below: radio). It
contains important information on use and care.
Before using the radio, read the user manual carefully. This
particularly applies to the safety notes. Failure to follow the
instructions in this user manual may result in injury or damage to the
radio.
Store the user manual for future use. It you pass the radio on to a
third party please be absolutely sure to include this user manual.
SAFETY INFORMATION
Proper use
The radio is designed as a clock radio. It is exclusively intended for
indoor private use and is not suitable for commercial purposes.
Only use the radio as described in this user manual. Any other use
is considered improper and may result in personal injury or damage
to property.
The manufacturer or vendor accepts no liability for damage caused
by improper or incorrect use.
SAFETY WARNINGS
1. Connect the radio only to an alternating current (AC) power
supply. Make sure the voltage corresponds with the voltage details
on the radio.
2. Do not use the radio if the housing or cord is defective or has
other visible damages. In the event of damage and to avoid risks,
only have the radio serviced by the manufacturer, its customer
service team or a similarly qualified person.
3. Do not attempt to use a damaged radio as this may result in
electric shock or death.
4. Do not use the radio in a wet or damp condition as this may result
in electric shock or death. Do not expose the radio to dripping or
splashing. Never expose the radio to rain or water.
5. Do not place containers of liquids on the radio.
6. If liquids are split on or into the radio, disconnect it from the power
outlet immediately.
7. If you do not intend to use the radio for a long period of time,
disconnect the radio from the power supply. To do so, remove the
power adapter from the power socket.
8. Ensure clear access without obstruction to the power adapter of
the radio during operation.
9. Long-term exposure to loud music may cause hearing damage. It
is best to avoid extreme volume when listening via earphones or
headphones, especially for extended periods of time.
10. Never place the radio near naked flame or other heat sources,
including direct sunlight.
11. Never insert objects into ventilation slots or other openings on the
radio.
12. Disconnect the radio from the power socket before lightning
storms.
13. Always pull the plug instead of the power cord to disconnect the
radio from the power socket.
14. Never open the housing of the radio. All repairs must be carried
out solely by a qualified electrician. There are no user-serviceable
parts inside.
15. Do not let the power cord hand over edge of table or counter, or
touch hot surfaces.
16. Only use attachments/accessories specified by the manufacturer.
17. Adequate ventilation with a minimum gap of 15 cm between the
radio and the surrounding surfaces is necessary to prevent heat
build-up.
18. Make sure that curtains or other objects never cover the radio.
19. Store the batteries so they are not accessible to children and
animals. If you suspect a battery has been swallowed, seek
immediate medical advice.
20. Store the batteries in a cool, dry place. Never expose the batteries
to excessive heat (e.g. direct sunlight) and never dispose of them
in a fire.
21. Ensure the correct polarity when inserting the battery. This is
shown in the battery compartment.
22. Remove the battery from the radio if it is dead. Also remove the
battery if you do not intend on using the radio for a prolonged
period of time. Otherwise, the battery may leak and cause
damage.
23. Battery should be installed or replaced only by an adult.
24. Keep the device away from children when the battery cover is
removed.
25. Remove the battery before disposing of the radio.
CAUTION
Danger of explosion if battery is incorrectly replaced.
Replace only with the same or equivalent type.
DISPOSAL OF YOUR OLD APPLIANCE OR BATTERY
1. When this crossed-out wheeled bin symbol is attached to a
product, it means the product is covered by the European
Directive.
2. All electrical and electronic products including battery should
be disposed of separately from the municipal waste stream via
designated collection facilities appointed by the government or the
local authorities.
3. The correct disposal of your old appliance will help prevent
potential negative consequences for the environment and human
health.
4. For more detailed information about disposal of your old
appliance, please contact your city office, waste disposal service
or the shop where you purchased the product.
WARNING
DO NOT INGEST BATTERY, CHEMICAL BURN HAZARD
This product contains a coin/button cell battery. If the coin/button cell
battery is swallowed, it can cause severe burns in just 2 hours and
can lead to death.
Keep new and used batteries away from children. If the battery
compartment does not close securely, stop using the product and
keep it away from children.
If you think batteries might have been swallowed or placed inside any
part of the body, seek immediate medical attention.
PRODUCT CONTENTS
Check to make sure that all contents have been received. Do not use
the radio if there is damage.
1. Clock radio
2. User manual
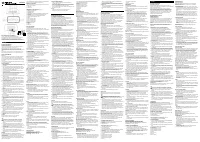
OVERVIEW OF THE PRODUCT
(see fig. 1)
1. MEM/M+ button/SET button
2. BACKWARD button
3. FORWARD button
4. SNOOZE button/SLEEP button/DIMMER button/DISPLAY ON/
OFF button
5. ALARM 1 button/VOL DOWN button/ALARM OFF button
6. ALARM 2 button/VOL UP button/ALARM OFF button
7. POWER button/ALARM OFF button
8. Display
9. Alarm 1 indicator (alarm)
10. Alarm 1 indicator (radio)
11. Alarm 2 indicator (alarm)
12. Alarm 2 indicator (radio)
13. Speaker
14. Battery compartment
15. Antenna
16. Power cord
GETTING STARTED
Connecting to power
Connect the power cord to a wall socket (AC 230V ~ 50Hz).
The radio is powered and in standby mode when you see the display
is switched on.
Backup system
• The radio is equipped with a backup system. It requires a 3V
lithium battery (type: CR2032). Insert the battery into the battery
compartment and make sure the positive and negative (+ or -)
sides of the battery are in contact with the corresponding terminals
in the battery compartment.
• If a power cut occurs, the radio automatically switches to the
battery power supply and keeps the clock and timer settings.
• To open the battery compartment, use a screwdriver to detach the
screw on the compartment door.
• When replacing the battery, do not disconnect the power adapter.
Otherwise, all clock and alarm settings will be lost.
SETTING THE CLOCK
1. In standby mode, press and hold the CLOCK button to enter the
clock setting mode.
• Setting the time: Press the BACKWARD button to set the hour
time and FORWARD button to set the minute time.
• Press the SET button to confirm each setting option.
Using the antenna
Unroll and extend the antenna to improve FM signal reception.
LISTENING TO RADIO
1. Press the POWER button to switch the radio on.
2. Press the BACKWARD or FORWARD button to adjust frequency.
3. Press and hold the BACKWARD or FORWARD button to
automatically tune to the next available FM station.
4. Press the POWER button to switch the radio off.
Setting preset stations
You can store up to 10 preset stations.
1. Tune to a station.
2. Press and hold the MEM/M+ button until “P01” (or the next
available preset slot) shows on the display.
3. Press the BACKWARD or FORWARD button to select a preset
number (P01-P10).
4. Press the SET button to confirm. The preset station has been set
up.
5. Press the MEM/M+ button repeatedly while listening to the radio
to select a preset station. Alternatively, press the MEM/M+ button
once and then press the BACKWARD or FORWARD button to
select a preset station.
USING THE ALARMS
Setting alarms
The radio lets you have 2 alarm settings. To set the alarms:
1. In standby mode, press and hold the ALARM 1 or ALARM 2 button
to enter the alarm time setting mode.
2. In the alarm setting mode, press the ALARM 1 or ALARM 2
repeatedly to cycle through the setting options:
Alarm time > Alarm sound source > Alarm frequency
• Setting alarm time: Press the BACKWARD to set the hour time
and FORWARD button to set the minute time.
• Setting alarm sound source: Press the BACKWARD or
FORWARD button to select the alarm or radio as the alarm sound
source. The corresponding alarm indicator will turn on according
to your selection.
Note:
When the alarm is set to radio mode, the alarm will use the last
tuned radio station.
Turning the alarms on or off
When the clock time is displayed, press and hold the ALARM 1 or
ALARM 2 button to enable or disable the respective alarm. The
corresponding Alarm 1 or Alarm 2 indicator (alarm or radio) will switch
on when the alarm is enabled.
Deactivating a sounding alarm
• Press any ALARM OFF button to switch off a sounding alarm.
• When the alarm sounds, the corresponding Alarm 1 or Alarm 2
indicator (alarm or radio) flashes on the display.
SNOOZE
• To temporarily silence a sounding alarm, press the SNOOZE
button. The alarm will sound again when the snooze period (9
minutes) is over.
• The corresponding Alarm 1 or Alarm 2 indicator (alarm or radio)
flashes on the display during the snooze period.
• To cancel the snooze period and the alarm, press any ALARM
OFF.
SLEEP
• This sleep function defines the duration of time before the radio
switches itself off automatically.
• When the radio is switched on, press the SLEEP button
repeatedly to select a sleep period (Options: Off, 10, 20, 30, 40,
50, 60, 70, 80 and 90 minutes).
• The radio will automatically switch off when the sleep period is
over.
• Press the SLEEP button to check the remaining time before the
radio switches off.
• Press the POWER button to cancel this function.
DISPLAY INFORMATION
• In radio mode, press the BACKWARD or FORWARD button once
to briefly change the display from the clock time to the current
radio frequency.
Display brightness
• In standby mode, press the DIMMER button to change the
brightness level of the display (low level, high level or off).
Display on/off
In standby mode, press and hold the DISPLAY ON/OFF button for 2
seconds. „OFF“ appears on the display. After 10 seconds, the display
turns off.
Press any button to turn the display on for another 10 seconds.
To deactivate this function, press and hold DISPLAY ON/OFF
button for 2 seconds. „ON“ appears on the display. Then the display
switches back to the clock mode.
Remark:
• Clock display with dimmer “low” is the default setting.
• It will consume more power if you set the clock display with
dimmer high.
SPECIFICATIONS
Tuner Range:
FM: 87.50 – 108.00 MHz
Number of preset radio stations:
10
Amplifier Rated Output Power:
200mW (RMS)
Power supply:
AC 230V ~ 50Hz, 5W
CARE AND MAINTENANCE
• Clean the radio with a soft damp cloth and let all parts dry
completely after cleaning.
• Do not use any aggressive cleaners, brushes with nylon bristles,
sharp or metallic cleaning utensils, knives, hard scrapers and the
like. They could damage the surfaces of the radio.
• Do not immerse the radio in water and do not let water getting into
the housing of the radio.
Storage
• Unplug the power and clean the radio before storage.
• Always store the radio in a dry and clean place.
DEUTSCH
BEDIENUNGSANLEITUNG
ALLGEMEINE INFORMATIONEN
Der Radiowecker (im Folgenden mit Radio bezeichnet) wird
mit diesem Benutzerhandbuch geliefert. Es enthält wichtige
Informationen zum Gebrauch und zur Pflege.
Bitte lesen Sie vor Gebrauch des Radios dieses Benutzerhandbuch
sorgfältig durch. Dies gilt insbesondere für die Sicherheitshinweise.
Die Nichteinhaltung der Anweisungen in diesem Benutzerhandbuch
kann zu Verletzungen oder Schäden am Radio führen.
Bewahren Sie das Benutzerhandbuch für ein späteres Nachschlagen
auf. Sollten Sie das Radio an Dritte weitergeben, dann muss dieses
Benutzerhandbuch mit ausgehändigt werden.
SICHERHEITSHINWEISE
Bestimmungsgemäße Nutzung
Das Gerät wurde als Radiowecker konzipiert. Es ist ausschließlich
für den privaten Gebrauch bestimmt und eignet sich nicht für
gewerbliche Zwecke.
Nehmen Sie das Radio gemäß den Angaben im Benutzerhandbuch in
Betrieb. Jede andere Verwendung gilt als nicht bestimmungsgemäß
und kann Verletzungen oder Sachschäden zur Folge haben.
Der Hersteller oder Verkäufer übernimmt keine Verantwortung für
Schäden, die durch unsachgemäßen Gebrauch entstanden sind.
SICHERHEITSHINWEISE
1. Schließen Sie das Radio nur an eine Steckdose mit Wechselstrom
(AC) an. Vergewissern Sie sich, dass die Netzspannung mit den
Spannungsangaben am Radio übereinstimmt.
2. Nehmen Sie das Radio nicht in Betrieb, wenn das Gehäuse oder
das Kabel defekt ist bzw. sichtbare Beschädigungen aufweist.
Im Falle von Schäden und zur Vermeidung von Risiken darf das
Radio nur durch den Hersteller, seinen technischen Support oder
einer ähnlich qualifizierten Person gewartet werden.
3. Versuchen Sie nicht, ein beschädigtes Radio in Betrieb zu
nehmen, da dies zu einem Stromschlag oder Lebensgefahr führen
kann.
4. Verwenden Sie das Radio nicht in nassen oder feuchten
Umgebungen, da dies zu einem Stromschlag oder Lebensgefahr
führen kann. Schützen Sie das Radio vor tropfenden oder
spritzenden Flüssigkeiten. Setzen Sie das Radio niemals Regen
oder Wasser aus.
5. Stellen Sie auf keinen Fall flüssigkeitsgefüllte Gegenstände auf
das Radio.
6. Wenn Flüssigkeiten auf dem Radio verschüttet wurden oder in
dieses eingedrungen sind, ziehen Sie sofort das Steckernetzteil
aus der Steckdose.
7. Trennen Sie das Radio bei längerer Nichtnutzung von der
Stromversorgung. Ziehen Sie dazu das Steckernetzteil aus der
Steckdose.
8. Achten Sie während des Betriebs auf einen ungehinderten
Zugang zum Steckernetzteil des Radios.
9. Die Dauerbelastung durch laute Musik kann zu Gehörschäden
führen. Vermeiden Sie am besten extreme Lautstärken, wenn Sie
über Ohr- oder Kopfhörer wiedergeben, besonders für längere
Zeit.
10. Stellen Sie das Radio niemals in der Nähe von offenem Feuer
oder anderen Wärmequellen einschließlich direktem Sonnenlicht
auf.
11. Stecken Sie niemals Gegenstände in Lüftungsschlitze oder in
andere Öffnungen des Radios.
12. Ziehen Sie das Steckernetzteil des Radios während eines
Gewitters aus der Steckdose.
13. Ziehen Sie den Steckernetzteil des Radios nie an der Zuleitung
aus der Steckdose, fassen Sie immer am Stecker an.
14. Öffnen Sie niemals das Gehäuse des Radios. Alle Reparaturen
müssen ausschließlich von qualifizierten Elektrikern durchgeführt
werden. Im Geräteinneren befinden sich keine zu wartenden Teile.
15. Lassen Sie das Versorgungskabel nicht über die Kanten einer
Tisch- oder Arbeitsplatte hängen und halten Sie es von heißen
Flächen fern.
16. Verwenden Sie nur vom Hersteller empfohlene Zubehörteile.
17. Halten Sie für eine ausreichende Belüftung einem Mindestabstand
von 15 cm zwischen dem Radio und den umliegenden Wänden
ein, um einen Hitzestau zu verhindern.
18. Sorgen Sie dafür, dass das Radio niemals mit Vorhängen und
anderen Gegenständen abgedeckt wird.
19. Bewahren Sie Batterien außerhalb der Reichweite von Kindern
und Tieren auf. Wenn Sie annehmen, dass eine Batterie
verschluckt wurde, suchen Sie sofort einen Arzt auf.
20. Bewahren Sie Batterien an einem kühlen und trockenen Ort auf.
Setzen Sie Batterien niemals übermäßiger Wärme (z.B. direktem
Sonnenlicht) aus und werfen Sie sie niemals ins Feuer.
21. Achten Sie beim Einlegen der Batterie auf korrekte Polarität.
Diese ist im Batteriefach dargestellt.
22. Entfernen Sie die Batterie aus dem Radio, wenn sie verbraucht
ist. Auch wenn das Radio längere Zeit nicht benutzt wird,
entfernen Sie die Batterie. Andernfalls kann die Batterie auslaufen
und Schäden verursachen.
23. Die Batterie sollte nur von einem Erwachsenen eingelegt oder
ersetzt werden.
24. Halten Sie Kinder vom Gerät fern, wenn der Batteriefachdeckel
entfernt wurde.
25. Entfernen Sie die Batterie vor der Entsorgung des Radios.
VORSICHT
Eine falsch eingelegte Batterie kann explodieren.
Nur mit dem gleichen oder ähnlichen Batterietyp austauschen.
ENTSORGUNG VON ALTGERÄTEN ODER BATTERIEN
1. Das Symbol auf dem Produkt weist darauf hin, dass dieses Gerät
die Anforderungen der europäischen Richtlinie erfüllt.
2. Alle Elektro- und Elektronik-Altgeräte, einschließlich Batterien,
müssen getrennt vom Hausmüll in staatlichen oder kommunalen
Sammeleinrichtungen und entsprechend den geltenden
Vorschriften entsorgt werden.
3. Durch korrekte Entsorgung des Altgeräts können schädliche
Auswirkungen auf die Umwelt und Personen vermieden werden.
4. Genauere Informationen zur Entsorgung des Altgeräts erhalten
Sie bei den örtlichen Behörden, der Entsorgungseinrichtung oder
dem Fachhändler, bei dem Sie das Produkt erworben haben.
WARNUNG
DIE BATTERIE NICHT VERSCHLUCKEN, VERÄTZUNGSGEFAHR
Dieses Produkt enthält eine Knopfzellen-Batterie. Wenn die
Knopfzellen-Batterie verschluckt wird, kann es in nur 2 Stunden zu
schweren Verätzungen kommen und diese können zum Tod führen.
Halten Sie neue und gebrauchte Batterien von Kindern fern. Lässt
sich das Batteriefach nicht sicher schließen, so verwenden Sie das
Produkt nicht mehr und halten Sie es von Kindern fern.
Wenden Sie sich unmittelbar an einen Arzt, wenn Sie glauben, dass
Batterien verschluckt oder in ein Körperteil eingeführt wurden.
LIEFERUMFANG
Achten Sie darauf, dass alle Komponenten vorhanden sind. Nehmen
Sie das Radio nicht in Betrieb, wenn es beschädigt ist.
1. Radiowecker
2. Benutzerhandbuch
AUFBAU DES GERÄTS
(siehe Abb. 1)
1. Taste SPEICHER/SPEICHER+/EINSTELL-Taste
2. Taste ZURÜCK
3. Taste WEITER
4. SCHLUMMER-Taste/SCHLAF-Taste/DIMMER-Taste/Taste
DISPLAY EIN/AUS
5. Taste WECKER 1/LAUTSTÄRKE VERRINGERN/ALARM OFF
(WECKER AUS)
6. Taste WECKER 2/LAUTSTÄRKE ERHÖHEN/WECKER AUS
7. Taste EIN/AUS/WECKER AUS
8. Display
9. Weckalarmanzeige 1 (Summer)
10. Weckalarmanzeige 1 (Radio)
11. Weckalarmanzeige 2 (Summer)
12. Weckalarmanzeige 2 (Radio)
13. Lautsprecher
14. Batteriefach
15. Antenne
16. Netzkabel
INBETRIEBNAHME
Anschluss an die Stromversorgung
Stecken Sie den Netzstecker in eine Netzsteckdose (230V ~ 50Hz).
Das Radio schaltet sich ein und geht in den Standby-Modus. Das
Display leuchtet auf.
Stützbatteriesystem
• Das Radio ist mit einem Stützbatteriesystem ausgestattet. Es
benötigt eine 3 V-Lithiumbatterie (Typ: CR2032). Setzen Sie die
Batterie in das Batteriefach ein und achten Sie darauf, dass der
Plus- und Minuspol (+ oder -) der Batterie die entsprechenden
Kontakte im Batteriefach berührt.
• Wenn ein Stromausfall auftritt, schaltet das Radio automatisch auf
die Stützbatterieversorgung und behält die Einstellung von Uhrzeit
und Wecker bei.
• Verwenden Sie zum Öffnen des Batteriefachs einen
Schraubendreher, um die Schraube am Batteriefachdeckel zu
lösen.
• Ziehen Sie beim Austausch der Batterie nicht das Steckernetzteil
aus der Steckdose. Andernfalls sind alle Uhrzeit- und Wecker-
Einstellungen gelöscht.
EINSTELLEN DER UHRZEIT
1. Halten Sie im Standby-Modus die Taste UHRZEIT gedrückt, um
den Uhrzeit-Einstellmodus aufzurufen.
• Uhrzeit einstellen: Stellen Sie die Stunden mit der Taste ZURÜCK
und die Minuten mit der Taste WEITER ein.
• Bestätigen Sie jede eingestellte Option durch Drücken der Taste
SET.
Antenne verwenden
Wickeln Sie die Antenne vollständig ab, um den UKW-Empfang zu
verbessern.
RADIOWIEDERGABE
1. Drücken Sie zum Einschalten des Radios die Taste EIN/AUS.
2. Stellen Sie die Frequenz mit der Taste ZURÜCK oder WEITER
ein.
3. Halten Sie die Taste ZURÜCK oder WEITER gedrückt, um
automatisch den nächsten UKW-Sender zu suchen.
4. Schalten Sie das Radio durch erneutes Drücken der Taste EIN/
AUS ab.
Sender voreinstellen
Sie können bis zu 10 voreingestellte Sender speichern.
1. Stellen Sie einen Sender ein.
2. Halten Sie die Taste MEM/M+ gedrückt, bis „P01“ (oder der
nächste verfügbare Speicherplatz) auf dem Display angezeigt
wird.
3. Wählen Sie mit der Taste ZURÜCK oder WEITER eine
Vorbelegungsnummer (P01 bis P10).
4. Bestätigen Sie mit der Taste SET. Der voreingestellte Sender
wurde eingerichtet.
5. Drücken Sie während der Radiowiedergabe wiederholt die Taste
MEM/M+, um einen voreingestellten Sender auszuwählen.
Alternativ können Sie die Taste MEM/M+ einmal und anschließend
die Taste ZURÜCK oder WEITER mehrmals drücken, um einen
voreingestellten Sender auszuwählen.
WECKER VERWENDEN
Wecker einstellen
Das Radio besitzt 2 Weckerein-stellungen. Einstellen der Wecker:
1. Halten Sie im Standby-Modus die Taste WECKER 1 oder
WECKER 2 gedrückt, um den Weckereinstellmodus aufzurufen.
2. Drücken Sie im Weckereinstellmodus wiederholt die Taste
WECKER 1 oder WECKER 2, um zyklisch durch die
Einstelloptionen zu gehen:
Weckzeit > Wecktonquelle > Weckhäufigkeit
• Weckzeit einstellen: Stellen Sie die Stunden mit der Taste
ZURÜCK und die Minuten mit der Taste WEITER ein.
• Wecktonquelle einstellen: Wählen Sie den Summer oder das
Radio mit der Taste ZURÜCK oder der Taste WEITER als
Wecktonquelle aus. Entsprechend Ihrer Auswahl leuchtet die
zugehörige Weckalarmanzeige auf.
Hinweis:
Wenn der Alarm auf Radiomodus eingestellt wurde, dann
wird für den Wecker der zuletzt eingestellte Radiosender verwendet.
Wecker ein- oder ausschalten
Halten Sie während der Uhrzeitanzeige die Taste WECKER 1
oder WECKER 2 gedrückt, um den entsprechenden Weckalarm
zu aktivieren oder zu deaktivieren. Die entsprechende
Weckalarmanzeige 1 oder 2 (Summer oder Radio) leuchtet auf, wenn
der Wecker aktiviert wurde.
Aktiven Weckalarm deaktivieren
• Drücken Sie eine Taste ALARM OFF, um einen aktivierten
Weckalarm auszuschalten.
• Wenn der Weckalarm ertönt, blinkt die entsprechende
Weckalarmanzeige 1 oder 2 (Summer oder Radio) auf dem
Display.
SCHLUMMERFUNKTION
• Drücken Sie zum vorübergehenden Stummschalten eines aktiven
Wecktons die Taste SNOOZE. Der Weckton ertönt nach Ablauf
der Schlummerdauer (9 Minuten) erneut.
• Die entsprechende Weckalarmanzeige 1 oder 2 (Summer oder
Radio) blinkt während der Schlummerdauer auf dem Display.
• Drücken Sie zum Abbrechen der Schlummerfunktion und des
Weckers eine Taste ALARM OFF.
EINSCHLAFFUNKTION
• Diese Funktion legt einen Zeitraum fest, nach dem sich das Radio
automatisch abschaltet.
• Drücken Sie bei eingeschaltetem Radio wiederholt die Taste
SLEEP, um eine Einschlafdauer auswählen (Optionen: Aus, 10,
20, 30, 40, 50, 60, 70, 80 und 90 Minuten).
• Das Radio schaltet sich nach Ablauf der Einschlafdauer
automatisch ab.
• Drücken Sie die Taste SLEEP, um die verbleibenden Zeit bis zum
Abschalten des Radios zu überprüfen.
• Brechen Sie diese Funktion mit der Taste EIN/AUS ab.
DISPLAY-ANZEIGE
• Drücken Sie im Radiomodus einmal kurz die Taste ZURÜCK oder
WEITER, um von der Uhrzeitanzeige zur Anzeige der aktuellen
Radiofrequenz zu wechseln.
Displayhelligkeit
• Drücken Sie im Standby-Modus die Taste DIMMER, um die
Displayhelligkeit auf (Niedrig, Hoch oder Aus) zu wechseln.
Display ein/aus
Halten Sie im Standby-Modus die Taste DISPLAY EIN/AUS 2
Sekunden lang gedrückt. Im Display wird „AUS“ angezeigt. Nach 10
Sekunden schaltet sich das Display wieder aus.
Drücken Sie eine beliebige Taste, um das Display für weitere 10
Sekunden anzeigen zu lassen.
Halten Sie 2 Sekunden lang die Taste DISPLAY EIN/AUS gedrückt,
um diese Funktion zu deaktivieren. Im Display wird „AN“ angezeigt.
Danach wechselt das Display zurück zur Anzeige der Uhrzeit.
Anmerkung:
• Die Standardeinstellung ist Uhrenanzeige mit Dimmer „dunkel“.
• Es wird mehr Energie verbraucht, wenn Sie die Uhrzeitanzeige
heller einstellen.
TECHNISCHE DATEN
Empfangsbereich:
UKW: 87,50 bis 108,00 MHz
Anzahl der vorbelegten Radiosender:
10
Nennausgangsleistung des Verstärkers:
200mW (RMS)
Stromversorgung:
AC: 230V ~ 50Hz, 5W
PFLEGE UND WARTUNG
• Reinigen Sie das Gerät mit einem weichen, angefeuchteten Tuch
und lassen Sie nach der Reinigung alle Teile vollständig trocknen.
• Verwenden Sie keine aggressiven Reinigungsmittel, Bürsten mit
Nylonborsten, scharfe oder metallische Reinigungsutensilien,
Messer, harte Schaber oder dergleichen. Diese können das
Äußere des Radios beschädigen.
• Tauchen Sie das Radio niemals in Wasser ein und achten Sie
darauf, dass kein Wasser in das Gehäuse des Radios eindringt.
Aufbewahrung
• Ziehen Sie vor der Aufbewahrung den Stecker aus der Steckdose
und reinigen Sie das Radio.
• Bewahren Sie das Radio an einem trockenen und sauberen Ort
auf.
ESPAÑOL
MANUAL DE INSTRUCCIONES
INFORMACIÓN GENERAL
Este manual de usuario acompaña este radio reloj (debajo: radio).
Contiene información importante acerca de su uso y cuidado.
Antes de usar la radio, lea detenidamente el manual de usuario. Esto
se aplica en particular a las notas sobre seguridad. En caso de no
seguir las instrucciones que aparecen en este manual de usuario se
pueden producir lesiones o daños a la radio.
Guarde el manual de usuario para su uso futuro. En caso de que
traspase la radio a una tercera persona, por favor, asegúrese
absolutamente de incluir este manual de usuario.
INFORMACIÓN DE SEGURIDAD
Uso adecuado
La radio está diseñada como un radio reloj. Está diseñada
exclusivamente para su uso privado interior y no es apta para una
finalidad comercial.
Use únicamente la radio tal y como se describe en este manual de
usuario. Cualquier otro uso se considerará inadecuado y puede
provocar lesiones personales o daños a la propiedad.
El fabricante o vendedor no asume ninguna responsabilidad por los
daños causados por el uso inadecuado o incorrecto.
ADVERTENCIAS DE SEGURIDAD
1. Conecte la radio a una alimentación de corriente alterna (CA).
Asegúrese de que la tensión se corresponde con los detalles de
tensión de la radio.
2. No use la radio si la carcasa o el cable están defectuosos o
presentan otros daños visibles. En caso de que presente daños
y para evitar riesgos, haga que el mantenimiento de la radio
lo realice el fabricante, su equipo de servicio al cliente o una
persona con una cualificación similar.
3. No intente usar una radio dañada ya que esto puede provocar
una descarga eléctrica o la muerte.
4. No use la radio en condiciones de agua o humedad ya que esto
puede provocar una descarga eléctrica o la muerte. No exponga
la radio a goteos o salpicaduras. Nunca exponga la radio a la
lluvia o el agua.
5. No coloque recipientes de líquido sobre la radio.
6. Si se derraman líquidos sobre o en la radio; desconéctela de la
salida de alimentación inmediatamente.
7. Si no tiene intención de usar la radio durante un periodo
prolongado de tiempo, desconecte la radio de la alimentación.
Para hacerlo, retire el adaptador de alimentación de la toma de
corriente.
8. Asegúrese de disponer de una acceso limpio, sin obstrucciones a
la radio durante su funcionamiento.
9. La exposición a largo plazo a música elevada puede causar
daños en la audición. Es mejor evitar el volumen extremo cuando
escuche mediante auriculares o audífonos, en especial durante
periodos prolongados de tiempo.
10. Nunca coloque la radio cerca de llamas vivas u otras Fuentes de
calor, incluyendo la luz solar directa.
11. Nunca inserte objetos en las ranuras de ventilación u otras
aberturas de la radio.
12. Desconecte la radio de la toma de alimentación antes de
tormentas eléctricas.
13. Tire siempre del enchufe en lugar del cable de alimentación para
desconectar la radio de la toma de corriente.
14. Nunca abra la carcasa de la radio. Todas las reparaciones deben
realizarlas únicamente un electricista cualificado. No hay piezas
utilizables por el usuario en su interior.
15. No deje que el cable de alimentación cuelgue sobre el borde de
una mesa o encimera, o toque superficies calientes.
16. Use únicamente los adjuntos/accesorios especificados por el
fabricante.
17. Es necesaria una ventilación adecuada con un espacio mínimo de
15 cm entre la radio y las superficies circundantes para evitar la
acumulación de calor.
18. Asegúrese de que nunca cubran la radio ni cortinas ni otros
objetos.
19. Guarde las pilas de forma que no sean accesibles a niños
ni animales. Si sospecha que se ha tragado la pila, busque
asistencia médica inmediatamente.
20. Guarde las pilas en un lugar fresco y seco. Nunca exponga las
pilas a un calor excesivo (por ejemplo, luz solar directa) y nunca
se deshaga de ellas en el fuego.
21. Asegúrese de tener la polaridad correcta cuando inserte las pilas.
Esta se muestra en el compartimento de las pilas.
22. Retire las pilas de la radio si están gastadas. Asimismo retire las
pilas si no tiene intención de usar la radio durante un periodo
prolongado de tiempo. En caso contario, la pila puede filtrarse y
provocar daños.
23. La pila debe instalarse y retirarse por parte de un adulto.
24. Mantenga el aparato alejado de niños cuando se retire la cubierta
de las pilas.
25. Retire las pilas antes de deshacerse de la radio.
PRECAUCIÓN
Riesgo de explosión si la pila se coloca de forma incorrecta.
Reemplace solamente con una igual o de tipo equivalente.
ELIMINACIÓN DE UN VIEJO APARATO O PILAS
1. Cuando se adjunta a un producto este cubo de basura con ruedas
tachado, indica que el producto está cubierto por la Directiva
Europea.
2. Todos los productos eléctricos o electrónicos incluyendo pilas
deben eliminarse de forma separada a la vía de residuos
municipales mediante los complejos de recogida designados por
el gobierno o las autoridades locales.
3. La correcta eliminación de su antiguo aparato ayudará a evitar
potenciales consecuencias negativas al medioambiente y a la
salud humana.
4. Para obtener información más detallada acerca de la eliminación
de su antiguo aparato, por favor, póngase en contacto con la
oficina de su ciudad, con el servicio de recogida de residuos o el
establecimiento donde adquirió el producto.
ADVERTENCIA
NO INGIERA LA BATERÍA, RIESGO DE QUEMADURAS QUÍMICAS
Este producto contiene una pila de botón/moneda. Si se ingiere la
pila moneda/botón puede provocar quemaduras graves en solo 2
horas y puede provocar la muerte.
Mantenga las pilas nuevas y usadas fuera del alcance de los niños.
Si el compartimento de las pilas no se cierra con seguridad, deje de
usar el producto y manténgalo alejado de los niños.
Si cree que se han podido tragar las pilas en cualquier parte del
cuerpo, busque inmediatamente asistencia médica.
CONTENIDOS DEL PRODUCTO
Compruébelo para asegurarse de que se han recibido todos los
contenidos. No use la radio si existen daños.
1. Radio reloj
2. Manual de Usuario
VISTA GENERAL DEL PRODUCTO
(véase fig. 1)
1. Botón MEM/M+/botón SET
2. Botón HACIA ATRÁS
3. Botón HACIA DELANTE
4. Botón SNOOZE/Botón SLEEP/Botón DIMMER /Botón DISPLAY
ON/OFF
5. Botón ALARM 1/botón VOL DOWN/botón ALARM OFF
6. Botón ALARM 2/botón VOL UP/botón ALARM OFF
7. Botón ENCENDIDO/botón ALARMA DESCONECTADA
8. Pantalla
9. Indicador de Alarma 1 (alarma)
10. Indicador de Alarma 1 (radio)
11. Indicador de Alarma 2 (alarma)
12. Indicador de Alarma 2 (radio)
13. Altavoz
14. Compartimento de las pilas
15. Antena
16. Cable de alimentación
EMPEZANDO
Conectarse a la alimentación
Conecte el cable de alimentación a una toma de pared (CA 230V ~
50Hz).
La radio tiene alimentación y está en modo en espera cuando vea
que la pantalla se enciende.
Sistema de soporte
• La radio está equipada con un sistema de soporte. Requiere
una pila de litio de 3V (tipo: CR2032). Inserte la pila en el
compartimento de las pilas y asegúrese de que los polos
positivo y negativo (+ o -) de la pila están en contacto con las
correspondientes terminales en el compartimento de las pilas.
• Si se produce un corte de alimentación, la radio cambia
automáticamente a la alimentación por pilas y mantiene la
configuración del reloj y del temporizador.
• Para abrir el compartimento de las pilas, use un destornillador
para separar el tornillo de la puerta del compartimento.
• Cuando sustituya la pila, no desconecte el adaptador de
alimentación. En caso contrario, se perderá la configuración del
reloj y la alarma.
CONFIGURAR EL RELOJ
1. En modo en espera, mantenga pulsado el botón RELOJ para
entrar en el modo de configuración del reloj.
• Configurar la hora: Pulse el botón HACIA ATRÁS para fijar el
tiempo de la hora y el botón HACIA DELANTE para fijar la hora de
los minutos.
• Pulse el botón SET para confirmar cada opción de configuración.
Uso de la antena
Desenrolle y extienda la antena para mejorar la recepción de la señal
FM.
ESCUCHAR LA RADIO
1. Pulse el botón POWER para encender la radio.
2. Pulse el botón HACIA ATRÁS o HACIA DELANTE para ajustar la
frecuencia.
3. Mantenga pulsado el botón HACIA ATRÁS o HACIA DELANTE
para sintonizar automáticamente la siguiente emisora FM.
4. Pulse el botón POWER para apagar la radio.
Configurar emisoras presintonizadas
Puede guardar hasta 10 emisoras presintonizadas.
1. Sintonizar una emisora.
2. Mantenga pulsado el botón MEM/M+ hasta que aparezca “P01” (o
el siguiente espacio de presintonización disponible) en la pantalla.
3. Pulse el botón HACIA ATRÁS o HACIA DELANTE para
seleccionar un número de presintonización (P01-P10).
4. Pulse el botón SET para confirmarlo. Se ha configurado esta
emisora presintonizada.
5. Pulse el botón MEM/M+ de forma reiterada mientras escucha
la radio para seleccionar una emisora presintonizada. De forma
alternativa, pulse el botón MEM/M+ una vez y después pulse el
botón HACIA ATRÁS o HACIA DELANTE para seleccionar una
emisora presintonizada.
USO DE LAS ALARMAS
Configurar las alarmas
La radio le permite configurar 2 alarmas. Para fijar las alarmas:
1. En modo en espera, mantenga pulsado el botón ALARM 1 o
ALARM 2 para entrar en el modo de configuración de la alarma.
2. En el modo de configuración de alarma, pulse ALARM 1 o
ALARM 2 de forma reiterada para cambiar entre las opciones de
configuración:
Hora de la alarma > Fuente del sonido de la alarma > Frecuencia de
la alarma
• Configurar la hora de la alarma: Pulse el botón HACIA ATRÁS
para fijar el tiempo de la hora y el botón HACIA DELANTE para
fijar el tiempo de los minutos.
• Configurar la fuente de los sonidos de la alarma: Pulse el botón
HACIA ATRÁS o HACIA DELANTE para seleccionar la alarma o
la radio como la fuente de sonido de la alarma. El indicador de la
alarma correspondiente se encenderá conforme a su selección.
Nota:
Cuando la alarma está fijada en modo radio, la alarma
empleará la última emisora de radio sintonizada.
Encender y apagar las alarmas
Cuando se muestre la hora del reloj, mantenga pulsado el botón
ALARM 1 o ALARM 2 para activar o desactivar la respectiva alarma.
El indicador correspondiente de Alarma 1 o Alarma 2 (alarma o radio)
se encenderá cuando se active la alarma.
Desactivar una alarma que suena
• Pulse el botón ALARMA DESCONECTADA para desconectar una
alarma que suena.
• Cuando suene la alarma, el indicador correspondiente de Alarma
1 o Alarma 2 (alarma o radio) parpadea en la pantalla.
RETARDO
• Para silenciar temporalmente la alarma que suena, pulse el botón
SNOOZE. La alarma volverá a sonar cuando finalice el periodo de
retardo (9 minutos).
• El indicador correspondiente de Alarma 1 o Alarma 2 (alarma o
radio) parpadea en la pantalla durante el periodo de retardo.
• Para cancelar el periodo de retardo y la alarma pulse ALARMA
DESCONECTADA.
RETARDO
• Esta función retardo define la duración de tiempo antes de que la
radio se apague automáticamente.
• Cuando la radio está conectada, pulse el botón SLEEP de forma
reiterada para seleccionar un periodo de retardo (Opciones:
Desconectado, 10, 20, 30, 40, 50, 60, 70, 80 y 90 minutos).
• La radio se apagará automáticamente cuando finalice el periodo
de retardo.
• Pulse el botón SLEEP para comprobar el tiempo restante antes
de que la radio se apague.
• Pulse el botón POWER para cancelar esta función.
INFORMACIÓN EN PANTALLA
• En modo radio, pulse el botón ATRÁS o ADELANTE una vez para
cambiar la pantalla desde la hora del reloj a la frecuencia de radio
actual.
Brillo de la pantalla
• En modo en espera, pulse el botón DIMMER para cambiar el nivel
de brillo de la pantalla (nivel bajo0, nivel alto o desconectado).
Pantalla conectada/desconectada
En modo en espera, mantenga pulsado el botón DISPLAY ON/OFF
durante 2 segundos. „OFF“ aparece en la pantalla. Después de 10
segundos la pantalla se apaga.
Pulse cualquier botón para encender la pantalla durante otros 10
segundos.
Para desactivar esta función, mantenga pulsado el botón DISPLAY
ON/OFF durante 2 segundos. „ON“ aparece en la pantalla.
Posteriormente, la pantalla vuelve a cambiar al modo reloj.
Nota:
• La pantalla del reloj con atenuador “bajo” es la configuración por
defecto.
• Consumirá más energía si fija la pantalla del reloj con el regulador
de intensidad alto.
ESPECIFICACIONES
Alcance del sintonizador:
FM: 87.50 - 108.00 MHz
Número de emisoras de radio presintonizadas:
10
Potencia de salida nominal del amplificador:
200mW (RMS)
Alimentación:
CA 230V ~ 50Hz, 5W
CUIDADO Y MANTENIMIENTO
• Limpie la radio con un paño húmedo suave y deje que todas las
piezas se sequen completamente tras limpiarlo.
• No use limpiadores agresivos, cepillos con cerdas de nylon,
utensilios de limpieza afilados o metálicos, cuchillos, espátulas y
similares. Podría dañar las superficies de la radio.
• No sumerja la radio en agua y no deje que el agua entre en la
carcasa de la radio.
Almacenamiento
• Desconecte de alimentación y limpie la radio antes de usarla.
• Guarde siempre la radio en un lugar seco y limpio.
POLSKI
INSTRUKCJA OBSŁUGI
INFORMACJE OGÓLNE
Niniejsza instrukcja obsługi dostarczana jest wraz z radiem z
zegarem (zwanym dalej: radiem). Znajdziesz w niej istotne informacje
dotyczące obsługi i konserwacji.
Zanim użyjesz radia, uważnie przeczytaj instrukcję obsługi.
Dotyczy to w szczególności informacji na temat bezpieczeństwa.
Nieprzestrzeganie wskazówek zawartych w niniejszej instrukcji
obsługi może skutkować obrażeniami lub uszkodzeniem radia.
Zachowaj instrukcję, aby móc z niej później skorzystać. W razie
przekazania radia innej osobie, pamiętaj aby wraz z radiem
przekazać również instrukcję obsługi.
INFORMACJE DOTYCZĄCE
BEZPIECZEŃSTWA
Poprawne użytkowanie
Niniejsze radio jest radiem z zegarem. Zostało zaprojektowane do
użytku domowego i nie może być wykorzystywane komercyjnie.
Korzystając z radia, zawsze przestrzegaj zamieszczonych tu
wskazówek. Korzystanie z radia w inny sposób jest uznawane za
niepoprawne i może prowadzić do obrażeń ciała lub uszkodzenia
mienia.
Producent i sprzedawca nie ponoszą odpowiedzialności w razie
szkód wywołanych niewłaściwą lub nieprawidłową obsługą
urządzenia.
OSTRZEŻENIA DOTYCZĄCE BEZPIECZEŃSTWA
1. Podłączaj radio wyłącznie do źródeł zasilania prądem
przemiennym. Upewnij się, że napięcie źródła jest zgodne z
napięciem wskazanym na obudowie radia.
2. Nie korzystaj z radia, jeżeli jego obudowa lub przewód są
uszkodzone lub występują inne widoczne uszkodzenia. W
przypadku uszkodzenia urządzenia, aby ograniczyć ryzyko, oddaj
radio do naprawy producentowi, serwisowi producenta lub innej
osobie posiadającej podobne kwalifikacje.
3. Nie używaj uszkodzonego radia, gdyż grozi to porażeniem
prądem lub śmiercią.
4. Nie korzystaj z radia w mokrych lub wilgotnych pomieszczeniach,
gdyż grozi to porażeniem prądem lub śmiercią. Nie narażaj radia
na działanie kapiącej wody lub zachlapanie. Chroń radio przed
deszczem i wodą.
5. Nie ustawiaj na radiu zbiorników z płynami.
6. W razie rozlania płynu na radio lub do jego wnętrza natychmiast
odłącz radio od zasilania.
7. Jeśli nie zamierzasz korzystać z radia przez dłuższy czas, odłącz
je od źródła zasilania. Aby to zrobić, odłącz zasilacz od gniazda
ściennego.
8. Gdy radio jest włączone należy zadbać o swobodny dostęp do
jego zasilacza.
9. Długie słuchanie głośnej muzyki może spowodować uszkodzenie
słuchu. Zalecamy unikanie nastawiania maksymalnej głośności
podczas korzystania ze słuchawek, zwłaszcza przez dłuższy czas.
10. Nigdy nie umieszczaj radia w pobliżu otwartego płomienia
lub innych źródeł ciepła, ani w miejscu bezpośrednio
nasłonecznionym.
11. Nigdy nie umieszczaj żadnych przedmiotów w otworach
wentylacyjnych lub innych otworach w obudowie radia.
12. Przed burzą z wyładowaniami atmosferycznymi odłącz radio od
zasilania.
13. Aby odłączyć radio od zasilania, zawsze ciągnij za wtyczkę, a
nigdy za przewód zasilający.
14. Nigdy nie otwieraj obudowy radia. Wszelkie naprawy należy
zlecać wykwalifikowanemu elektrykowi. Urządzenie nie zawiera
części, które mogą być serwisowane przez użytkownika.
15. Zadbaj o to, aby przewód zasilający nie zwisał z blatu lub stołu,
ani nie dotykał gorących powierzchni.
16. Stosuj wyłącznie przystawki/akcesoria wskazane przez
producenta.
17. Aby zapobiec przegrzaniu urządzenia, należy zapewnić odstęp
wynoszący minimum 15 cm pomiędzy radiem, a otaczającymi go
powierzchniami.
18. Zadbaj o to, aby zasłony lub inne przedmioty nie zasłaniały radia.
19. Baterie przechowuj w miejscu niedostępnym dla dzieci i zwierząt.
Jeśli podejrzewasz połknięcie baterii, natychmiast wezwij pomoc
medyczną.
20. Przechowuj baterie w chłodnym, suchym miejscu. Chroń
baterie przed nadmiernym rozgrzaniem (np. bezpośrednie
nasłonecznienie) i nigdy nie wrzucaj ich do ognia.
21. Umieszczając baterie, zwracaj uwagę na ich polaryzację.
Polaryzację oznaczono w komorze baterii.
22. Wyjmij rozładowane baterie z radia. Jeśli nie będziesz korzystać
z radia przez dłuższy czas, wyjmij z niego baterie. W przeciwnym
razie z baterii może wyciec elektrolit i wywołać uszkodzenia.
23. Instalację i wymianę baterii może przeprowadzać wyłącznie osoba
dorosła.
24. Gdy pokrywa komory baterii jest zdjęta, przechowuj radio w
miejscu niedostępnym dla dzieci.
25. Wyjmij baterie przed oddaniem radia do utylizacji.
PRZESTROGA
Ryzyko wybuchu w przypadku włożenia baterii w niewłaściwy sposób.
Wymieniaj tylko na ten sam lub równoważny typ.
UTYLIZACJA ZUŻYTEGO URZĄDZENIA LUB BATERII
1. Produkt oznaczony symbolem przekreślonego kosza na śmieci
podlega dyrektywie Unii Europejskiej w zakresie utylizacji
odpadów.
2. Produkty elektryczne i elektroniczne oraz baterie powinny być
utylizowane oddzielnie od odpadów z gospodarstw domowych, za
pośrednictwem specjalnych instytucji mianowanych przez rząd lub
samorząd.
3. Poprawna utylizacja zużytego sprzętu pomaga ograniczyć
potencjalny negatywny wpływ na środowisko naturalne i zdrowie
ludzkie.
4. Więcej informacji na temat utylizacji zużytego produktu uzyskasz
od władz lokalnych, firmy zajmującej się odbiorem odpadów lub
sklepu, w którym kupiłeś produkt.
OSTRZEŻENIE
POŁKNIĘCIE BATERII GROZI POWSTANIEM OPARZEŃ
CHEMICZNYCH
Niniejszy produkt zawiera małą baterię guzikową. Połknięcie baterii
miniaturowych może wywołać poważne oparzenia w zaledwie 2
godziny i doprowadzić do śmierci.
Przechowuj nowe i zużyte baterie w miejscu niedostępnym dla
dzieci. Jeżeli komora baterii nie domyka się, nie używaj produktu i
przechowuj go w miejscu niedostępnym dla dzieci.
W razie podejrzenia połknięcia baterii lub umieszczenia jej w innej
wewnętrznej części ciała, bezzwłocznie wezwij pomoc medyczną.
ZAWARTOŚĆ OPAKOWANIA
Sprawdź, czy w opakowaniu znajdują się wszystkie elementy. Nie
używaj radia, jeżeli uległo uszkodzeniu.
1. Radio z zegarem
2. Podręcznik użytkownika
OGÓLNE INFORMACJE O PRODUKCIE
(patrz il. 1)
1. Przycisk PAM./P+/Przycisk USTAWIANIE
2. Przycisk WSTECZ
3. Przycisk DO PRZODU
4. Przycisk DRZEMKA/Przycisk SEN/Przycisk PRZYCIEMNIENIE/
Przycisk WŁ./WYŁ. WYŚWIETLACZA
5. Przycisk BUDZIK 1/Przycisk GŁOŚ. W DÓŁ/Przycisk BUDZIK
WYŁ.
6. Przycisk BUDZIK 2/Przycisk GŁOŚ. W GÓRĘ/Przycisk BUDZIK
WYŁ.
7. Przycisk ZASILANIE/Przycisk BUDZIK WYŁ.
8. Wyświetlacz
9. Oznaczenie Budzik 1 (budzik)
10. Oznaczenie Budzik 1 (radio)
11. Oznaczenie Budzik 2 (budzik)
12. Oznaczenie Budzik 2 (radio)
13. Głośnik
14. Komora baterii
15. Antena
16. Sznur sieciowy
PIERWSZE KROKI
Podłączanie zasilania
Podłącz kabel zasilania do gniazda ściennego (AC 230V, 50Hz).
Radio włączy się i przejdzie w tryb czuwania, o czym świadczy
włączony wyświetlacz.
System podtrzymujący
• Radio posiada system podtrzymujący. System wymaga użycia
baterii litowej 3V (typ: CR2032). Umieść baterię w komorze baterii,
upewniając się, że jest właściwie zorientowana, aby bieguny
dodatni i ujemny (+ i -) dotykały odpowiednich styków w komorze
baterii.
• W razie odcięcia zasilania radio automatycznie przełączy się na
zasilanie bateryjne i zachowa ustawienia zegara i budzika.
• Aby otworzyć komorę baterii, użyj śrubokrętu i wykręć śrubkę z
pokrywy komory baterii.
• Nie odłączaj zasilacza urządzenia na czas wymiany baterii. W
przeciwnym razie ustawienia zegara i budzika zostaną utracone.
USTAWIANIE ZEGARA
1. W trybie czuwania naciśnij i przytrzymaj przycisk ZEGAR, aby
uruchomić tryb konfiguracji zegara.
• Ustawianie czasu: Naciśnij przycisk WSTECZ, aby ustawić
godziny i przycisk DO PRZODU, aby ustawić minuty.
• Naciśnij przycisk SET, aby zatwierdzić poszczególne wartości
ustawień.
Korzystanie z anteny
Rozwiń i rozprostuj antenę, aby poprawić odbiór sygnału FM.
SŁUCHANIE RADIA
1. Naciśnij przycisk ZASILANIE, aby włączyć radio.
2. Naciśnij przycisk WSTECZ lub DO PRZODU, aby zmienić
częstotliwość.
3. Naciśnij i przytrzymaj przycisk WSTECZ lub DO PRZODU, aby
automatycznie przejść do częstotliwości najbliższej dostępnej
stacji FM.
4. Naciśnij przycisk ZASILANIE, aby wyłączyć radio.
Zapamiętywanie stacji radiowych
Możesz zapisać do 10 częstotliwości stacji radiowych.
1. Ustaw częstotliwość stacji radiowej.
2. Naciśnij i przytrzymaj przycisk MEM/M+ do momentu wyświetlenia
wskazania „P01” (lub kolejnego wolnego numeru pamięci).
3. Naciśnij przycisk WSTECZ lub DO PRZODU, aby wybrać numer
pamięci (P01-P10).
4. Naciśnij przycisk SET, aby potwierdzić. Częstotliwość radiostacji
została zapisana w pamięci.
5. Aby wybrać zapamiętaną stację, po włączeniu radia kilkakrotnie
naciśnij przycisk MEM/M+. Możesz również jednokrotnie nacisnąć
przycisk MEM/M+, a następnie nacisnąć przycisk WSTECZ lub
DO PRZODU, aby wybrać zapamiętaną stację.
KORZYSTANIE Z BUDZIKA
Ustawianie budzika
Radio umożliwia skonfigurowanie 2 budzików. Konfiguracja budzików:
1. W trybie czuwania naciśnij i przytrzymaj przycisk BUDZIK 1 lub
BUDZIK 2, aby uruchomić tryb konfiguracji czasu budzenia.
2. W trybie konfiguracji budzika kilkakrotnie naciśnij przycisk
BUDZIK 1 lub BUDZIK 2, aby przewinąć opcje ustawień:
Czas budzenia > Źródło dźwięku budzika > Częstotliwość budzika
• Konfiguracja czasu budzenia: Naciśnij WSTECZ, aby ustawić
godziny i przycisk DO PRZODU, aby ustawić minuty.
• Konfiguracja źródła dźwięku budzika: Naciśnij przycisk WSTECZ
lub DO PRZODU, aby wybrać źródło dźwięku: alarm lub radio.
Włączony zostanie wskaźnik odpowiedniego trybu budzika.
Uwaga:
Gdy budzik jest ustawiony na tryb radia, budzik użyje
ostatnio dostrojonej stacji radiowej.
Włączanie lub wyłączanie budzików
Gdy wyświetlany jest zegar, naciśnij i przytrzymaj przycisk BUDZIK 1
lub BUDZIK 2, aby aktywować lub anulować dany budzik. Gdy budzik
jest ustawiony, włączony jest odpowiedni znacznik Budzik 1 lub
Budzik 2 (alarm lub radio).
Wyłączanie budzika w czasie budzenia
• Aby wyłączyć budzik uruchomiony zgodnie z czasem budzenia,
naciśnij dowolny przycisk ALARM OFF.
• Po uruchomieniu się budzika, na wyświetlaczu miga
odpowiadający mu wskaźnik Budzika 1 lub Budzika 2 (alarm lub
radio).
DRZEMKA
• Aby na chwilę wyciszyć uruchomiony budzik, naciśnij przycisk
SNOOZE. Budzik zostanie uruchomiony ponownie po upłynięciu
czasu drzemki (9 minut).
• W trakcie trybu drzemki na wyświetlaczu miga wskaźnik Budzika 1
lub Budzika 2 (alarm lub radio).
• Aby anulować tryb drzemki i budzik, naciśnij dowolny przycisk
ALARM OFF.
SLEEP
• Funkcja Sleep umożliwia wybór czasu po jakim radio zostanie
automatyczne wyłączone.
• Gdy radio jest włączone, kilkakrotnie naciśnij przycisk SLEEP, aby
wybrać czas wyłączenia (opcje: Wyłączone, 10, 20, 30, 40, 50, 60,
70, 80 i 90 minut).
• Gdy upłynie czas automatycznego wyłączenia, radio wyłączy się.
• Naciśnij przycisk SLEEP, aby sprawdzić ile czasu pozostało do
wyłączenia radia.
• Naciśnij przycisk ZASILANIE, aby anulować tę funkcję.
WYŚWIETLANIE INFORMACJI
• W trybie radia jednokrotnie naciśnij przycisk WSTECZ lub
DO PRZODU, aby na chwilę zmienić wyświetlanie czasu na
wyświetlanie częstotliwości wybranej stacji radiowej.
Jasność wyświetlacza
• W trybie czuwania naciśnij przycisk DIMMER, aby zmienić jasność
wyświetlacza (poziom niski, poziom wysoki lub wyłączony).
Wł./wył. wyświetlacza
W trybie oczekiwania wcisnąć i przytrzymać przez 2 sekundy przycisk
WYŚWIETLACZ WŁ./WYŁ. Na wyświetlaczu pojawi się „WYŁ.”. Po
10 sekundach wyświetlacz się wyłączy.
Naciśnij którykolwiek przycisk, by włączyć wyświetlacz na kolejne 10
sekund.
Aby wyłączyć tę funkcję, należy wcisnąć i przytrzymać przez 2
sekundy przycisk WYŚWIETLACZ WŁ./WYŁ. Na wyświetlaczu pojawi
się „WŁ.” Następnie wyświetlacz z powrotem przełączy się do trybu
zegara.
Uwaga:
• Domyślnym ustawieniem wyświetlacza zegara z przyciemnieniem
jest „niskie”.
• Wybór jaśniejszego podświetlenia będzie skutkował wyższym
zużyciem energii.
SPECYFIKACJA
Zakres strojenia:
FM: 87,50 - 108,00 MHz
Liczba zapamiętywanych stacji:
10
Znamionowa moc wyjścia wzmacniacza:
200mW (RMS)
Zasilanie:
AC 230V, 50Hz, 5W
KONSERWACJA
• Oczyść radio za pomocą miękkiej, wilgotnej ściereczki i pozostaw
je do wyschnięcia.
• Nie stosuj agresywnych środków czyszczących, szczotek
z nylonowego włosia, ostrych lub metalowych przyrządów
czyszczących, noży, twardych skrobaczek itp. Można w ten
sposób uszkodzić powierzchnię obudowy radia.
• Nie zanurzaj radia w wodzie i chroń radio przed przedostaniem się
wody do jego wnętrza.
Przechowywanie
• Przed schowaniem nieużywanego radia, odłącz zasilacz od
gniazdka i oczyść radio.
• Przechowuj radio w czystym i suchym miejscu.
1
FA-2406-6
"Загрузка инструкции" означает, что нужно подождать пока файл загрузится и можно будет его читать онлайн. Некоторые инструкции очень большие и время их появления зависит от вашей скорости интернета.
Была ли эта инструкция полезной?
Об этой инструкции
- Бренд
- FIRST
- Модель
- FA-2406-6
- Тип документа
- Инструкция по эксплуатации
- Категория
- Настольные часы
- Язык(и)
- Русский
- Страницы
- 4
- Размер файла
- 563,7 KB
- Формат
Задать вопрос
Похожие инструкции
Ещё модели: настольные часы FIRST
 FIRST FA-2406-1 Инструкция по эксплуатации
 FIRST FA-2406-2 Инструкция по эксплуатации
 FIRST FA-2406-5 Инструкция по эксплуатации
 FIRST FA-2409-1-RF Инструкция по эксплуатации
 FIRST FA-2410 Инструкция по эксплуатации
 FIRST FA-2416-1 Инструкция по эксплуатации
 FIRST FA-2419-3 Инструкция по эксплуатации
 FIRST FA-2420-3 Инструкция по эксплуатации
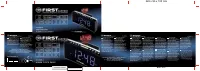 FIRST FA-2420-4 Инструкция по эксплуатации
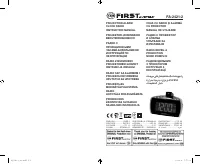 FIRST FA-2421-2 Инструкция по эксплуатации
 FIRST FA-2421-4 Инструкция по эксплуатации
 FIRST FA-2421-5 Инструкция по эксплуатации
 FIRST FA-2421-7 Инструкция по эксплуатации
Другая техника FIRST
 FIRST 750Вт / 1250Вт / 2000Вт, FA-5570-2 White Инструкция по эксплуатации
 FIRST 1000/2000 Вт, FA-5571-1 White Инструкция по эксплуатации
 FIRST 1000Вт / 2000Вт, FA-5571-8-RE Инструкция по эксплуатации
 FIRST 1500 Вт/3000 Вт FA-5565 White Инструкция по эксплуатации
 FIRST 2460-5 BA Инструкция по эксплуатации
 FIRST 2461-2 Инструкция по эксплуатации
 FIRST 2461-5 BA Инструкция по эксплуатации