
Электрорубанки Bosch GHO 6500 - инструкция пользователя по применению, эксплуатации и установке на русском языке. Мы надеемся, она поможет вам решить возникшие у вас вопросы при эксплуатации техники.
Если остались вопросы, задайте их в комментариях после инструкции.
"Загружаем инструкцию", означает, что нужно подождать пока файл загрузится и можно будет его читать онлайн. Некоторые инструкции очень большие и время их появления зависит от вашей скорости интернета.


18
| English
1 609 92A 4LE | (17.10.2018)
Bosch Power Tools
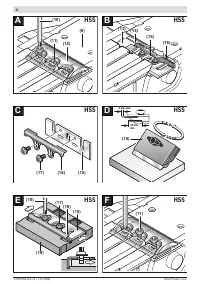
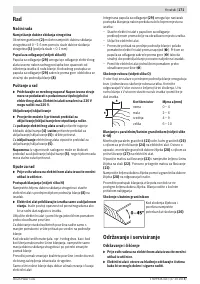
Fitting the Planer Blades (see figures I–J)
The guide groove on the planer blade ensures a constant,
even height setting when changing or turning the blade.
If necessary, clean the blade seat in the blade head
(13)
and
the planer blade
(20)
.
When fitting the planer blade, ensure that it is correctly
seated in the mounting guide of the blade head
(13)
.
The planer blade must be fitted and aligned with the
centre
of the planer base plate
(8)
. Then tighten the three fasten-
ing screws
(11)
using the Torx key
(10)
, following the tight-
ening sequence (
①②③
) specified on the clamping jaw
(12)
.
Note:
Check that the fastening screws
(11)
are firmly
tightened before start-up. Turn the blade head
(13)
by hand
and ensure that the planer blades are not brushing against
anything.
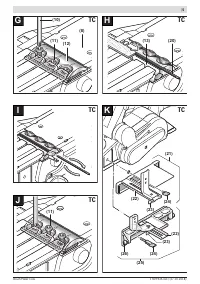
Use of conversion kits
Changing from HSS to HM/TC
The HM/TC adapter enables a planer fitted with HSS planer
blades to be changed over to HM/TC planer blades.
– Unscrew the three fastening screws
(11)
using the Torx
key
(10)
and remove the clamping jaw
(12)
.
– Push the retaining clip
(16)
together with the planer
blade
(15)
out of the blade head
(13)
and/or the guide
groove
(14)
.
– Remove the screws
(17)
.
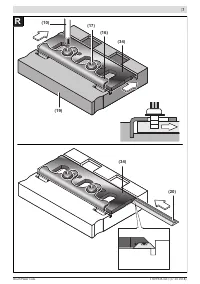
– Place the retaining clip
(16)
and the adapter
(34)
in the
setting gauge
(19)
. The retaining clip
(16)
must slot into
the groove on the setting gauge (see figure
R
).
– Push the HM/TC planer blade
(20)
into the adapter
(34)
from the side. The ridge on the adapter
(34)
must slot
into the groove on the HM/TC planer blade (see figure
R
).
– Tighten the screws
(17)
.
– Insert the retaining clip
(16)
together with the adapter
(34)
and the planer blade
(15)
into the blade head
(13)
and/or the guide groove
(14)
.
– Put the clamping jaw
(12)
on and insert the fastening
screws
(11)
, which do not yet need to be screwed in
tightly.
– The planer blade must be fitted and aligned with the
centre of the planer base plate
(8)
. Then tighten the
three fastening screws
(11)
using the Torx key
(10)
, fol-
lowing the tightening sequence (
①②③
) specified on
the clamping jaw
(12)
.
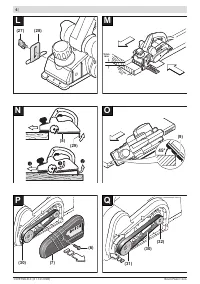
Changing from HM/TC to HSS
Planers fitted with HM/TC planer blades can be changed
over to HSS planer blades.
– Unscrew the three fastening screws
(11)
using the Torx
key
(10)
and remove the clamping jaw
(12)
.
– Push the retaining clip
(16)
together with the planer
blade
(15)
and/or the HM/TC adapter
(34)
out of the
blade head
(13)
.
– Remove the screws
(17)
.
– Fit the assembled HSS planer blade (see "Fitting the
with the
centre of the planer base plate
(8)
.
– Put the clamping jaw
(12)
on and tighten the three
fastening screws
(11)
using the Torx key
(10)
, following
the tightening sequence (
①②③
) specified on the
clamping jaw
(12)
.
Dust/chip extraction
The dust from materials such as lead paint, some types of
wood, minerals and metal can be harmful to human health.
Touching or breathing in this dust can trigger allergic reac-
tions and/or cause respiratory illnesses in the user or in
people in the near vicinity.
Certain dusts, such as oak or beech dust, are classified as
carcinogenic, especially in conjunction with wood treatment
additives (chromate, wood preservative). Materials contain-
ing asbestos may only be machined by specialists.
– Use a dust extraction system that is suitable for the ma-
terial wherever possible.
– Provide good ventilation at the workplace.
– It is advisable to wear a P2 filter class breathing mask.
The regulations on the material being machined that apply in
the country of use must be observed.
u
Avoid dust accumulation at the workplace.
Dust can
easily ignite.
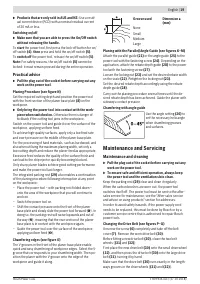
Clean the chip ejector
(3)
regularly. Clean a clogged chip
ejector using a suitable tool, e.g. a piece of wood, com-
pressed air, etc.
u
Do not allow the chip ejector to come into contact with
your hands.
You may be injured by rotating parts.
Always use an external dust extraction device or chip/dust
bag to guarantee optimum suction.
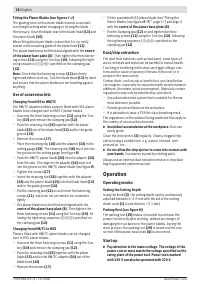
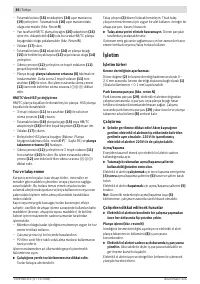
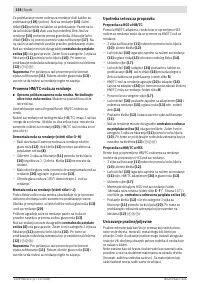
Operation
Operating modes
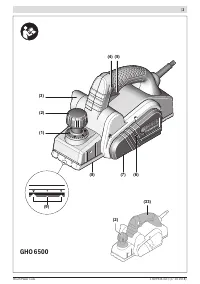
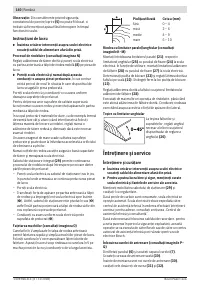
Setting the Cutting Depth
Using the knob
(2)
, the cutting depth can be continuously
adjusted between 0–2.6 mm with the aid of the cutting
depth scale
(1)
(scale division = 0.1 mm).
Parking Rest (see figure N)
The parking rest
(29)
makes it possible to put down the
power tool directly after working, without any danger of
damaging the workpiece or the planer blades. During the
work process, the parking rest
(29)
is raised and the rear
section of the planer base plate
(8)
is uncovered.
Start-up
u
Pay attention to the mains voltage. The voltage of the
power source must match the voltage specified on the
rating plate of the power tool. Power tools marked
with 230 V can also be operated with 220 V.
Содержание
- 114 Указания по технике безопасности; ЖДЕНИЕ
- 116 Описание продукта и услуг; Применение по назначению
- 117 Данные по шуму и вибрации; Сборка; Выбор строгального ножа
- 118 Смена твердосплавных ножей HM/TC
- 119 Удаление пыли и стружки; Работа с инструментом; Режимы работы; Включение электроинструмента; Указания по применению
- 120 Техобслуживание и сервис; Техобслуживание и очистка
- 121 Утилизация; Українська; Вказівки з техніки безпеки; ДЖЕННЯ
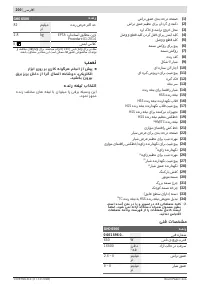
Характеристики

Остались вопросы?Не нашли свой ответ в руководстве или возникли другие проблемы? Задайте свой вопрос в форме ниже с подробным описанием вашей ситуации, чтобы другие люди и специалисты смогли дать на него ответ. Если вы знаете как решить проблему другого человека, пожалуйста, подскажите ему :)


