Электропилы AL-KO SOLO 621 - инструкция пользователя по применению, эксплуатации и установке на русском языке. Мы надеемся, она поможет вам решить возникшие у вас вопросы при эксплуатации техники.
Если остались вопросы, задайте их в комментариях после инструкции.
"Загружаем инструкцию", означает, что нужно подождать пока файл загрузится и можно будет его читать онлайн. Некоторые инструкции очень большие и время их появления зависит от вашей скорости интернета.


GB-7
is equipped with a mechanical rundown brake. This
brake is connected to the chain brake and stops the
running chain after the chain saw has been switched off.
It is activated by releasing the ON/OFF switch. The
rundown brake avoids injuries through the coasting of
the chain.
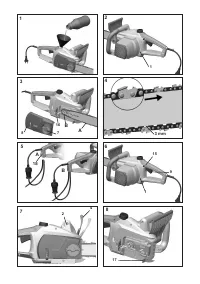
4.3. Chain catch bolt
(Fig. 8)
This chainsaw is fi tted with a chain catch bolt (17). If the
chain breaks when the saw is in operation, the chain bolt
will catch the loose chain end and thus prevent injury to
the operator‘s hand.
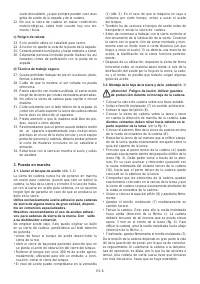
5. Instructions on working properly with the
chainsaw
(Fig. 9 - 15)
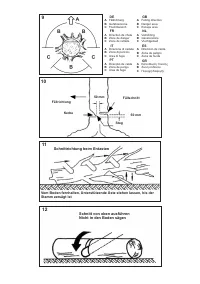
a) Felling a Tree
When bucking and felling operations are being per-
formed by two or more persons, at the same time, the
felling operation should be separated from the bucking
operation by a distance of at least twice the height of the
tree being felled. Trees should be felled in a manner that
would endanger any person, strike any utility line, the util-
ity company should be notifi ed immediately.
The chain saw operator should keep on the uphill side
of the terrain as the tree is likely to roll or slide downhill
after it is felled.
A retreat path should be planned and cleared as neces-
sary befor cuts are started. The retreat path should ex-
tend back and diagonally to the rear of the expected line
of fall as illustrated in Figure 9.
Before felling is started, consider the natural lean of the
tree, the location of larger branches and the wind direc-
tion to judge which way the tree will fall.
Remove dirt, stones, loose bark, nails, staples, and wire
from the tree where felling cuts are to be made.
b) Notching Undercut
Make the notch 1/3 the diameter of the tree, perpendicu-
lar to the direction of fall as illustrated in 10. Make the
lower horiziontal notching cut fi rst. This will help to avoid
pinching of either the saw chain or the guide bar when
the second notch is being made.
c) Felling Back Cut
Make the felling back cut at least 2 inches (50.8 mm)
higher than the horizontal notching cut as illustrated in
Figure 10. Keep the felling back cut parallel to the hori-
zontal notching cut. Make the felling back cut so enough
wood is left to act as a hinge. The hinge wood keeps the
tree from twisting and falling in the wrong direction. Do
not cut through the hinge.
As the felling cut gets close to the hinge the tree should
begin to fall. If there is any chance that the tree may not
fall in the desired direction or it may rock back and bind
the saw chain, stop cutting before the felling back cut is
complete and use wedges of wood, plastic or aluminum
to open the cut and drop the tree along the desired line
of fall.
When the tree begins to fall remove the chain saw from
the cut, stop the motor, put the chain saw down, then use
the retreat path planned. Be alert for overhead limbs fall-
ing and watch your footing.
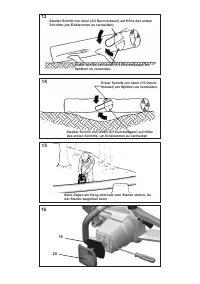
d) Limbing a Tree
Limbing is removing the branches from a fallen tree.
When limbing, leave larger lower limbs to support the log
off the ground. Remove the small limbs in one cut as il-
lustrated in Figure 11. Branches under tension should be
cut from the bottom up to avoid binding the chain saw.
e) Bucking a Log
Bucking is cutting a log into lengths. It is important to
make sure your footing is fi m and your weigth is evenly
distributed on both feet. When possible, the log should be
raised and supported by the use of limbs, logs or chocks.
Follow the simple directions for easy cutting.
When the log is supported along its entire length as il-
lustrated in Figure 12, it is cut from the top (over-buck).
When the log is supported on one end, as illustrated in
Figure 13, cut 1/3 the diameter from the underside (un-
derbuck). Then make the fi nished cut by overbucking to
meet the fi rst cut.
When the log is supported on both ends, as illustrated in
Figure 14, cut 1/3 of that diameter from the top overbruck.
Then make the fi nished cut by underbucking to meet the
fi rst cut.
When bucking on a slope always stand on the uphill
side of the log, as illustrated in Figure 15. When “cut-
ting through”, to maintain complete control release the
cutting pressure near the end of the cut without relaxing
your grip on the chain saw handles. Don’t let the chain
contact the ground. After completing the cut, wait for the
saw chain to stop before you move the chain saw. Always
stop the motor before moving from tree to tree.
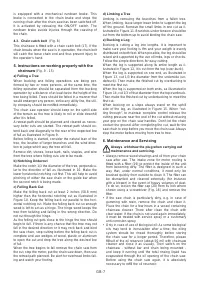
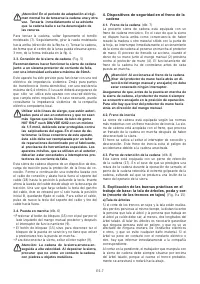
6. Maintenance and Servicing
Always withdraw the plug when carrying out
maintenance and servicing.
• Always remove wood shavings and oil from your chain
saw after use. The intake zone for motor cooling is
fi tted with a fi lter (19) to protect the inside of the unit
from becoming dirty. The fi lter is designed in such a
way that, under normal conditions, it need only be
brushed quickly from outside to clean it. The fi lter can
be dismantled and cleaned externally (for instance
with a blower) in the event of heavy volumes of dust.
To do so, loosen the fi lter cap (20) from its lock where
shown using a screwdriver (Fig. 16) and remove the
fi lter.
• If the saw chain is particularly dirty, e.g. in case of
gumming with resin, remove the chain and clean it.
Place the chain for a few hours in a vessel containing
chainsaw cleaner. There after clean the chain with
clear water. If the chain is not used again immediately,
it must be treated with service spray or a customary
anti-corrosion-spray.
• Only in case of use of biological oil: As some biological
oils may tend to incrustation after a time, the oiling
system should be rinsed thoroughly before storing
the chain saw for a longer period. Therefore, please
fi llhalf of the oil reservoir (about 50 ml) with chainsaw
cleaner and close it as usually. Then switch on the
chainsaw - without bar and chain being mounted -
and keep it running until the total rinsing liquid has
evapurated through the oil opening of the chain saw.
Before using the chain saw again, it is absolutely
necessary to refi ll the oil reservoir.


