
Электробритвы HOTTEK HT-964-210 - инструкция пользователя по применению, эксплуатации и установке на русском языке. Мы надеемся, она поможет вам решить возникшие у вас вопросы при эксплуатации техники.
Если остались вопросы, задайте их в комментариях после инструкции.
"Загружаем инструкцию", означает, что нужно подождать пока файл загрузится и можно будет его читать онлайн. Некоторые инструкции очень большие и время их появления зависит от вашей скорости интернета.


ENG
8
• Do not attempt to repair the appliance. Repair the malfunctioning appliance in
the nearest service center.
• Never immerse the appliance in any form of liquid. Do not turn the appliance on
with wet hands. Store the appliance in a dry place.
• Use the appliance only for the purpose for which it is intended.
• Do not use this appliance near a bath, water basin or any other vessels
containing water.
• If the product is not used for more than one month, Please remove the battery.
Special safety instructions
• Installation of this appliance is not provided, since it is delivered ready for
service.
• The special transportation regulations do not apply to this appliance. When
transporting the unit, use the original packaging. When transporting, avoid
drops, shocks and other mechanical effects on the appliance, as well as direct
influence of rain and aggressive medium.
• The appliance sale has to be carried out in accordance with the current
legislation of the participating countries of the Customs Union.
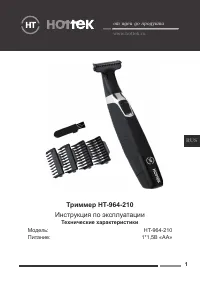
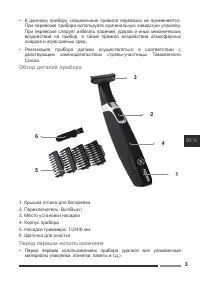
Overview of the component parts
1. Battery compartment lid
2. «ON/OFF» Switch
3. Attachment installation place
4. Body of appliance
5. Combs: 1/2/4/6 mm
6. Cleaning brush
Before first use
• Before using the appliance for the first time, remove all packaging materials
(stickers, labels, bags, etc.).
• Remove the preservative lubricant from the blades before use.
Battery installation
(batteries not included)
• Make sure the «ON/OFF» switch is in the off position.
• Remove the battery compartment lid, turn the base of unit counter –
clockwise (to the left ).
• Insert the 1.5 V «AA» battery, with the «plus» towards the inside.
• Replace the base and turn it clockwise (to the right) to lock it into place.
Характеристики

Остались вопросы?Не нашли свой ответ в руководстве или возникли другие проблемы? Задайте свой вопрос в форме ниже с подробным описанием вашей ситуации, чтобы другие люди и специалисты смогли дать на него ответ. Если вы знаете как решить проблему другого человека, пожалуйста, подскажите ему :)


