Духовые шкафы Korting OGG 741 CRN - инструкция пользователя по применению, эксплуатации и установке на русском языке. Мы надеемся, она поможет вам решить возникшие у вас вопросы при эксплуатации техники.
Если остались вопросы, задайте их в комментариях после инструкции.
"Загружаем инструкцию", означает, что нужно подождать пока файл загрузится и можно будет его читать онлайн. Некоторые инструкции очень большие и время их появления зависит от вашей скорости интернета.


3
1
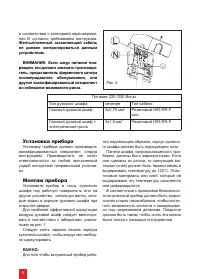
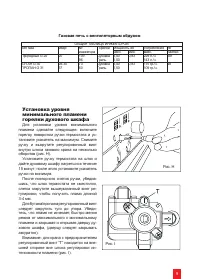
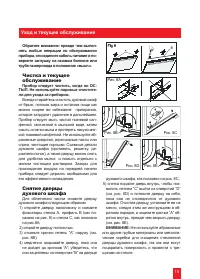
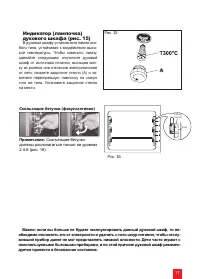
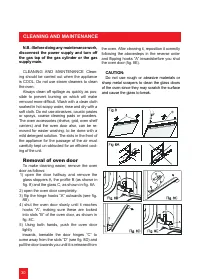
Side opening door.
N.B.:
The doors opening direction (right-hand or left-hand) can be changed.
Wa r n i n g : t h i s o p e r a t i o n m u s t b e c a r r i e d o u t b y s k i l l e d s ta f f d u r i n g a s s e m b l y.
1)
Open the oven door and undo the two screws in the block
A
(see figure 9).
(N.B.: when block
A
is unscrewed, the bottom of the door is left completely free. Two people are therefore
needed for this operation, one to hold the door firmly while the screws are undone).
2)
Reassemble the door on the required side of the oven, use the new block
A
(accessory supplied with
the appliance) and reverse the above instructions.
Fig. 9
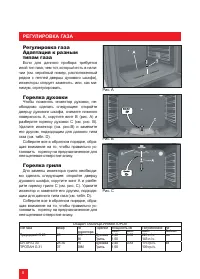
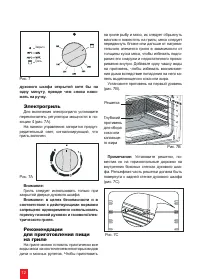
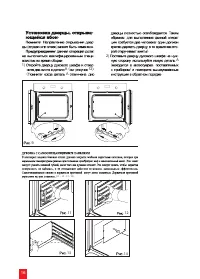
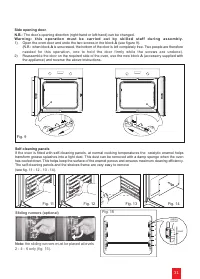
Self-cleaning panels
If the oven is fitted with self-cleaning panels, at normal cooking temperatures the catalytic enamel helps
transform grease splashes into a light dust. This dust can be removed with a damp sponge when the oven
has cooled down. This helps keep the surface of the enamel porous and ensures maximum cleaning efficiency.
The self-cleaning panels and the shelves frame are very easy to remove
(see fig. 11 - 12 - 13 - 14).
Fig. 11
Fig. 12
Fig. 13
Fig. 14
Fig. 15
A
A
Note:
the sliding runners must be placed at levels
2 - 4 - 6 only (fig. 15).
Sliding runners (optional)
5
4
3
2
6
sliding
runner
level


