Чайники Russell Hobbs 21281-70 - инструкция пользователя по применению, эксплуатации и установке на русском языке. Мы надеемся, она поможет вам решить возникшие у вас вопросы при эксплуатации техники.
Если остались вопросы, задайте их в комментариях после инструкции.
"Загружаем инструкцию", означает, что нужно подождать пока файл загрузится и можно будет его читать онлайн. Некоторые инструкции очень большие и время их появления зависит от вашей скорости интернета.


3
L
Don’t put the kettle, stand, cable, or plug in any liquid.
7 Don’t use the kettle for any purpose other than heating water.
8 Don’t operate the appliance if it’s damaged or malfunctions.
household use only
C
FILLING
1 To minimise exposure to steam, grip the rear of the handle.
2 Pull the lid up and away from the kettle.
3 Fill with at least 1 cup of water, but not above max.
,
If you want to boil only 1, 2, or 3 cups of water, fill to the
1
,
2
, or
3
marks inside the kettle.
4 Replace the lid.
C
SWITCHING ON
5 Put the stand on a stable, level surface.
6 Plug the stand into the wall socket.
7 Put the kettle on the stand.
8 Move the switch to
1
. The light will glow.
C
SWITCHING OFF
9 When the water boils the kettle will switch off.
10 To switch off, move the switch to
0
, or lift the kettle off the stand.
C
GENERAL
11 When you lift the kettle, you may see moisture on the stand. Don’t worry – it’s the steam
used to switch off automatically, which then condenses and escapes via vents under the
kettle.
12 You may see some discolouration on the floor of the kettle. Again, don’t worry – it’s due to
the bonding of the element to the kettle floor.
F
USING WITH INSUFFICIENT WATER
13 This will shorten the life of the element. A boil-dry cut-out will switch the kettle off.
14 You must then remove the kettle from its stand to reset the cut-out.
15 Sit the kettle on the work surface till it’s cold.
C
CARE AND MAINTENANCE
16 Unplug the appliance and let it cool.
17 Wipe all surfaces with a clean damp cloth.
18 Grip the top of the filter, and push it down and into the kettle to release it.
19 Rinse the filter under a running tap while brushing with a soft brush.
20 Fit the bottom of the filter into the seam between the floor of the kettle and the wall.
21 Squeeze the top of the filter, and push it towards the spout.
22 Release the top of the filter, to lock it under the rim of the kettle.
Descale regularly, (at least monthly).
23 Use a proprietary descaler. Follow the instructions accompanying the descaler.
,
Products returned under guarantee with faults due to scale will be subject to a repair charge.
W
ENVIRONMENTAL PROTECTION
To avoid environmental and health problems due to hazardous substances in electrical and
electronic goods, appliances marked with this symbol mustn’t be disposed of with unsorted
municipal waste, but recovered, reused, or recycled.
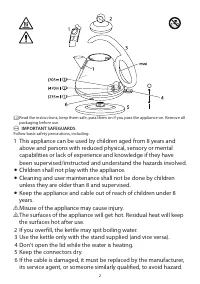
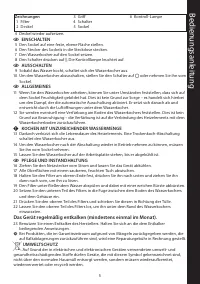
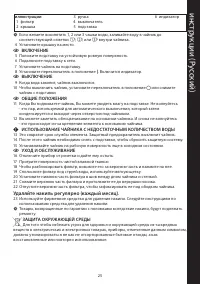
diagrams
1 filter
2 lid
3 handle
4 switch
5 stand
6 light
ins
tru
cti
ons
Характеристики

Остались вопросы?Не нашли свой ответ в руководстве или возникли другие проблемы? Задайте свой вопрос в форме ниже с подробным описанием вашей ситуации, чтобы другие люди и специалисты смогли дать на него ответ. Если вы знаете как решить проблему другого человека, пожалуйста, подскажите ему :)


