
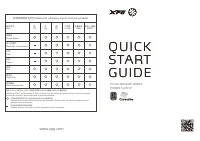
Блоки питания A-Data XPG PYLON - инструкция пользователя по применению, эксплуатации и установке на русском языке. Мы надеемся, она поможет вам решить возникшие у вас вопросы при эксплуатации техники.
Если остались вопросы, задайте их в комментариях после инструкции.
"Загружаем инструкцию", означает, что нужно подождать пока файл загрузится и можно будет его читать онлайн. Некоторые инструкции очень большие и время их появления зависит от вашей скорости интернета.

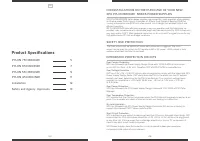

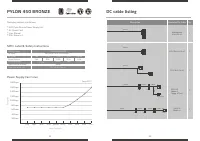
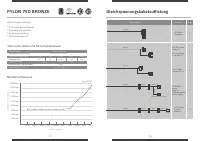
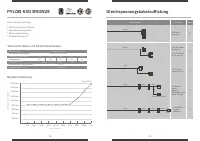
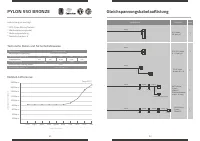
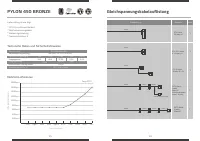

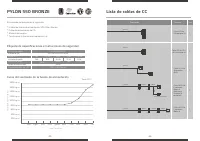
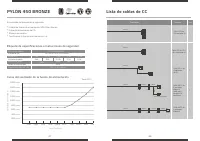
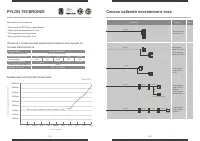
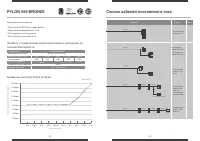
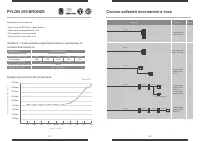
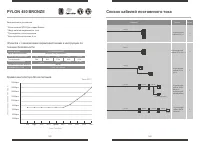
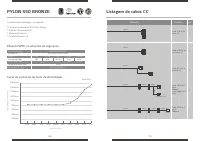
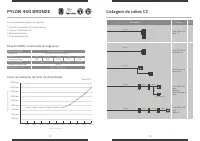
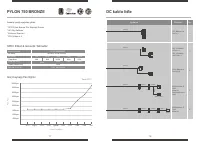


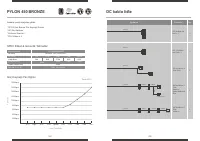
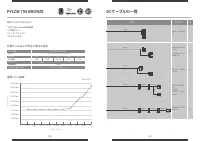
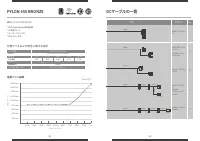

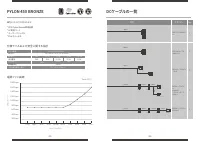

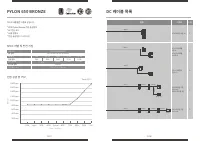

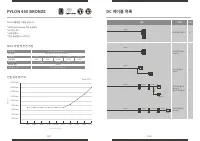

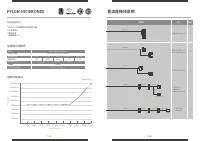
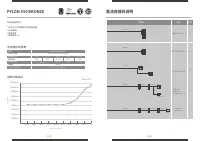
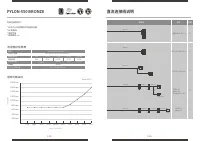


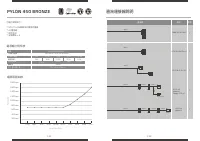

INSTALLING YOUR NEW PYLON POWER SUPPLY
1. Remove the power supply from its packaging.
2. Install the PSU into the case with the four screws provided.
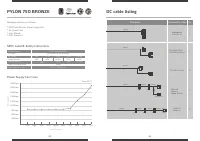
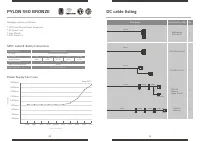
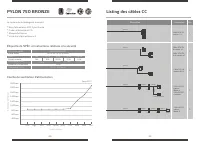
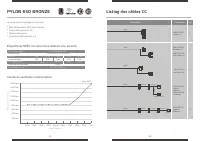
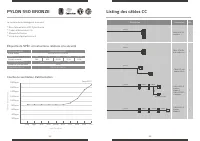
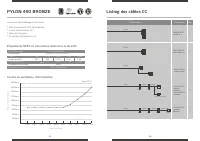
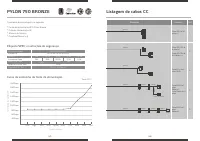
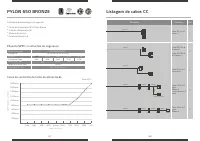
3. Connect the 24pin ATX cable to the motherboard 24pin power socket.
4. Connect the EPS 12V 8 / 4+4pin cable to the CPU power socket.
5. Connect SATA power cables to any devices that may use 4-pin peripheral connectors, i.e. hard drives, solid state
drives, optical drives.
6. Connect the corresponding PCI-E connector as instructed by your graphic card’s user manual, if your graphic card
requires additional PCI-E power.
Please note that the power supply utilizes a 6+2pin PCI-E connector that can be effectively used either as a single
8pin or a 6pin PCI-E connector.
To use it as a 6pin PCI-E connector, please detach the 2pin connector portion from the
connector header.
7. Connect the peripheral/floppy disk 4pin connector for fans, pumps, legacy components and other devices/adaptors.
8. Connect the AC Power cord to both your power supply and to the wall.
Check all connections to ensure that every item is properly plugged in and turn the power switch of the power supply
to the ON position.
Make sure that your system is turned off and unplugged before you start installing it.
Disconnect the AC power cord from your old power supply if any.
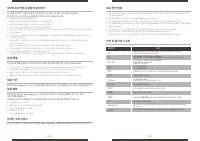
TROUBLESHOOTING
1. Please make sure the AC main power cord is connected to your PC correctly and that your power outlet is properly
emitting power.
2. Please make sure the AC On/Off switch on the back panel of the power supply unit in the “I” (On) position.
3. Please make sure that the MB& CPU Power Socket & connectors are connected correctly on the motherboard.
4. If you still have problem turning on your PC, please contact ADATA Tech Support, Service Center or your local dealer.
If your system does not turn on after installing the power supply, please follow the
troubleshooting guide listed below:
DURATION OF WARRANTY
ADATA Technology Co., Ltd. provides a 3 years warranty period for this product unless
regional laws and regulations state otherwise.
13
14
1. The warranty label is altered, damaged or missing.
2. Product serial number does not conform to our original system.
3. Product was purchased from an unauthorized agent.
4. Damage caused by natural calamity
5. Any abuse outside the intended product operation.
LIMITATION OF WARRANTY
This limited warranty covers only repairs or replacements of products manufactured by
ADATA Technology Co. Ltd. and its authorized partners.
Please note that ADATA is responsible for providing free repairs except for the following
reasons:
ONLINE CUSTOMER SERVICE
For frequently askeatd questions, additional information and service instruction please visit
our product page www.xpg.com
IMPORTANT SAFETY INFORMATION
1. NEVER, under any circumstances, open the power supply unit or attempt to repair it by yourself. This is extremely
dangerous due to the high voltage components inside.
2. DO NOT insert any object into the fan grill or the ventilation area of the power supply unit.
3. DO NOT place any object in front of the fan or the ventilation area of the power supply unit that may obstruct or
restrict airflow.
4. USE the included cable with the power supply unit. or as purchased from XPG. DO NOT use any third party cables
or extension cables with this unit.
5. Avoid dust, humidity, and temperature extremes. Do not place the power supply unit in any area where it may
become wet.
6. The power supply unit is for integration into a computer, and not intended for external or outdoor usage.
7. Failure to comply with any manufacturer instructions and/or any of these safety instructions may result void
warranties and guarantees.
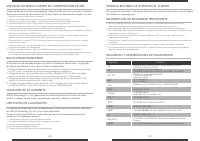
Agency
CE
CB
FCC (IC)
EAC
CCC
TUV
cTUVus
TUV-S
RCM
NOM
BSMI
KC
ROHS 2.0
WEEE
Standard
SAFETY AND AGENCY APPROVALS
EN55032:2015, EN55035:2017, EN IEC 61000-3-2:2019,
EN 6100-3-3:2013+A1:2019
IEC 62368-1:2014 (Second Edition)
IEC 60950-1:2005 (Second Edition) + Am 1:2009 + Am 2:2013
TP TC 004/2011
TP TC 020/2011
UL 62368-1:2014
CAN/CSA-C22.2 No. 62368-1-14
IEC 62368-1:2014, US-TUVR-012145
CNS15663
第五節
(102), CNS13438 (95), CNS14336-1 (99)
FCC Part 15 Subpart B Class B:2020
ICES-003 Issue 6:2016
ANSI C63.4:2014
GB4943.1-2011, GB17625.1-2012, GB/T9254-2008
EN 62368-1:2014
IEC 62368-1:2014
NOM-001-SCFI-1993
K60950-1 (2011-12)
2011/65/EU
&
2015/863/EU, Restriction of Hazardous Substances
Directive
2012/19/EU Waste electrical and electronic equipment Directive
Характеристики

Остались вопросы?Не нашли свой ответ в руководстве или возникли другие проблемы? Задайте свой вопрос в форме ниже с подробным описанием вашей ситуации, чтобы другие люди и специалисты смогли дать на него ответ. Если вы знаете как решить проблему другого человека, пожалуйста, подскажите ему :)


