Акустика Sven BTR5-10 - инструкция пользователя по применению, эксплуатации и установке на русском языке. Мы надеемся, она поможет вам решить возникшие у вас вопросы при эксплуатации техники.
Если остались вопросы, задайте их в комментариях после инструкции.
"Загружаем инструкцию", означает, что нужно подождать пока файл загрузится и можно будет его читать онлайн. Некоторые инструкции очень большие и время их появления зависит от вашей скорости интернета.

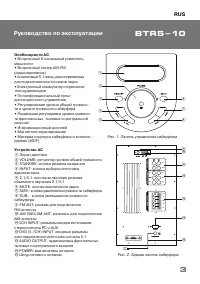
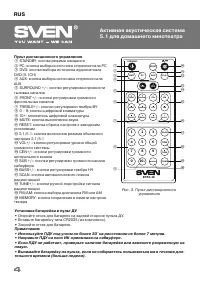
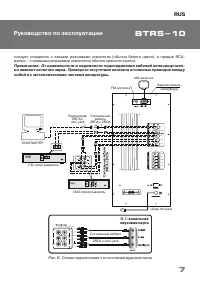
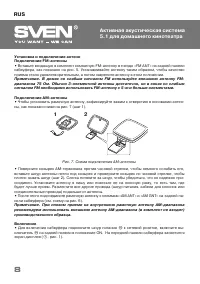


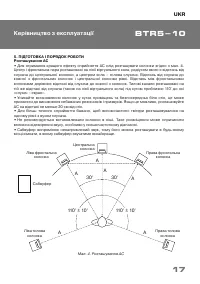
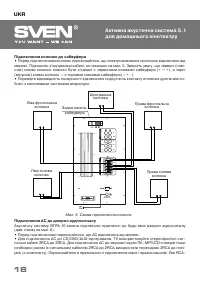
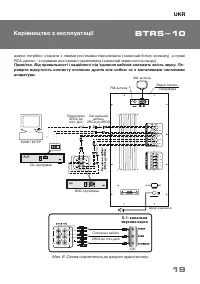


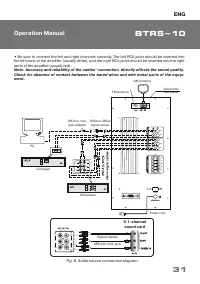
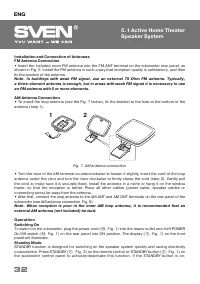
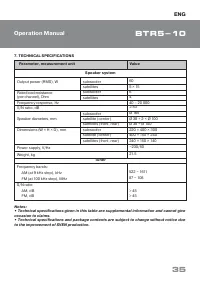

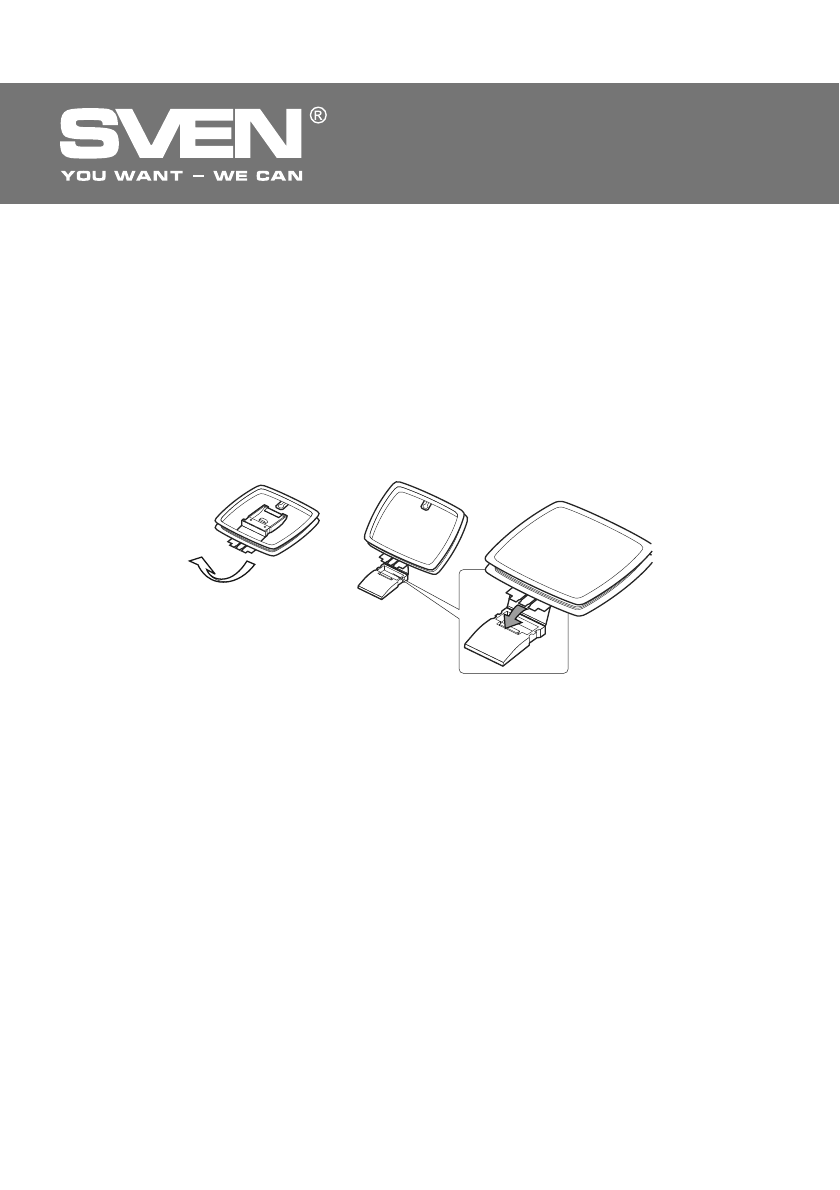
Fig. 7.
Ƶ
M antenna connection
Installation and Connection of Antennas
FM Antenna Connection
•
Insert the included room FM antenna into the FM ANT terminal on the subwoofer rear panel, as
shown in Fig. 5. Install the FM antenna in such a way that reception quality is satisfactory, and then
ԛ
x the position of the antenna.
Note. In buildings with weak FM signal, use an external 75 Ohm FM antenna. Typically,
a three-element antenna is enough, but in areas with weak FM signal it is necessary to use
an FM antenna with 5 or more elements.
ƴ
M Antenna Connection
•
To install the loop antenna (see the Fig. 7 below),
ԛ
x the bracket to the hole at the bottom of the
antenna (step 1).
•
Turn the visor of the AM terminal counterclockwise to loosen it slightly, insert the cord of the loop
antenna under the visor and turn the visor clockwise to
ԛ
rmly clamp the cord (step 2). Gently pull
the cord to make sure it is securely
ԛ
xed. Install the antenna in a niche or hang it on the window
frame, so that the reception is better. Place all other cables (power cable, speaker cables or
connecting wires) far away from the antenna.
•
After that, connect the loop antenna to the AM ANT and AM GNT terminals on the rear panel of the
subwoofer (see
ƴ
M antenna
connection, Fig. 6).
Note. When reception is poor in the inner AM loop antenna, it is recommended that an
external AM antenna (not included) be ised.
Operattion
Switching On
To switch on the subwoofer, plug the power cord (
o
, Fig. 1) into the mains outlet and shift POWER
On/O
Ԛ
switch (
n
, Fig. 1) on the rear panel into ON position. The display (
a
, Fig. 1) on the front
panel will illuminate.
Standby Mode
STANDBY function is designed for switching on the speaker system quickly and saving electricity
consumption. Press STANDBY (
a
, Fig. 3) on the remote control or STANDBY button (
c
, Fig. 1) on
the subwoofer control panel to activate/deactivate this function. If the STANDBY button is on,
1
2
ENG
32
5.1 Active Home Theater
Speaker System


